
Oops! I deleted the shape keys!
If you for whatever reason deleted your shape keys at any point during the upscaling process, now is the time when you would create them anew in order to have gloves and boots work when you get it into game. If you choose to leave the shape keys OUT, you will never be able to wear certain gloves and boots with your outfit.
The Purpose of Shape Keys
When you wear a vanilla outfit, shape keys inform the game that certain parts of the outfit, when placed into gloves or boots, should fold into themselves (or functionally disappear) in order to not clip with the glove or boot you’ve selected. While some parts will disappear on their own when correctly marked in textools with the elbow, wrist, knee, or shin modifier - some will always clip due to the shapes of the gloves/boots you’ve selected unless the shape key instructs the game to fold that mesh up and hide it inside!
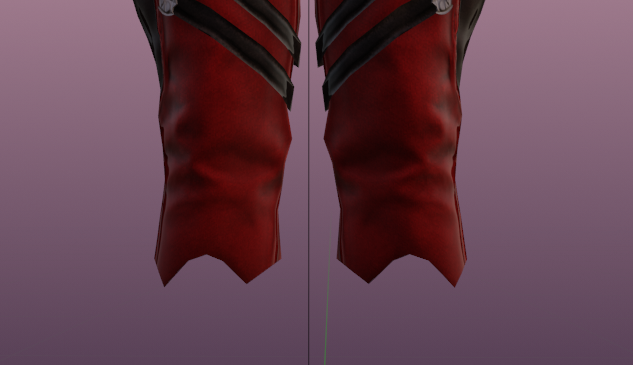
For example, on the RDM pants, there is a “shp_hiz” shapekey on the knee part. Here are the pants (shins hidden so you can see) with the shapekey OFF:
And here they are with the shapekey ON:
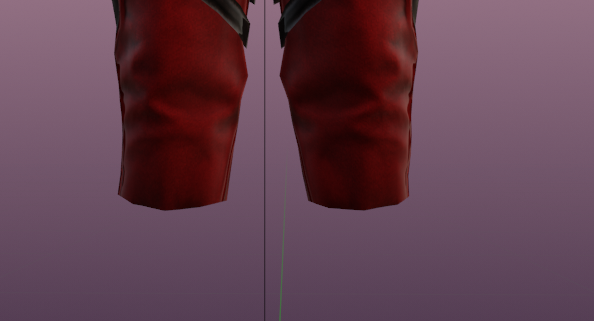
As you can see, the pants have gotten smaller as if they’re tucked into boots when the shape key is activated.
WHY would you leave the shape keys?
On RDM pants, it’s actually very simple - the RDM boots that accompany this set DEMAND this shape key so that you don’t have your beautiful red pants poking through the top of your stompers.
But this also makes it so that your users of the upscale (be it yourself, or random people) can actually swap boots and gloves out to their hearts’ content without giving you a bug report that xyz boots/gloves/whatever don’t work with the outfit. I highly recommend leaving them in or creating your new ones - the fun of vanilla is being able to swap between a multitude of options, and we want to encourage people to be able to mix and match!
Most Common Shapekeys
shp_kat - Long Gloves.
shp_ude - Mid Gloves.
shp_hij - Short Gloves.
shp_kos - Waistband.
shp_mom - Long Boot.
shp_hiz - Mid Boot.
shp_sne - Short Boot.
How to Create New Shapekeys
“Ah I deleted the shapekeys!” NOT TO FEAR. For today’s example, we will be using the Palaka Vest of Casting and its sleeves because I happen to have it loaded in to upscale for a commission to another body type.
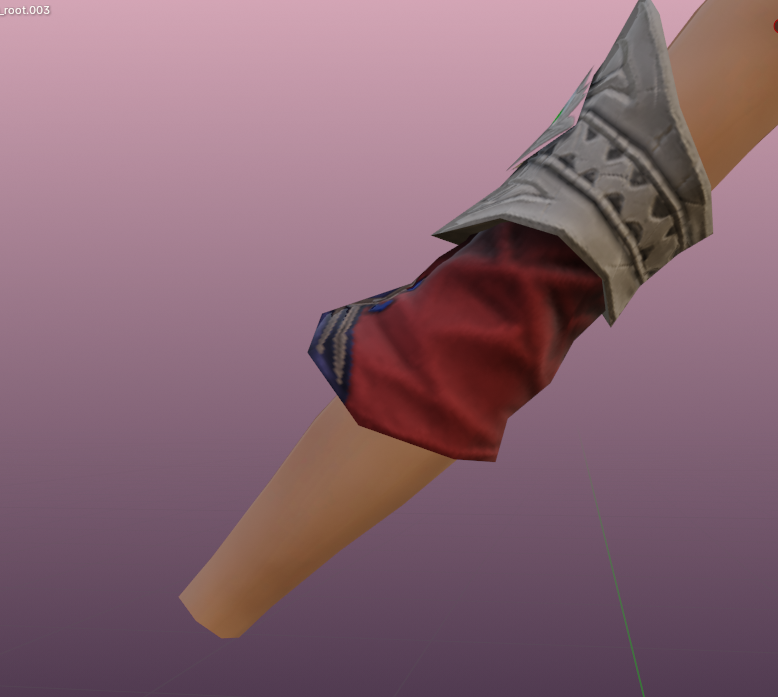
This sleeve has some flourished elements that make it so gloves will clip with it. It comes by default with two shapekeys: shp_ude (mid gloves) and shp_kat (long gloves). You can see what shapekeys you have on each part by going to your Vertex Groups tab in the viewport - the Shape Keys are directly beneath the vertex groups.
If you’re ever not sure what shape keys to add into your upscale, I highly recommend opening up that amazing “Backup” outfit I suggested you make at the very beginning of the guide and giving the pieces a look over to figure out what, exactly, you should be adding to your outfit.
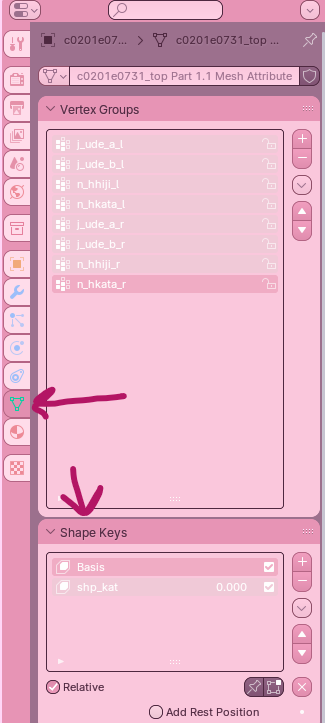
Now that you’ve figured out you’re going to need these two shape keys, select your first part you need to create a shape key on - in this example, it will be the puffy red part of the sleeve. In the Shape Keys list shown above (which for you, should be blank if you deleted them all), click the + sign next to the empty list. This will create a shape key called Basis.
BASIS = The DEFAULT appearance of your mesh.
So whatever the shape is on the basis, is what your mesh will look like when you do not have any gloves or boots on.
Click the + again to get “Key 1.” Rename this to your first shapekey name by doubleclicking on the text. (Not sure what the names are? Check your “Backup” copy OR refer to the table above in Most Common Shapekeys.) So in this example, as I’m working on the middle part of the elbow, I will rename Key 1 to “shp_ude”.
Next to the name of the shapekey, there are numbers, usually by default set to 0.000. Click on those numbers and set them to 1.0, which turns ‘on’ the shapekey. You can also use the Value slider which sits directly beneath the Shape Keys list to slide this off and on! RIGHT NOW when you turn it on, it will not do anything - because you haven’t directed it to do anything. The next step will be to make it deform the mesh so that it can get into those pretty gloves.
Deforming the Mesh
Making sure that you have the Shape Key you want SELECTED (make sure you click it ONCE in the Shape Keys list, it should show up as darker than all the other shape keys) and then head on over to your sculpt mode. We will be using mostly Elastic Deform to shove that sleeve down.
I did not take a picture (oops!) and I genuinely believe this is best done via video learning for this example, even as an ADHD text guide lover, so I encourage you to watch the video for a QUICKish guide on how you should do this (Start around 6:49 for the explanation and video of deform tools!). But the best metaphor I have is to think of it like stuffing your thick winter pants into your snow boots. When you shove those pants into your boots, you ‘deform’ the shape and fold it down to fit inside of your boot so that the fabric doesn’t flow over the boot, and doesn’t ‘clip’ with the shape of the boot. The same premise applies to your 3d model.
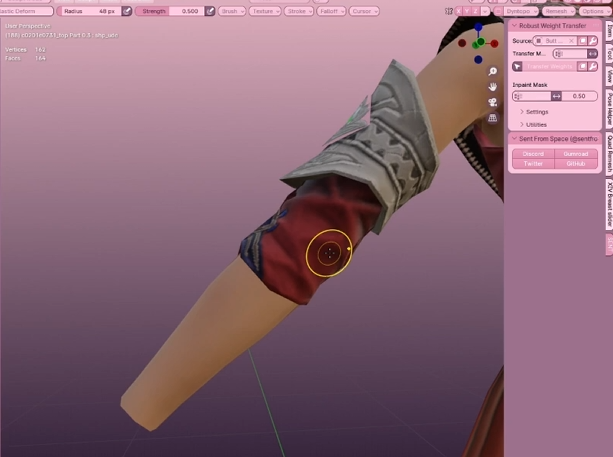
You should be left with a deformed mesh capable of fitting into gloves or pants like so!
This is a process that is best done by going back and forth between the game and blender. I usually test a variety of gloves with my outfit and take MANY pictures of clips I need to fix. My suggested gloves for this are: Ravel Keeper’s Casting, Witch’s Gloves, Anemos Halfgloves, Ehcatl Wristguards. Boots: Ravel Keeper’s Casting, Witch’s Boots/Scion Healer’s Boots, Roseblood Boots.
If anything clips in game, just deform it even FURTHER down towards your mesh until you’re satisfied. Remember: because you are deforming on a shape key, this won’t affect your default outfit. This is PURELY to make sure gloves and boots look cute and we can enjoy the benefits of mix and match!
No comments to display
No comments to display