
Merging By Distance
Up until now, unlike in a normal upscale, we haven’t really done any sort of merging by distance. Before now, the coat wasn’t really in a place where we could safely merge without destroying parts of the coat by joining together Forbidden Backfaces. But now that we’ve sorted all of those out and we’re prepared to fix the lumps and bumps on the mesh, we can begin merging by distance.
PLEASE NOTE: In the interest of keeping this below a billion pages, I’m assuming you understand the basics of upscaling and will not be explaining where to find merge by distance or averaging faces. If you don’t know where it is, I beg of ye, do a quick google for location before asking in any mod helps!
For any parts that you will not have to merge into the whole in order to weight (like detailing or panties or something), you can go ahead and merge by distance as normal. I recommend averaging by corner angle.
For those parts that will eventually join into the whole for weighting (elbows, wrists, knees, shins, etc), you’ll need to distinguish the parts so that you can separate them back out later. This has to be done BEFORE you merge. There are two ways to do this: Marking as Seam, and Changing Materials in the Viewport.
( Why do I need to do this? If you join elbows and wrists to the coat, or knees and shins to the butt, and do NOT separate them back out, you will ruin your ability to wear gloves, shoes, or other arm/leg accessories. It is vitally important that you keep those 3 separate parts you see in every ffxiv outfit for the ability to mix and match with other outfits! Take it from me: this will save you a bug report later!)
NOW ONTO THE TWO METHODS…
There are pros and cons to both methods of joining things together. Changing materials is simpler, but I’ve found on vanilla items that changing materials can leave unsightly normal problems at the seams for whatever reason. Marking as seam takes longer and requires more steps, but tends to leave a more ‘seamless’ finished product. I’ll cover both below, and generally use a mixture of both in my upscales.
Marking as Seam
I created a video guide to this here: Marking & Ripping at Seam
Generally, I will mark edges as seams on places where they will be highly visible to the naked eye, due to the problem with changing materials mentioned earlier. On my red mage coat, that’ll be the elbow to torso seam, and elbow to wrist seam.
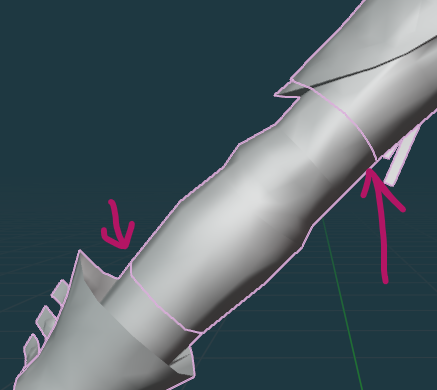
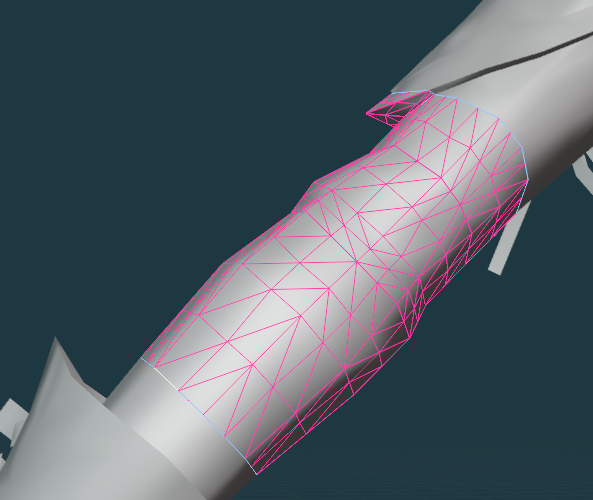
Go into Edit Mode on the Elbow. While in edge mode, carefully select all of the top and bottom edges of the part. You can see my selections here:
Right Click > Mark Seam.
Repeat this on the Torso, and the Wrists. Wherever things will join together.
Sometimes you’ll get little stray edges that decide they want to be seams. They’re forbidden, so: left click those strays, Right Click > Clear Seam.
Now you can join these all together and continue onwards with the guide.
WHEN YOU ARE COMPLETELY DONE WITH YOUR UPSCALE when everything is weighted, and ready for testing in game: select ONE edge that is marked as seam and then press Shift+G. On the menu that appears, select Seam. Then, press Ctrl+V and select Rip Vertices.
From there, you will be able to press L to select linked on the various parts of your upscale. You’ll notice that now (if you did it correctly) your mesh will separate at those seams, as they are no longer connected together. You can separate them into separate parts by selecting all of one type (for example, both elbows) > pressing P > “by selection”. Voila! You have retained your elbows, wrists, knees, and shins!
Changing Materials
I feel like this is fairly self-explanatory, but as in modded upscaling, if you want to join two pieces together you can change their material in the viewport and then AT THE END OF YOUR UPSCALE you can select the entire piece and go P > “By material” to separate them back out. As long as you have made the items two separate materials, they will separate themselves in this method.
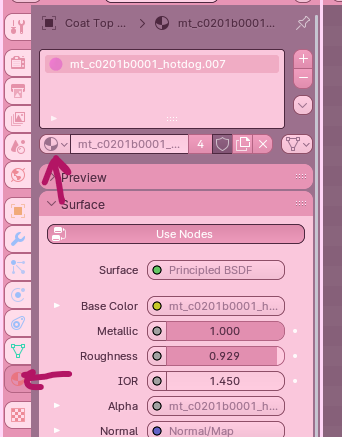
Select any material you want, as long as it’s not the same material as another part you want to keep separate later on. Personally on the Bimbo rig, I use the hotdog materials…because there’s 5 of them. And when you have dick textures on everything you can’t help but smile at how silly it is (and know you are DEFINITELY not keeping those that texture in Textools).
Whatever method you have chosen, you are now ready to continue onwards.
No comments to display
No comments to display