
Situational Issues
These are some issues I have had when separating by loose parts, that I will fix as I come across them. These do not ALWAYS crop up in vanilla upscales, so you may never see them, but just in case!
In the video of the red mage coat, I cover funny edges of the mesh that clip into the skin. That is the only problem this coat really has. I have other videos however for some of the others, and will endeavor to update this when I find the other problems I don’t have videos of again.
Funny edges of the mesh that would clip into skin
When SE creates a vanilla item, they seamlessly touch the clothing mesh to the skin. Vanilla skin and vanilla outfits have very similar polys and poly structure, so it’s easy for them to magnet everything together. Unfortunately, our bodies are very high poly and this is NOT, so it is virtually impossible to do this with our modded version.
You will sometimes find strange edges that don’t appear to make sense, pointing into the mesh. These are places where SE has done that “seamless look”. You can either leave them in, or delete them if you feel that they don’t add anything to the outfit. I prefer to leave them, as I find that if I clip them slightly into the skin, I can achieve a similar “seamless” look to vanilla that I wouldn’t be able to get without.
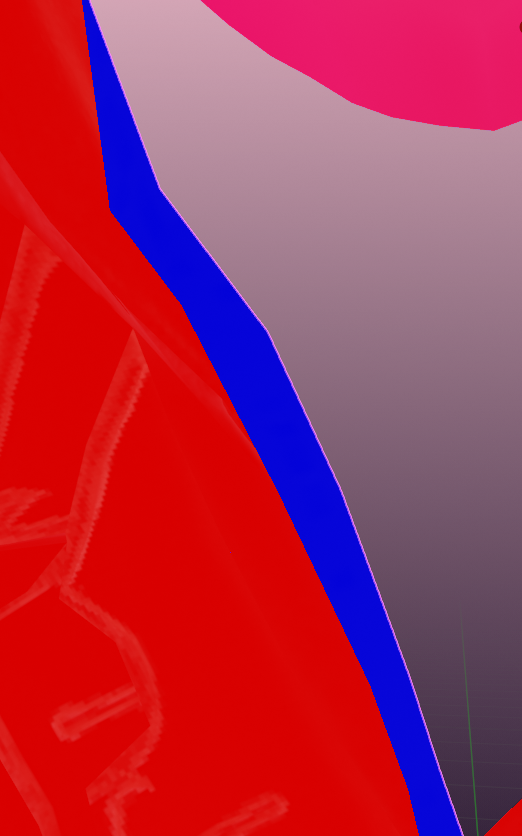
This is an example of a strange seam that sits INSIDE of the clothing but I would leave alone. Here is a picture of it with the bimbo chest in place so you can see what I mean by the “seamless look”:
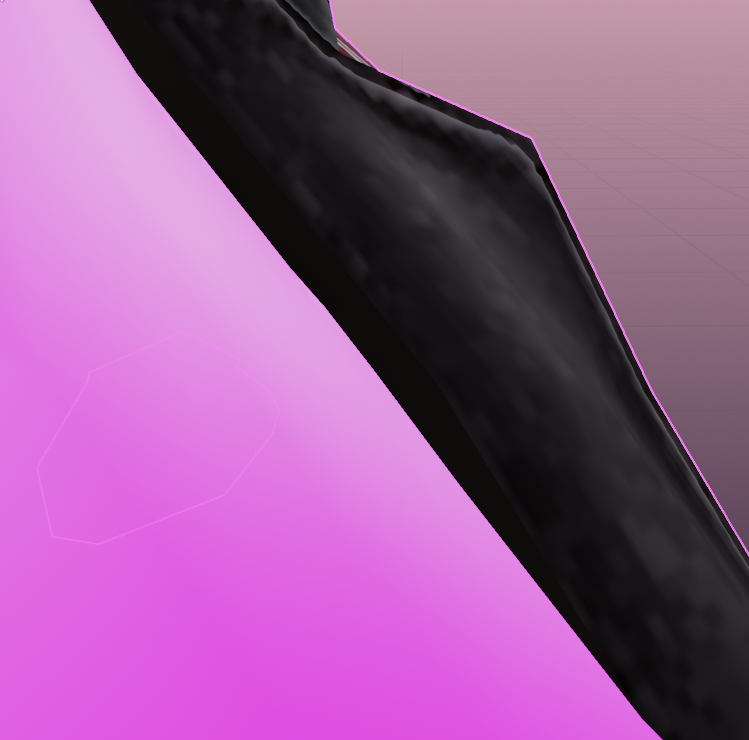
Without that part, it would either GAP at that location (meaning I need to leave more skin in the torso mesh later when upscaling), or it would float fairly significantly. I have had others where removing them made no noticeable difference, so it comes down to personal choice.
Wrist or waist “caps”
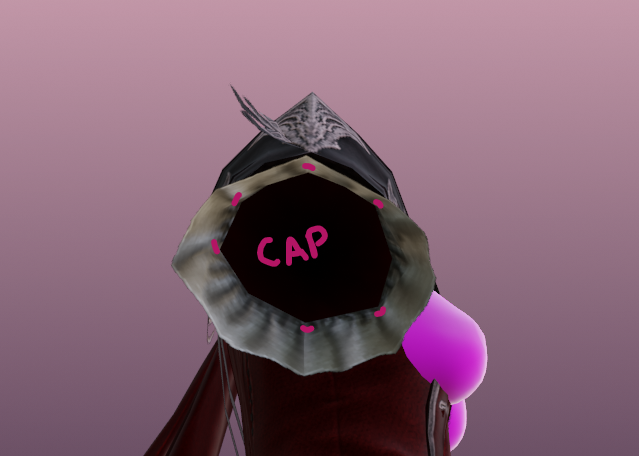
You will find that wrists, ankles, and torso areas tend to have what I will call “caps”. These are places where SE has created a ‘block’ so that they can remove skin inside of shirts/pants/skirts without the player seeing it. If you take these out, you will swiftly find that you’ll begin to see into the portal to the space dimension whenever your character waves their hands and legs around Here’s a picture of the sleeve cap from the bottom of the sleeve looking UP, as the RDM coat does not have arms inside of it.
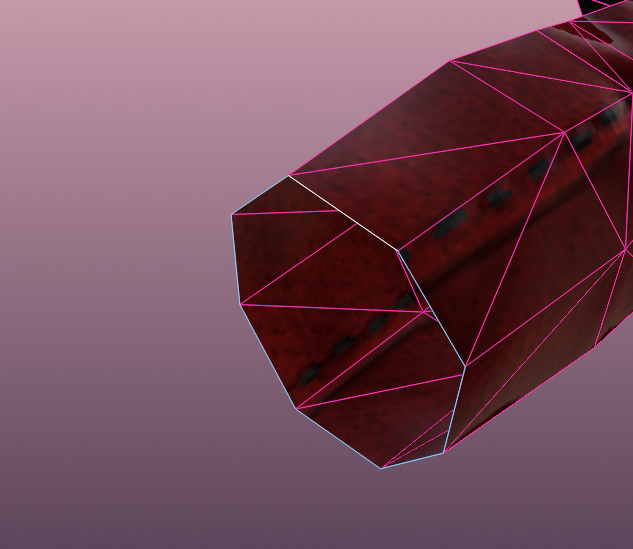
Generally, you have two options when handling caps: you can either keep SE’s existing caps and upscale them like normal, OR (provided you do not mess up the texture/UV by doing so), you can extrude the region and create a NEW cap off of the existing mesh. I would advise at this point, opening up the UV Editing panel at the top of blender and examining where on the UV the cap sits.

You can see in this example that SE actually created a separate texture for the arm cap. So in this case, I would leave the cap alone and subdivide/upscale as normal, as it can cause issues when dying the fabric in game if you do not.
I created a video guide on how to extrude the region, if you end up needing to learn this skill by watching, which you can find here:
When extruding and ‘capping off’ an area, ideally you do this where people will NOT see it very much, as it will distort the mesh in some fashion on the cap. However, it’s still a useful skill to learn for other things as well.
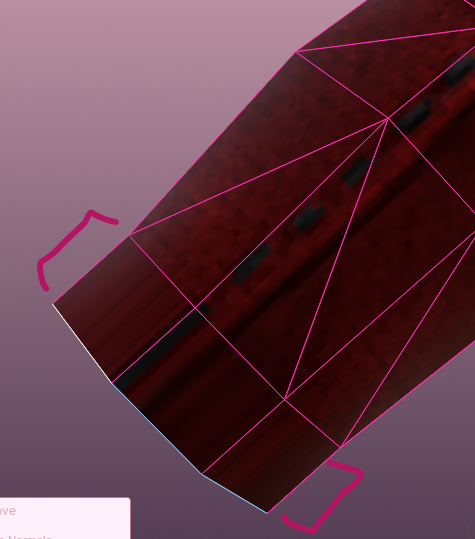
Go into Edit Mode on the item that has a hole you need to cap. For the purposes of this example, I will be using the elbow PURELY because it is a nicely shaped cylinder for ease of pictures. Go into Edge Mode (the second icon in the row of three next to the Edit Mode dropdown) and select all of the edges of the area you want to cap off:
Once those parts are selected, press E to extrude the region. Drag these out to a reasonable length and then left click to confirm. In the picture below, the bracketed area is the new extruded region.
Once you have extruded the faces, click M for the merge menu, and then select “At Center.” This should create a cone.
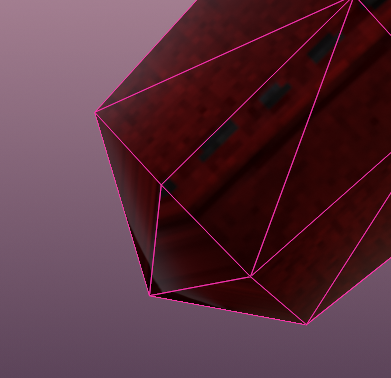
With your edit mode on “Vertices”, scoot that cone back until it makes a flat plane. Congratulations! You’ve capped the region. AGAIN, I really don’t recommend this unless you absolutely have no other option, as it DOES distort the textures and, in my opinion, really makes very visible areas look pretty bad in most circumstances. However, it’s very helpful for places like the top bit of vanilla pants/skirts, or other places where you won’t see the errors in the textures much (if at all).