7.0 Colorsetting Guide
This guide covers how to colorset and what material shaders do/don’t work on gear. It’s an attempt to explain all the new additions to Dawntrail, especially with how to get the cute metal/glass/velvet looks.
Most of this guide is written specifically for Penumbra, as Penumbra’s color setting is far easier to use and beginner-friendly, in my opinion. I’ll cover how to access the TexTools colorsets, but beyond that, this guide is only for Penumbra.
Additionally, this guide is how I’ve learned to use these shaders. There are different, and most likely easier ways, to do these, but this is how I do it.
Colorsets
As covered in the previous guide, Indexes control where the colorset rows are placed now, instead of the normal’s alpha. Colorsets are broken down into four main components:
Diffuse: The base color of your colorset row. This will appear as a flat color.
Specular: The shading on your diffuse. The brighter this is, the shinier your color will appear. The darker this is, the more matte your color will appear.
Gloss also controls how shiny your color will appear. I don’t usually mess with this, but I figured I’d include it.
Emissive: The easiest way to make things glowy!
Dye: Which channel the dye appears on; Dye channel 1 or Dye channel 2!
Dye Preview: This will show what your preview dye will look like.
I won’t focus on the Tile/Repeat /Skew since I also don’t mess with those!
TexTools Colorsetting
Your TexTools colorsets are located under the Materials tab. Click on the drop down box, then to the material you’d like to change.

From here, click “View / Edit Colorset.”

This will bring up this window!
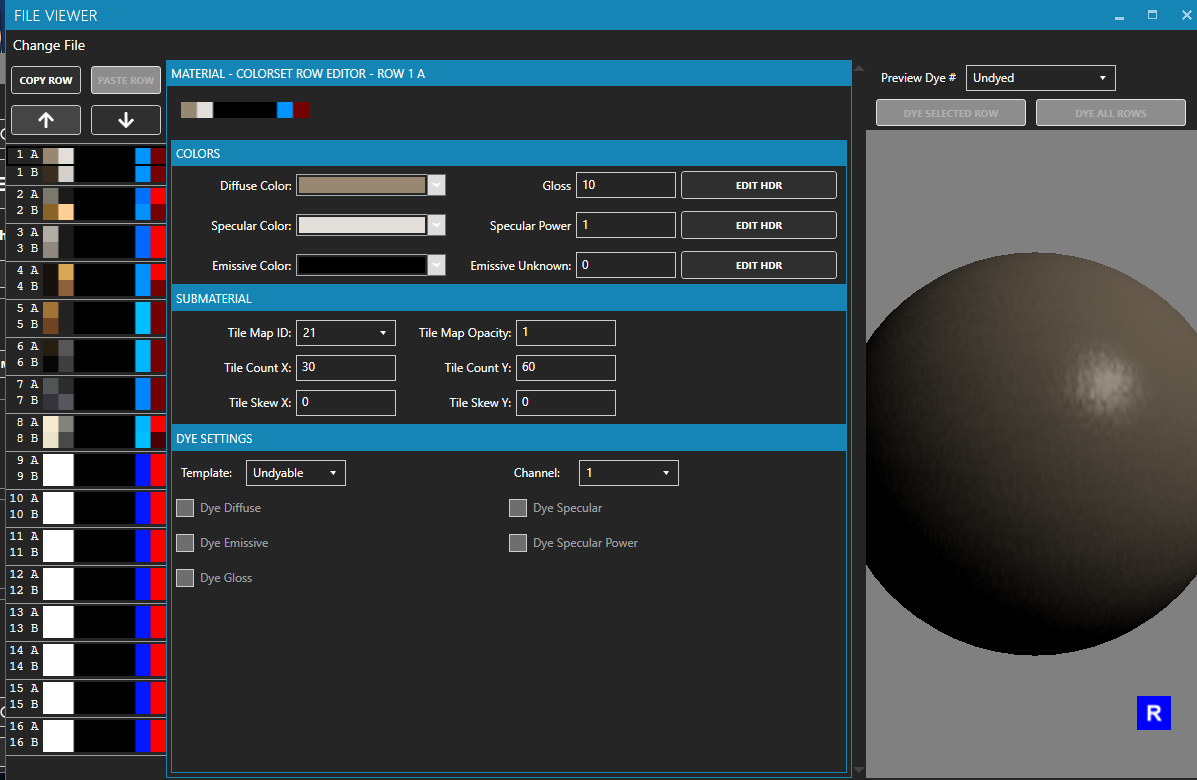
The first 3 squares are your Diffuse, Specular, and Emissive. You can see the color previews there.
In the middle, you can change your dye template, gloss, dye channel, and what’s dyed.
On the right side, you can see what your material will look like undyed / dyed!
To find your colorset rows, we’ll move back to the model tab!
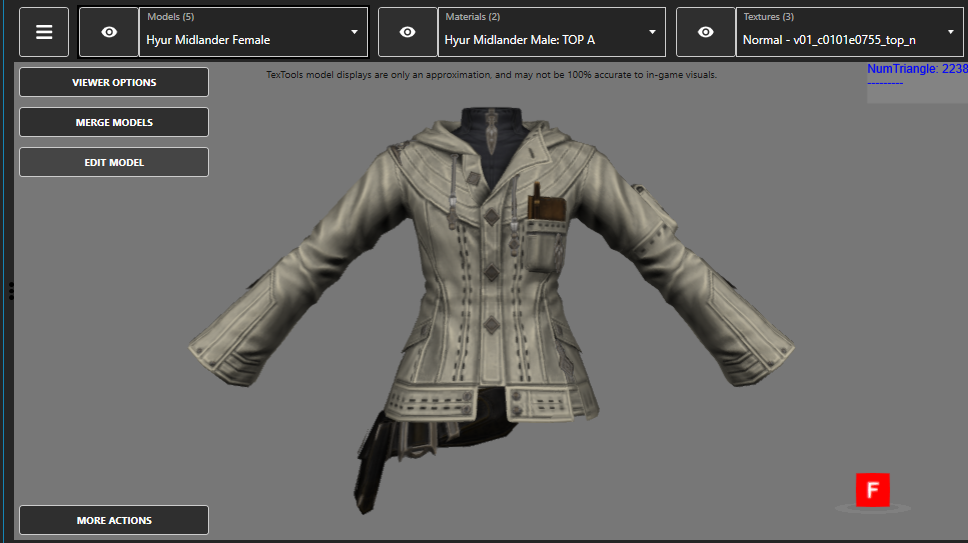
We’re looking for “View Options” in the top left.

Colorset row is your friend here! You’ll be searching through each row, finding what affects what. I normally take notes in a private Discord server / Word doc / Notepad!
I’d also recommend what color you’d like to change it to. I’ve… forgotten to add that a few times, and then I had to restart. Pain, suffering.
Here’s a little template, if it helps!
dye channel 1:
MAT A:
1A
5B
8A
8B
dye channel 2:
MAT B:
3A
3B
MAT C:
3B
4A
4B
no dye:
MAT A:
1A
1B
5A
6A
MAT B:
4A
MAT C:
6A
6B
This is the end of the TexTools portion. From here on out, I’ll cover to how to colorset in Penumbra!
Penumbra Colorsetting
Step 1 is navigating to the materials tab. To do this, go to your mod, and click advanced editing. The 8th tab should be named “Materials”. This is where we’ll be doing most of our work!
You’ll be greeted with this drop down box.
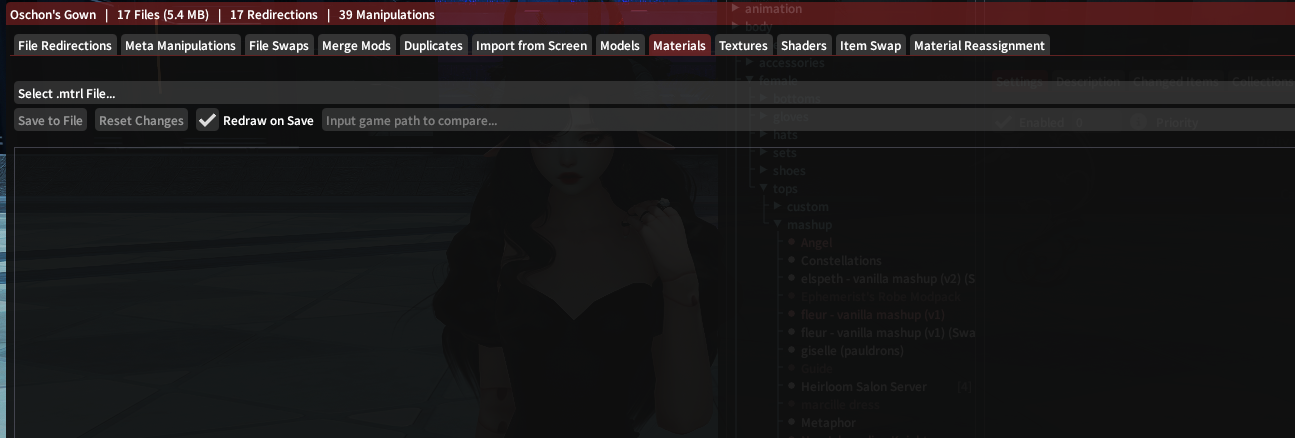
Click on it. I recommend wearing the piece you’re trying to colorset, since you’ll be able to see which materials are visible.
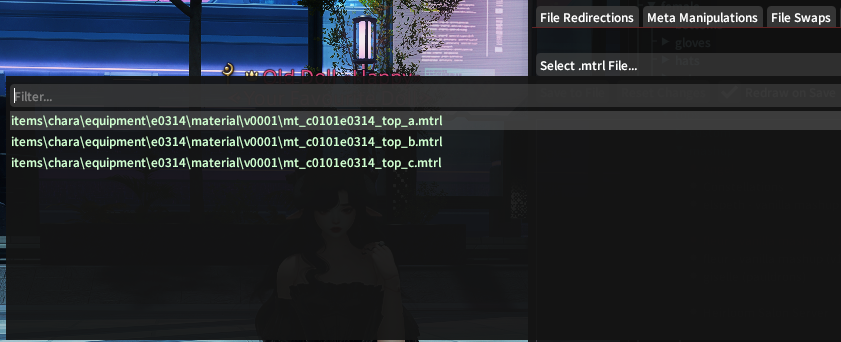
Any row that is green is a row that’s currently visible on your character. Click on top_a.mtrl.
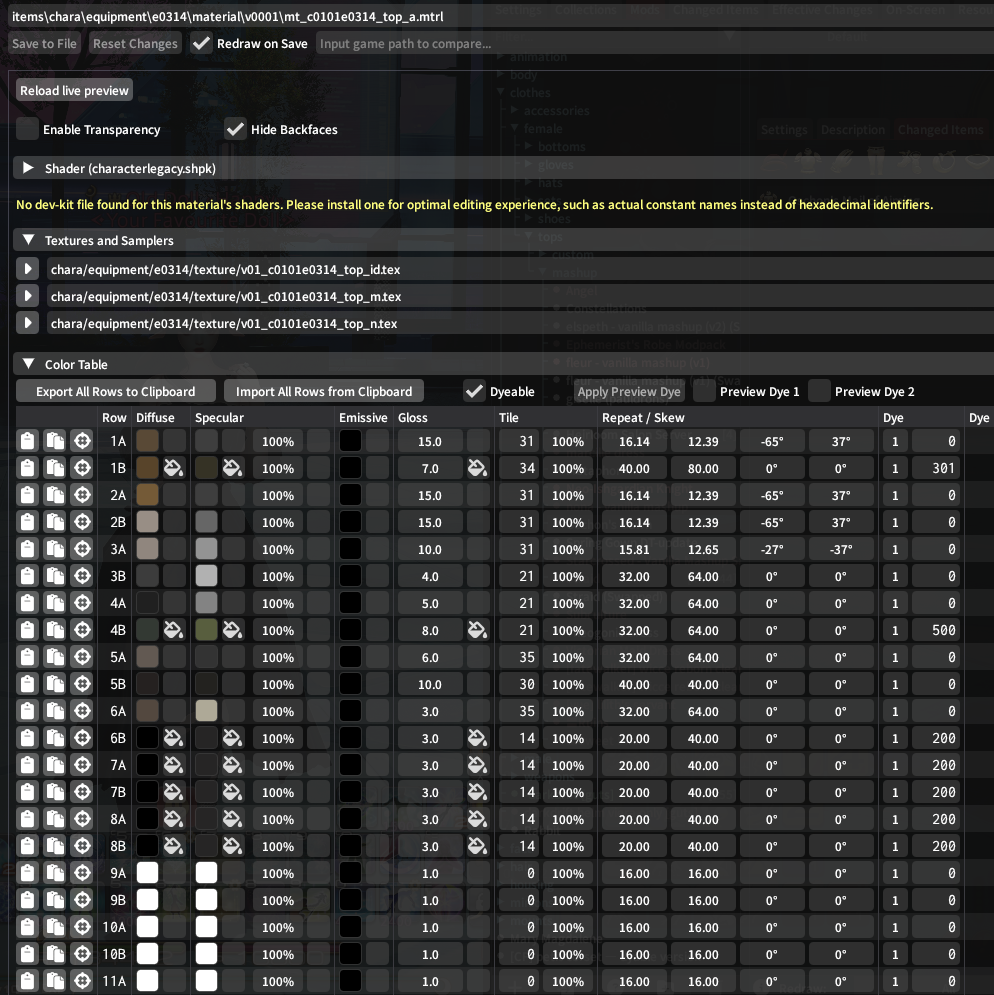
You’ll see these rows. From here, wiggle around the values until you find something you like!
Once you have values you like, we’ll move onto making it dyeable!
Next to each of the color values, there’s the box with the paint can you can tick! To make your rows dyeable, make sure both the diffuse checkbox and the specular checkbox are ticked!
If you made your row glow with Emissives, make sure the box next to that is ticked too!
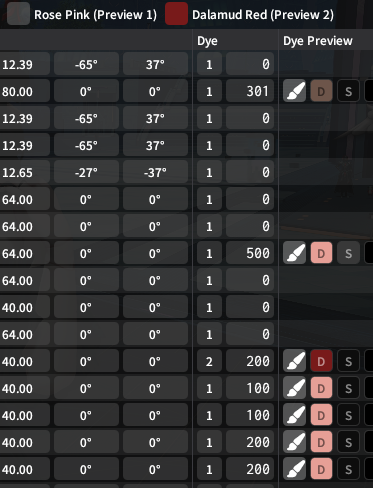
Now, on the left side, we’ll add dye templates!
These templates follow a pattern.
Anything that ends in 0 will dye true to the color.
Anything that ends in 1 will dye darker than the color
Anything that ends in 2 will dye lighter than the color.
(Preview is with Rose Pink)
Make sure to hit “Save to File” at the top left, and you’re all set! Now do this with your other materials!
Adding a 2nd dye channel
Adding 2 dye channels is a relatively straight forward process. Next to the dye template, there’s the single values. Change this value to “2”. You’re all set!
Migrating from Character Legacy shaders to Character Shaders
This is easier to do in Penumbra than TexTools, so I’ll show the process there.
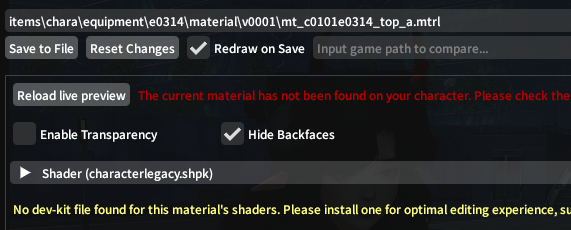
Find the material you want to have a Character shader using the process above.
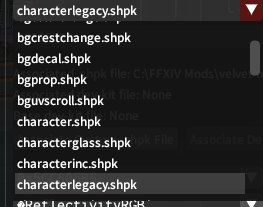
The first drop-down box will say “Shader (characterlegacy.shpk)”. Open this!
You’ll see this set of drop-down boxes. We’re only changing the Shader Package!

Open the drop-down box, and scroll down. Click “character.shpk”, and save to file. You’re done with this step!
Your colorset rows will change to look like this:
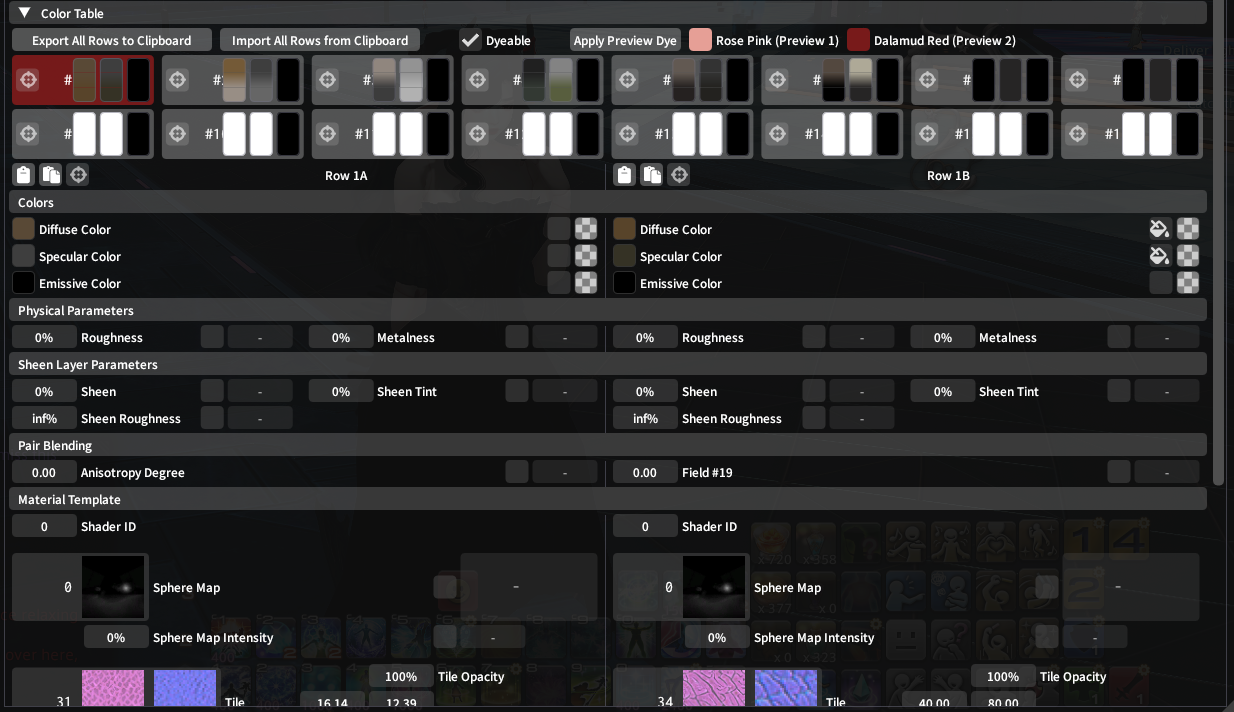
This is the same as before, but horizontal, and a few more options. The 3 boxes stay the same and are split between 1A and 1B (for example).
You’ll notice that the mesh tied to this material is now pitch black, and not dying. Let’s fix that!
Find the colorset row that affects the visible bits of the mesh.
For me, this is 8B. Any pre-DT items will be on rows 1-8. Rows 9-16 are only utilized by the new pieces of gear.
Click on this row, and scroll down until you see these boxes.
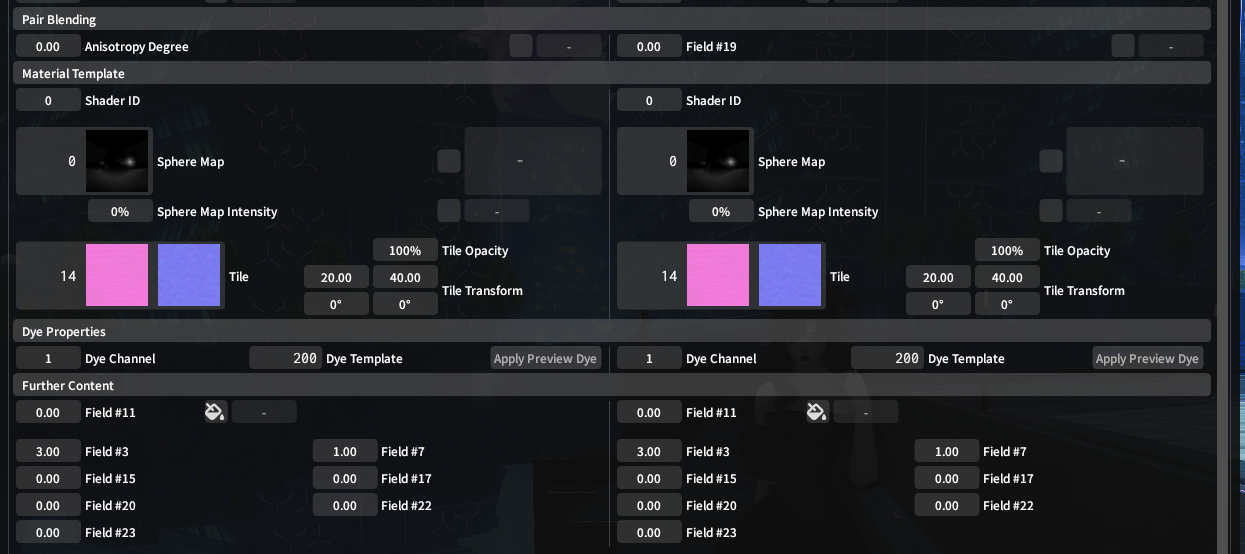
You’re going to be entering the value “1” in Field #19, Shader ID, and “Field 11”.
When done, the boxes should look like this!
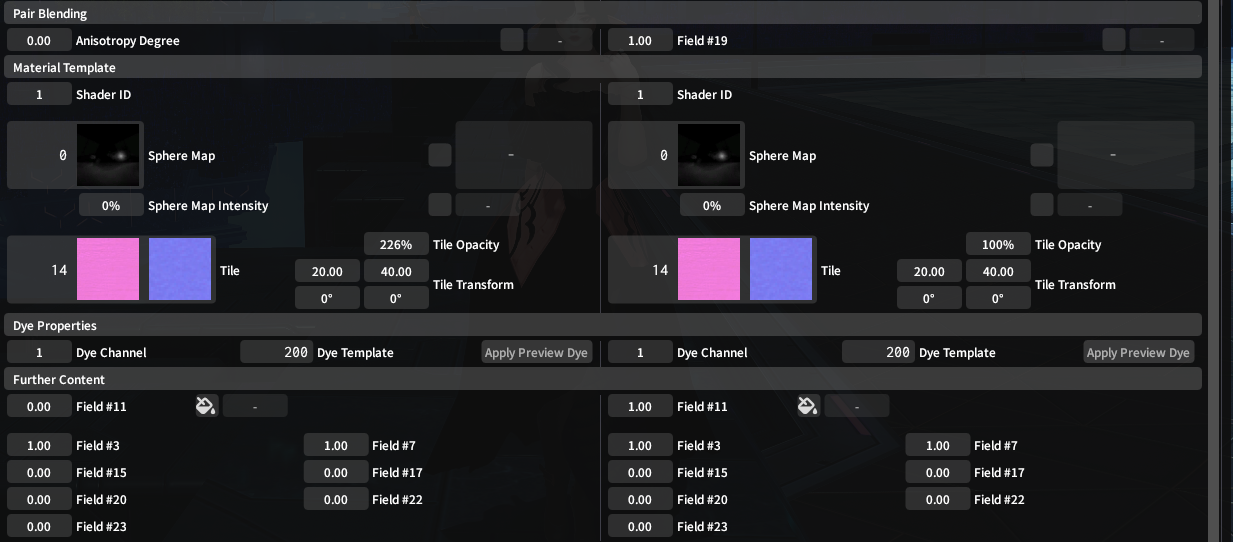
Now, we need to change the dye template to the DT dyes.
The same rule of the dye # endings still applies here!
Once you’re done, click save!
Colors + Textures
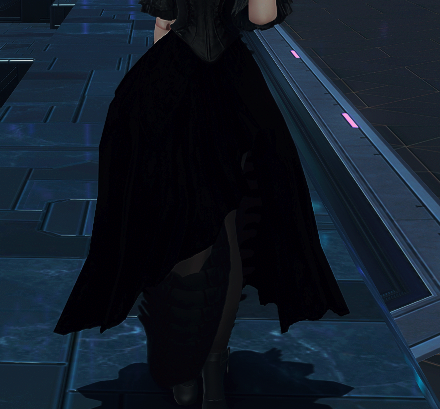
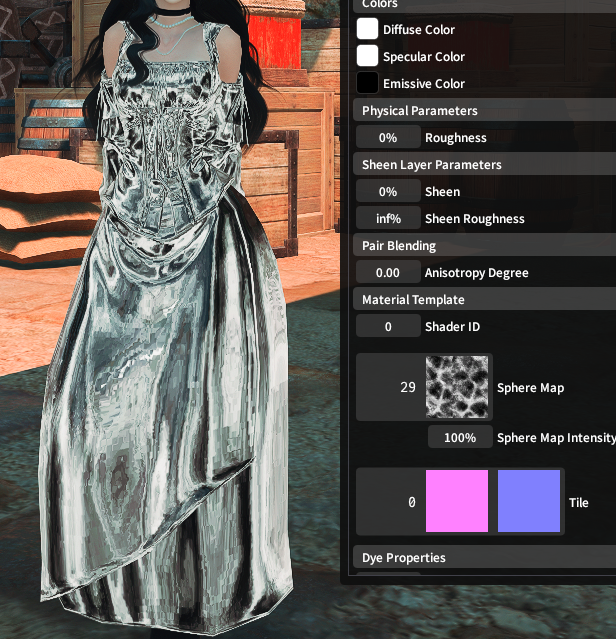
Velvet
REQUIRES a character shader, not character legacy
This is ripped from the Ephemerist’s coat, but it works just the same! You don’t need special textures.
Metal
REQUIRES a character shader, not character legacy
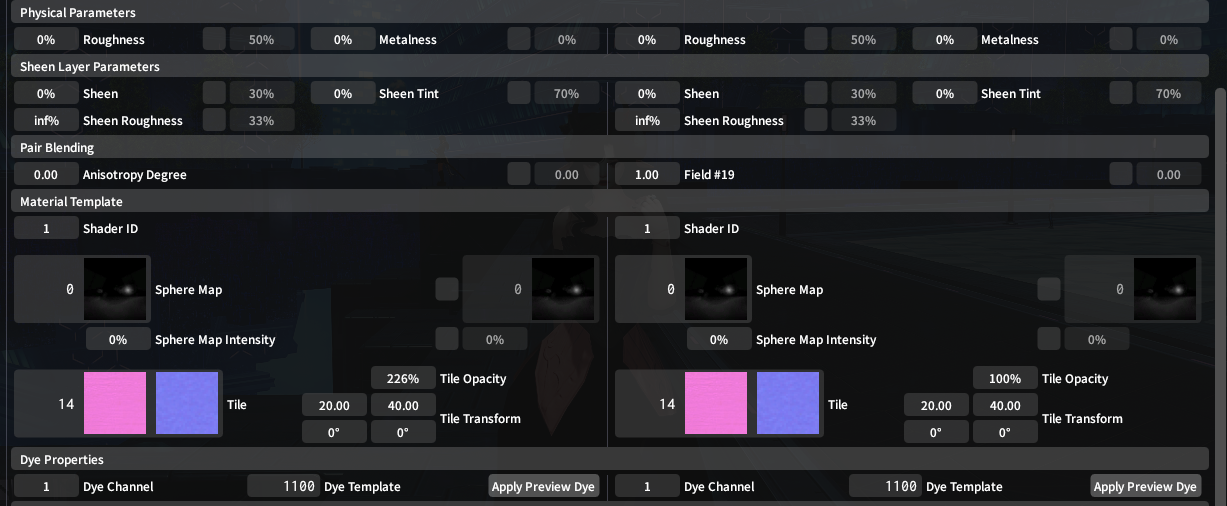
In your colorset row, scroll down to the bottom tabs.
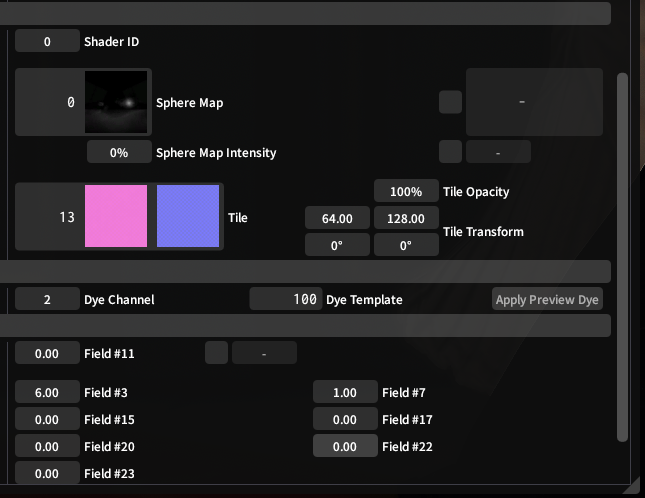
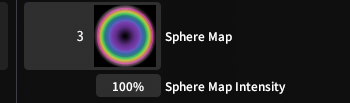
You’re looking for “Sphere Map” and “Sphere Map Intensity”
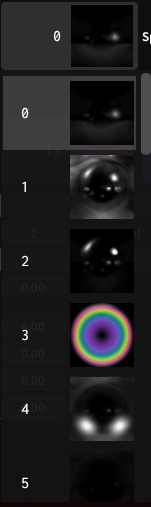
There are a few ways to accomplish a metal look! Scroll all the way to the bottom, and you’ll find these.
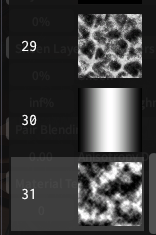
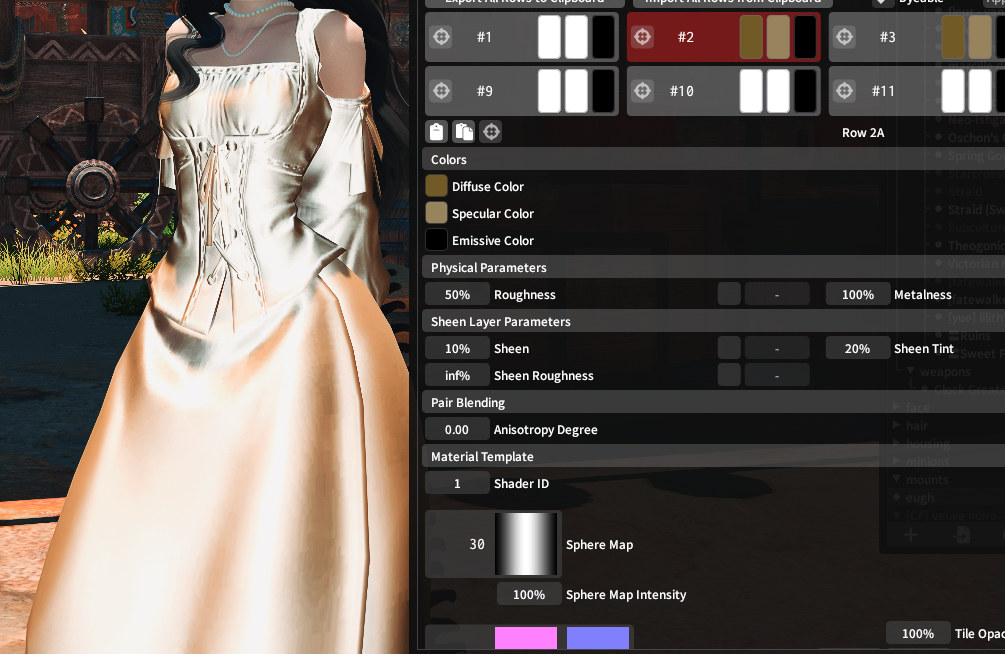
Sphere Map 29
Sphere Map 30

Sphere Map 31
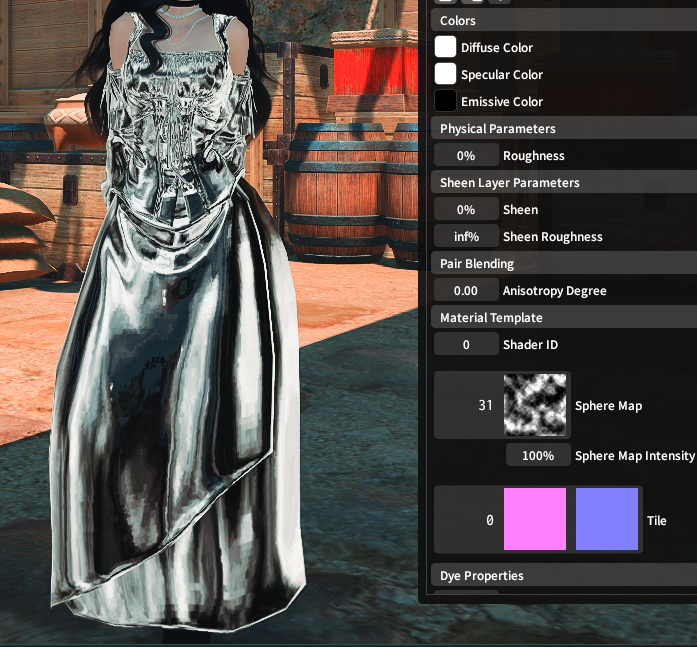
From here, colorset until it looks nice! I’d recommend a darker diffuse, and a lighter specular! Here’s what mine looks like for a nice gold effect.
Glass
This is a mix of textures and colorsets.
For color sets, you want the material to be as shiny as you can get it. Black diffuse, white specular.
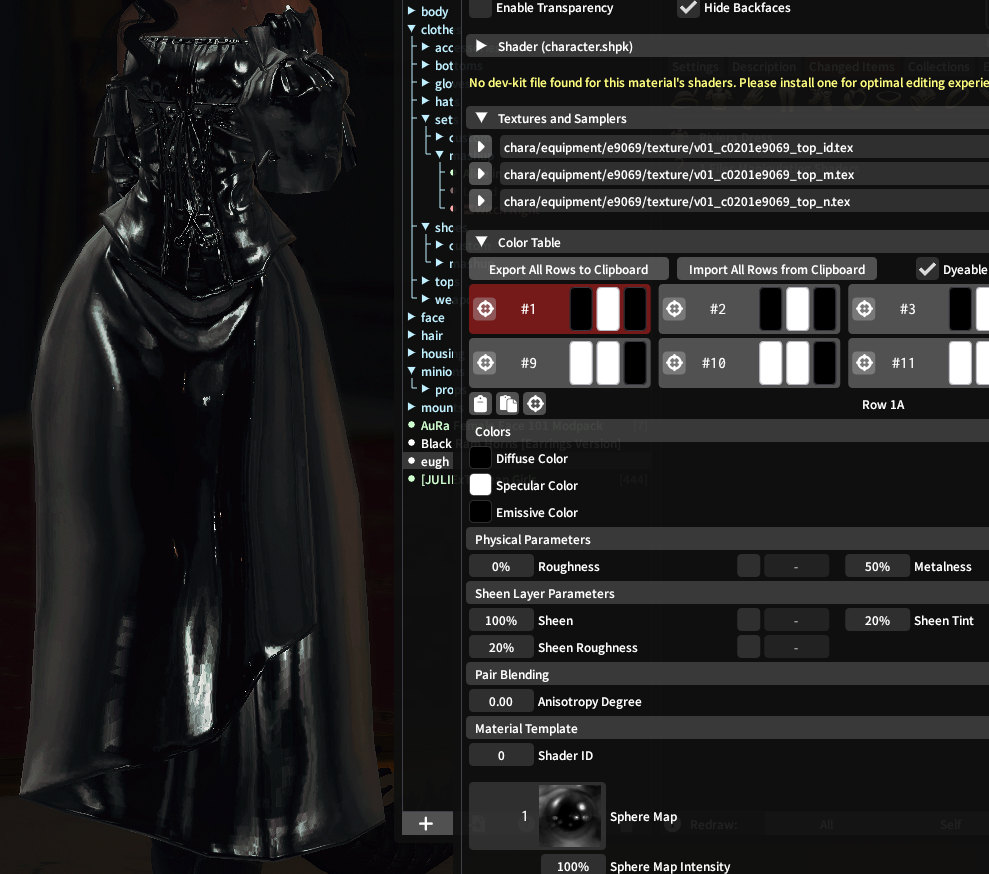
I found Sphere Map 1 to be the best for this, but Sphere Map 4 also works well!
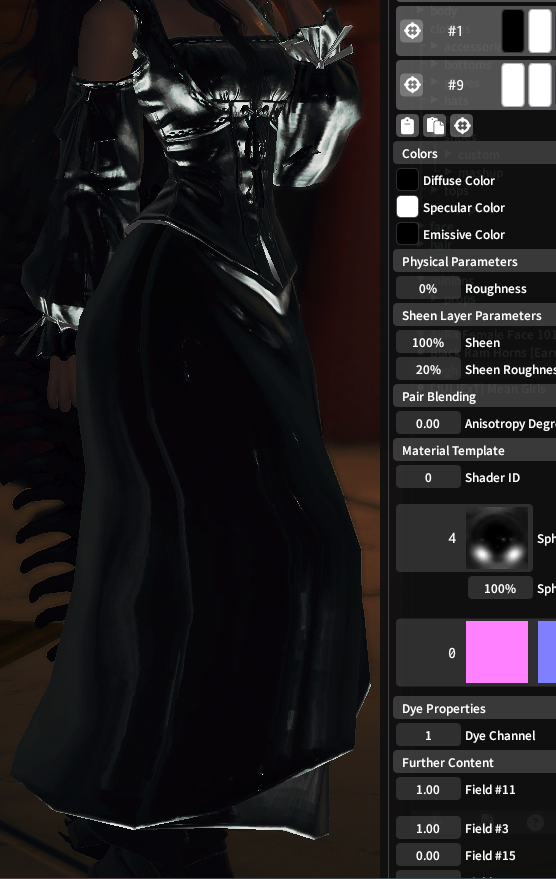
You can leave it here if you’d like, but adding some extra shininess via the normals is also nice!
- Grab the normal, and lower the blue channel to make it slightly transparent (make sure to tick “Enable Translucency” in material settings!!). It should look slightly orange-peach colored!
Save your edited normal, and redraw!
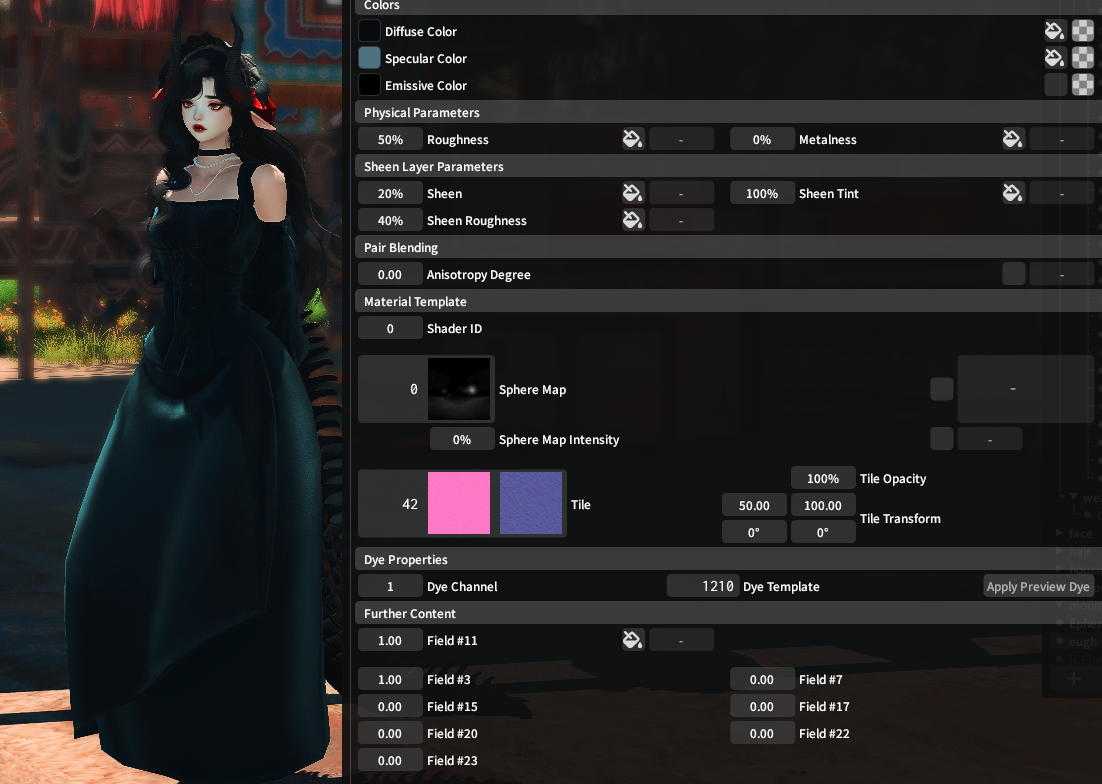
Holographic
REQUIRES a Character shader, not character legacy.
In your colorset row, scroll down to the bottom tabs.
You’re looking for “Sphere Map” and “Sphere Map Intensity”
Click the 3rd option, which looks like a rainbow.
Now, in the box below Sphere map, “Sphere Map Intensity”, change the % to any number you’d like. If you turn this too high, it’ll just go white, I’d recommend sticking below 300%