
Posing your characters
Creating interesting poses is not exclusive to those who have access to posing tools. But there's only so many animations available in the game, which can easily lead to shots becoming repetitive.
Head & Face
Conveying attitude
The choices you make for your picture are influences by its subject matter and tone. Is a scene soft, with the character looking at some flowers? Or is it a high stakes action scene, where everything feels like it is in motion? The way you pose your character changes based on what you're trying to convey.
 |
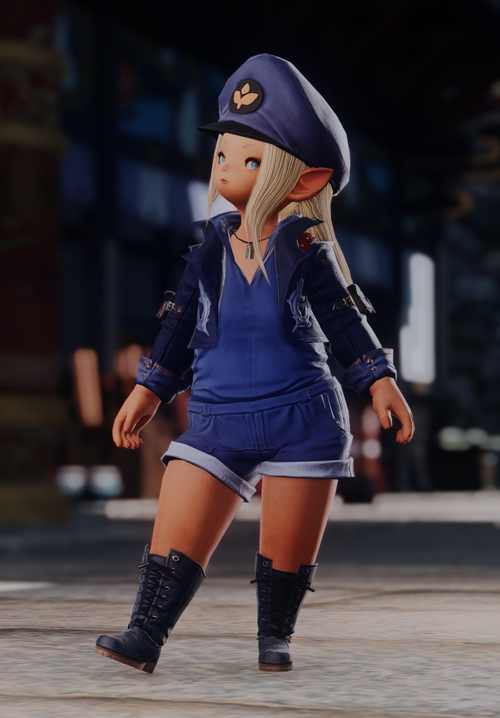 |
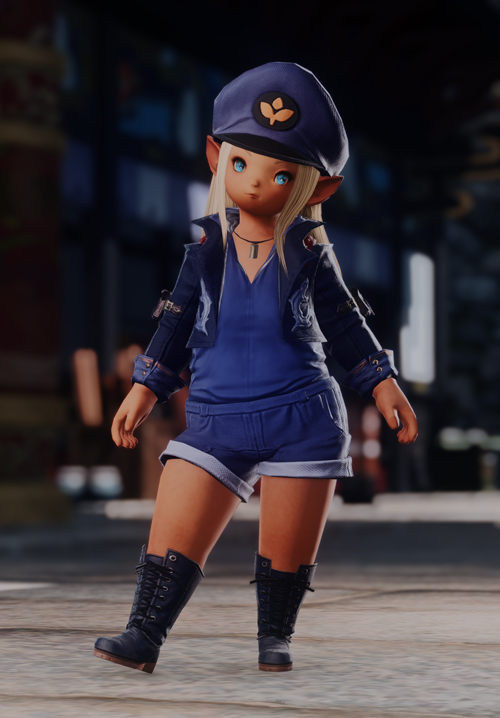
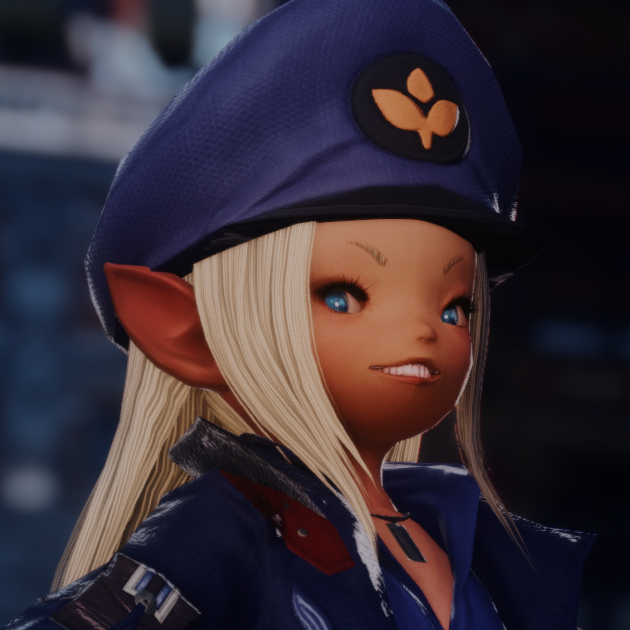
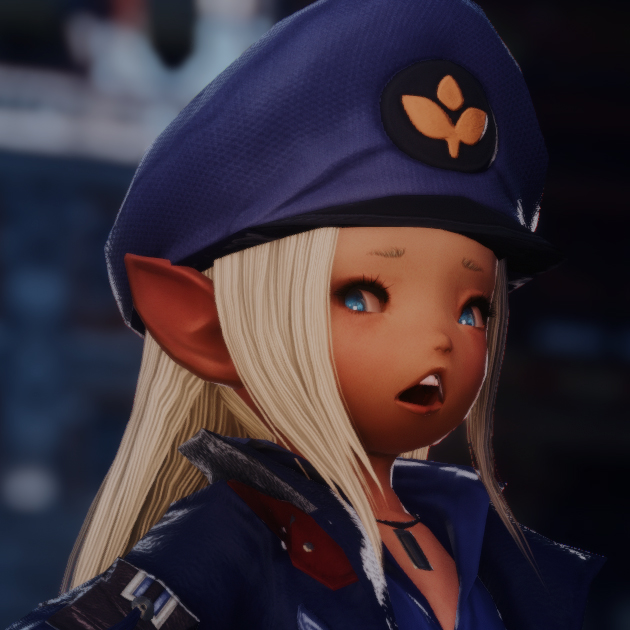
Attitude can and should be conveyed throughout the entire body. Above you can see how a simple head tilt can make the difference between a simple front-facing pose, and one with a lot of attitude; a change fairly small can influence the look and feel of your entire pose. All this is achieved by only moving her head and eyes.
Head angles & eye tracking
To replicate the aforementioned example two options are used. Within the motion settings menu, you can find “Face Camera” and “Eye Tracking.”
By selecting the “Face Camera” button, the character will face wherever the camera is positioned at that moment. By selecting the “Eye Tracking” button, the character's eyes will follow the camera as it moves.
By angling the camera up in the air, it is possible to get the character to look up when paired with the “Face Camera” button. Then, with the character's head locked in place and “Eye Tracking” enabled, the camera can be moved again to create the side-eye effect.
Lip movements
With what we’ve done so far we’re on track to make an interesting facial expression. To get more out of the face’s potential in a pose we’re going to have a look at “Lip Movements”.
In the drop down menu you’ll find three lip movement types. The difference between these three is the speed at which the lips move and the level of animation that is added to the character’s head.
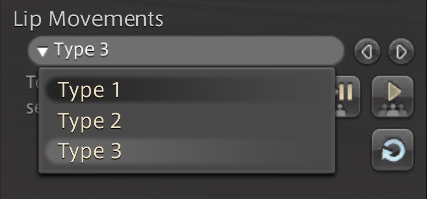
Type 1
Type 2
Type 3
Adding facial expressions
I feel like it goes without saying that adding facial expressions will make the biggest difference to well… the facial expression.
|
|
|
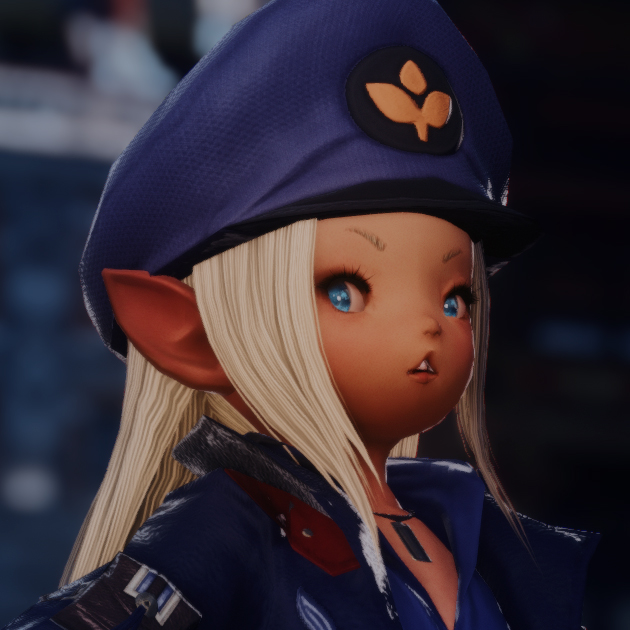
Even with your character’s mouth moving, you’re still able to add facial expressions. They might not translate 1:1 like they would with a static face, but there’s lots of neat little combinations you can achieve with them.
That said, you won’t be able to combine lip movements with every facial emote. There are a few expressions that will override lip movements.
Obstruction of the face
A pose might appear fine at first glance, but ask yourself, does it do a good job at showcasing what you want people to see? To make an image easier to read our needs need a point of interest. This will be covered more in depth in an actual composition guide, but I’ll quickly address the posing aspect of it here.
The image on the left is hard to read. You don’t really have anything to latch onto with your eyes as the character’s face is mostly hidden by the character’s arm. It could have been an interesting pose with a glance over the shoulders, but do to the Lalafell’s physique that quickly turned into an obstructed view.
The image on the right is much easier to read. By revealing the face I’ve given the viewer something to look at. Additionally it adds a natural break point between the clothes which are all a similar shade of blue. This contrast also makes the image easier to read.
This all said, you’re allowed to hide the face in certain situations. My general rule of thumb is that if I break a “rule” I have to do it in an intentional way. Again, the face doesn’t have to be visible, but it has to be clear that this was my intent. We can create drama by hiding parts of the character, would can result in enticing scenes.
Examples of hiding the face correctly
Move your body!
We’ve already made some pretty big steps in changing our character’s demeanor by only changing the head and facial expression. It’s time to move on to the rest of the body which is just as, if not most important.
Movement submenu
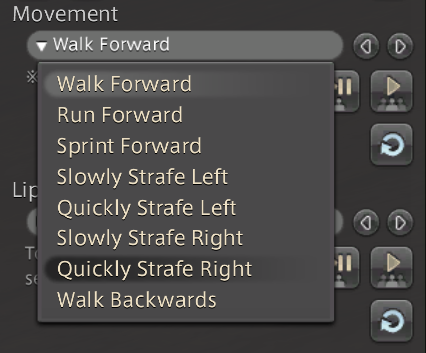
Backing up a little in the Gpose menu we’re going to have a look at the “Movements” drop down. This drop down contains all types of walking animations.
It’s an easily overlooked option as, it’s just walking animations right? Well, think again!
I’ve always found my biggest issue in posing my character than there’s such a huge limit when posing a specific class. Using the battle stance and victory pose emotes gets you a long way, but when you’re on your 50th screenshot of said class it starts to get a bit repetitive.
Luckily every class also comes with unique walking and running animations if you hold their weapon out. Thanks to this we’re able to add a whole repertoire of unique animations to our collection.
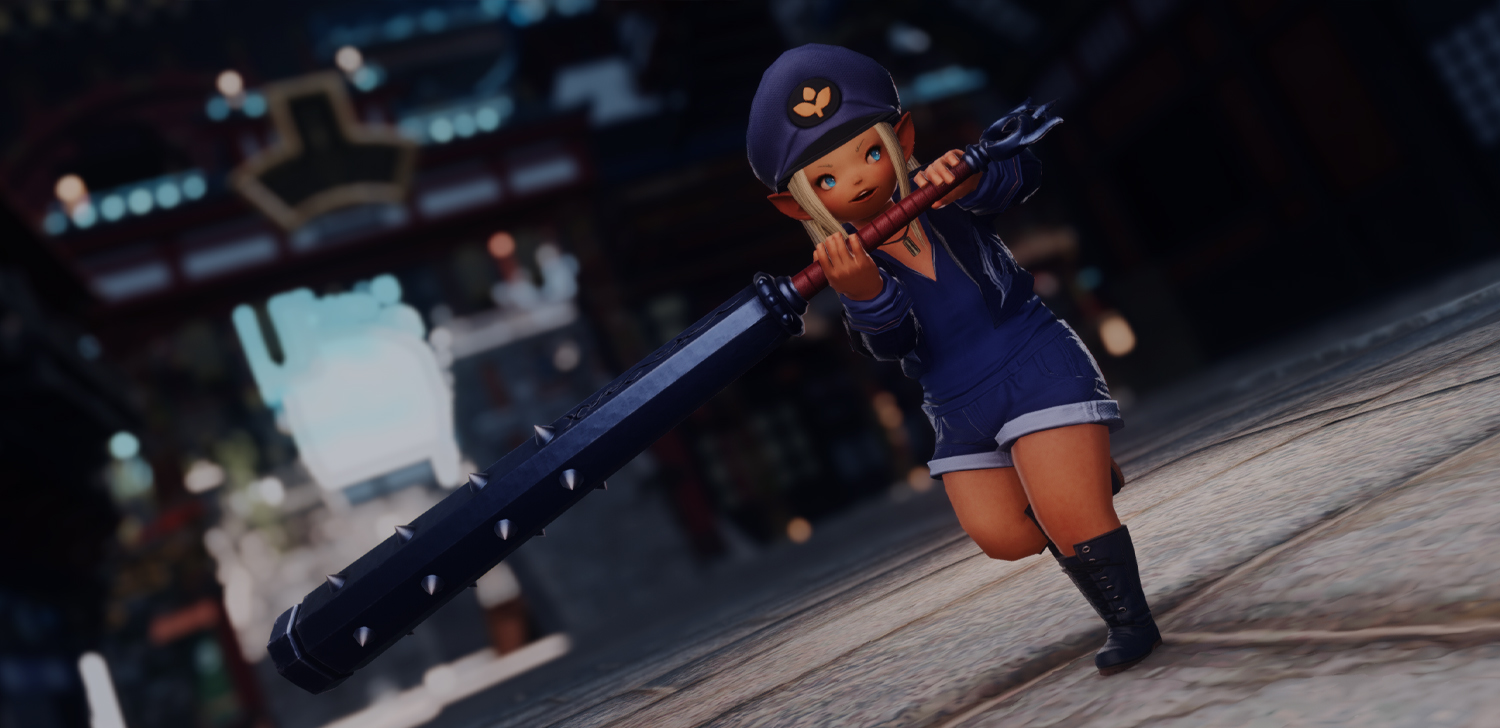
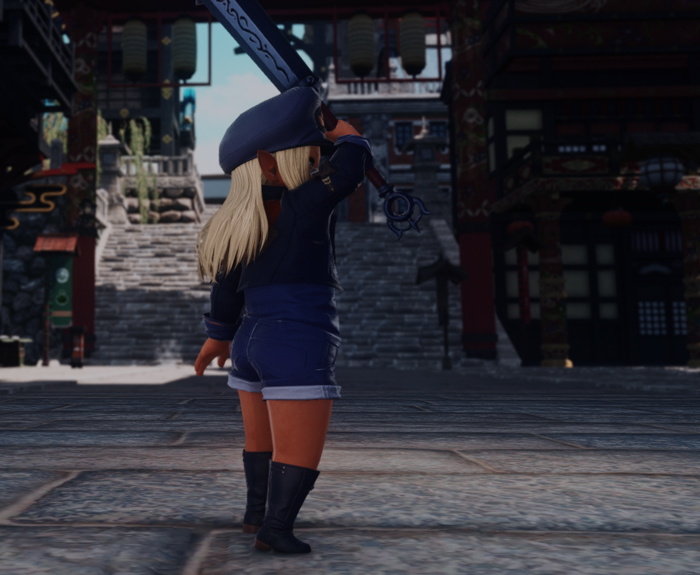
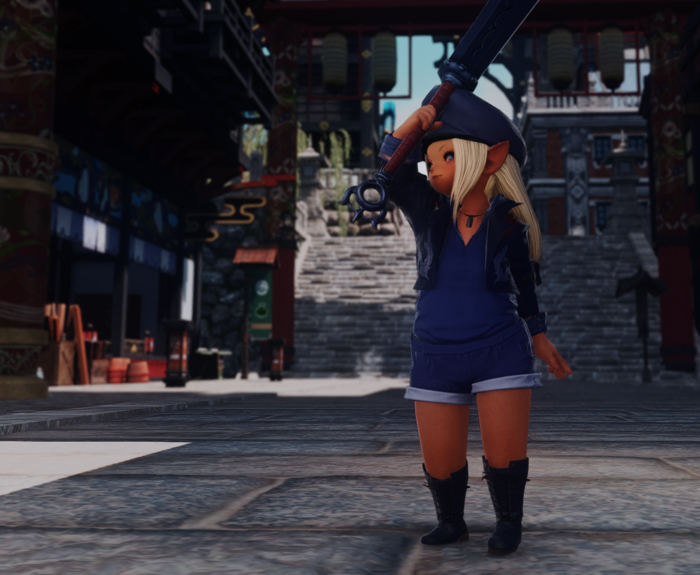
A pose created with the walking animations
Emotes
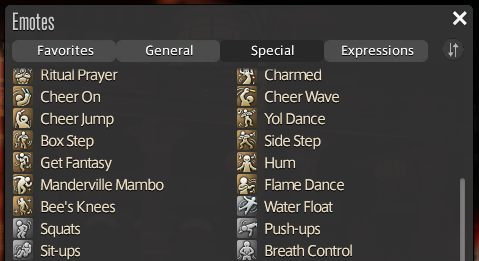
Without a doubt emotes will make the biggest difference to your character’s pose. Before I get into how to get the most out of emotes I would like to recommend you get into the habit of collecting.
By collecting emotes, even the ones you don’t quite like as much, you open yourself up to a lot more variety. Though you might not like the animation as a whole, there’s always the potential that one still frame from it makes for a beautiful and unique pose. Here you will be able to find a resource will all available emotes and where to get them.
Now that we’ve got that out of the way, let’s start navigating using emotes more efficiently.
Slowing down animations
3rd party tool users like myself might already be familiar with the ability to slow down animations. It’s an amazing advantage to have when trying to choose more precisely what frame you’d like to pause on.
Luckily this isn’t entirely exclusive to PC players and there’s a way for us to do this using just the in game tools. So, how do we do this?
First we’re going to open up the second tab in Gpose, “Effect/Frame Settings”. Here you will find the status drop down menu. In this menu we’ll select sleep and apply it with either of the play buttons below.
You’ll immediately see everything is slowed down. However you run into the issue of those pesky sleep bubbles. You can remove these by click the “Toggle Battle Effects ON/OFF” button in the top menu.
Secondly, you might have issues with the expression. You can combat this by using a facial expression emote before or after applying the sleep status.
I’ll be honest and say that this trick is rather finicky. It will help you in some cases and work against you in others. It’s sadly not fool proof in that it also doesn’t work for every type of animation, as you may find that battle animations aren’t affected.
Regardless, it might be useful to you even to just get a closer look at the animation’s potential.
Moving frame to frame
Another option for getting a more precise result out of your chose animation is to skip between frames quickly. I’d say this option comes with less downsides too.
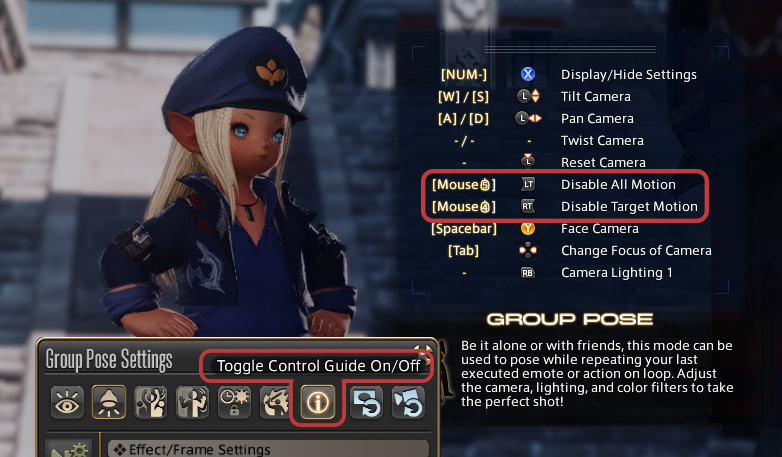
What I’m doing here is I’m quickly enabling and disabling motion using the shortkeys I have set for the disable all motion/target motion buttons. You’ll find these buttons in the top menu in Gpose, however we’re going to avoid actually clicking these buttons physically.
You can find which keys these buttons are bound to in the control guide Gpose provides. Hovering the buttons themselves will always show them bound to 1 or 2 which isn’t always the case.
Using cutscenes
This section isn’t something you’ll need an elaborate explanation for as it’s really just more of a reminder. Posing your character within Gpose is the default, but you’ll find many good poses can be found in the game’s cutscenes. All you have to do to access these is enter an inn, open up the unending journey and pick a cutscene.
Finding the right cutscene can take a while, so you might want to consider noting down cutscenes you liked as you progress through the story!