
Lighting tools
There’s a lot to be explored when talking about lighting in Gpose. As many other parts of the screenshot end game, a lot of the techniques and principles you’d encounter in real life photography can be applied to your in game photography.
This guide will be covering the in game tools we have at our disposal, as well as how to apply them effectively. Let’s dive right into it!
Full Screen Mode Gamma Correction
Before we get into /gpose and its lighting options, there’s one setting worth discussing that won’t be found in the Gpose menu. If you navigate yourself to the first tab in System Configuration and scroll down a little, you’ll find “Full Screen Mode Gamma Correction”
Now, before I cause any confusion, this isn’t a setting you’ll be adjusting every time you plan to take a screenshot. Rather, there’s a good chance you’ll never adjust this setting ever again if you even did in the first place.
Gamma Correction is something most if not all games nowadays provide as a setting for you to mess with. It’s meant to give you the ability to adjust the brightness of your game to be in line with your monitor’s display, as not everyone’s monitor is as bright or as dark as the other. It’s meant for your general game play experience, not for you to take screenshots with. That said, it still affects the appearance of your screenshots.
This means that there’s no optimal setting for me to recommend you, which is also not the intent of me bringing this setting up. Rather, I’d simply like to inform you that if your screenshots are coming out too dark or too bright on other people’s screens, you might want to consider giving it a look.
Manual brightness adjustments
With that out of the way, we can actually get into /gpose and look at what it offers us. First, we’re going to have a look at the “Manual brightness adjustment” slider. If there’s any way to describe this slider, I’d say it’s similar to exposure settings you’ll find in most editing software. The slider is used to darken or brighten your overall image.
The slider works from a 0 to 200 value range. The effect of these values is relative to the environment you’re in, meaning that time of day, weather and setting itself will influence the how much a certain value changes the overall scene. To give an example, my character is in Ralgr’s Reach at 1PM Eorzean Time, with the weather set to “Fog”. The slider value that changes “nothing” to the lighting right now is 70. If I were to change the time of day and the weather now, that slider value can be anything else.
It’s useful to find the value that closest resembles the actual lighting situation outside of Gpose, as you can work from there to add or remove lighting without going overboard. If I add or subtract no more than 10-50 to the value, I know I’ll generally be safe from under/overexposing the image.
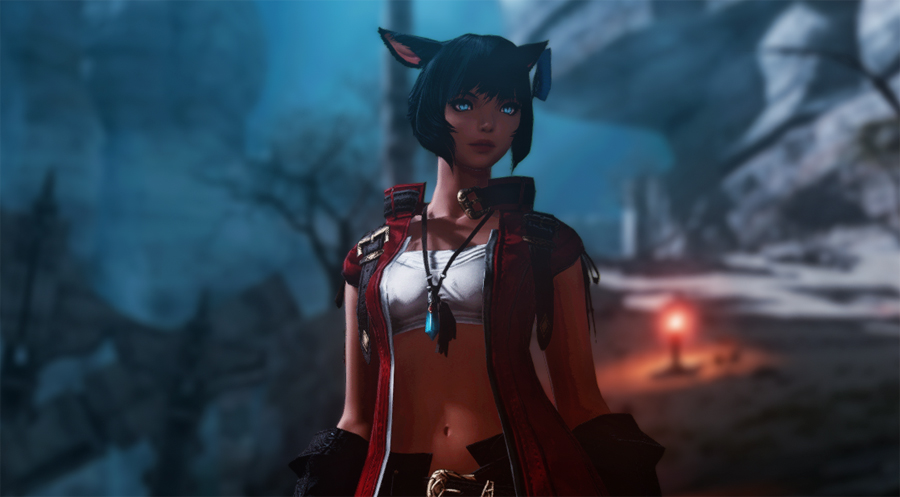
No adjustments made: Bit on the dark side, but not inherently bad
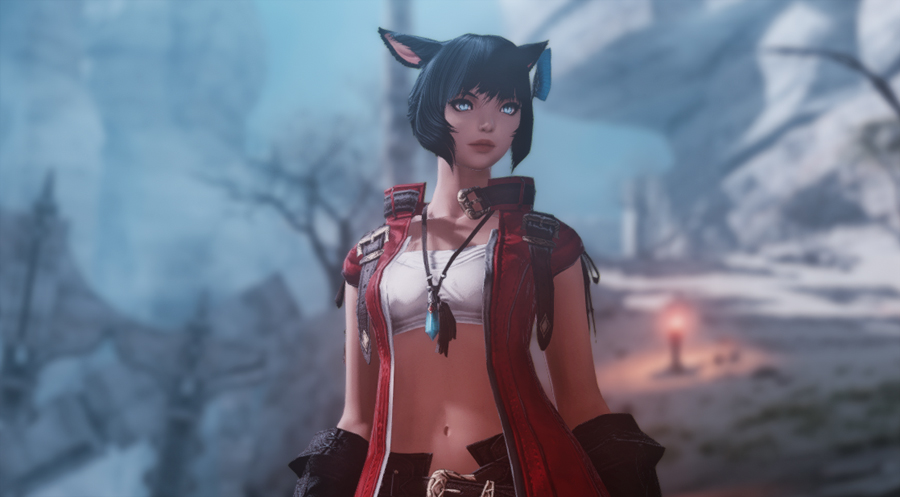
Slider at 100: It looks good, but it no longer looks like a night time scene
As this slider adjusts the overall brightness of the image and not just parts of it, if you add or subtract too much you will quickly run into the issue that parts of your image become unclear and leaving you with a very unbalanced picture in terms of lighting. The tool shines most when you need that little bit of boost to a dark scene, or need to reduce the brightness in an overexposed scene.While it can be extremely useful in dark scenes,
you also have to keep in mind that adding too much overall light can also change the time of day it looks like you’re taking pictures at. This, of course, isn’t really a problem unless you specifically want that night time aesthetic. If anything, you could use the slider to intentionally make it look like a different time of day.
A sentiment I’ll be repeating throughout this guide is how nearly all tools work best when combined with the others. This slider is great, but it’s even better when you use it with the other options alongside it!
Limb darkening
Limb darkening is not a lighting setting per se. All it really does is add a vignette to the edges of your screen, which you can alter the intensity of as you see fit. I cover it in the lighting section since a light vignette can be utilized as a means to brighten or darken the scene. It’s not ideal since at the end of the day, a vignette is a vignette and you don’t have that much control over it. I’d like to see it as an option that if it works, it works. If it doesn’t, it doesn’t.
The sliders are fairly straight forward. The first one determines the intensity and size. When it comes using it as a means to lighten or darken you’ll never go over 2, if not 1. The second slider determines the roundness. Set it to 0 for a vertical oval shape, 10 for a horizontal oval shape and 5 for a circle shape.
The next three sliders determine what colour the vignette has. Further along this guide we’ll talk about colour combinations we can make, so for now I’ll leave you with the knowledge that three 0’s will make black, while three 10’s will make white.
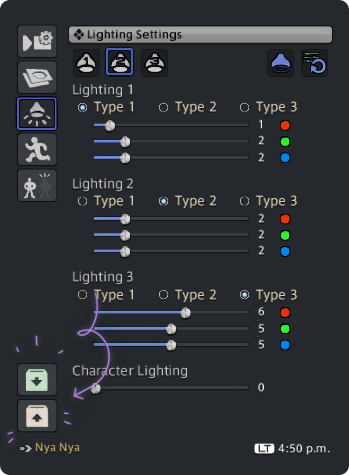
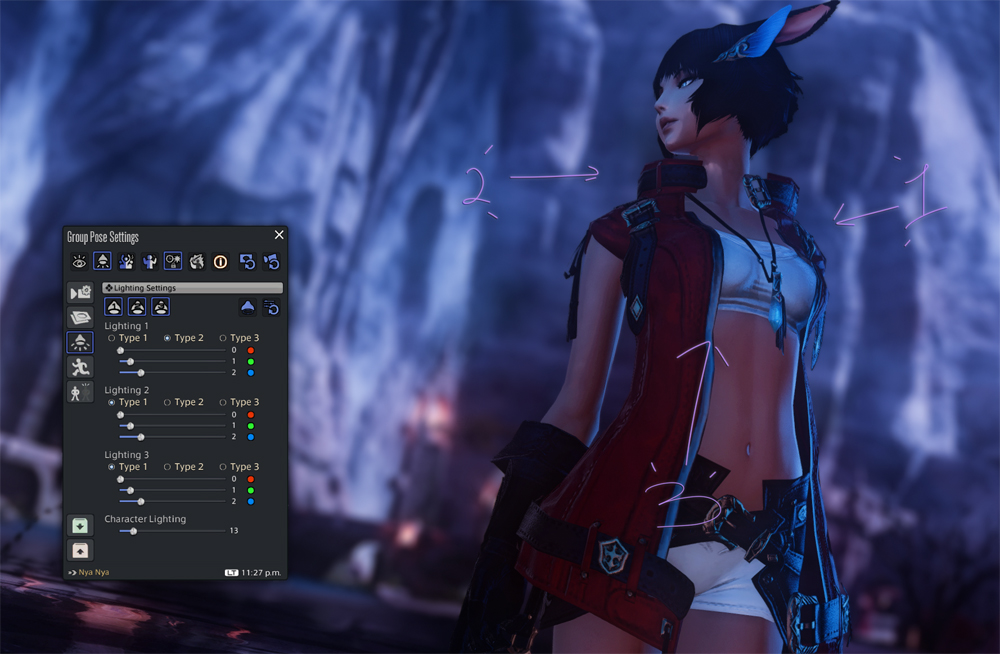
Lighting Settings
Now here we are, at the part of the guide where we talk about the hands down best lighting options this game has to offer. While the other options Gpose gives us will generally require you to to mess around with some other setting on the side, these lights can and probably will be enough for most your shots.
In the Lighting Settings tab, you’ll find a menu with three different lights. The other settings we’ve been looking at so far (and will be looking at) are restrictive in comparison, as we are able to place these three separate lights almost freely around our character. Our only restriction being how far our “camera” can reach.
Lighting settings continued: placement
It’s simple and straight forward enough, wherever you are positioned with your camera (so wherever you are looking from), if you press the light button, this is where it will place itself until you choose to remove it.
Due to being able to place these lights so freely, they’re extremely versatile. Not only can you be selective about the parts of the scene you light up, you’re able to create the illusion of lights that could have already been part of the scene. For example, I added a blue-toned light behind the character and a cool toned light in front of her. This emulates the light from the moon as well as the reflection of the water around her.
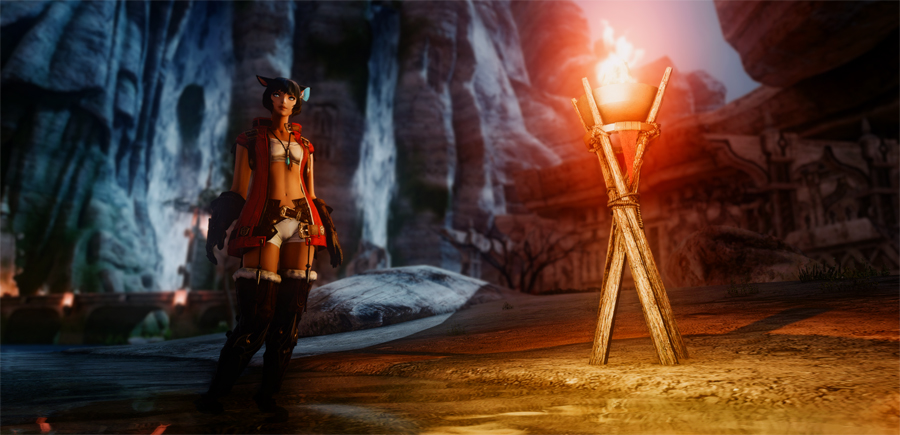
You’re also able to enhance already existing lighting. For example, I took the existing light source, the fire, and enhanced the effects on the character by adding a light to her side.
These are just some basic ideas and concepts in using these lights. This is something I will thoroughly expand upon in the guide about how to work with natural lighting however.
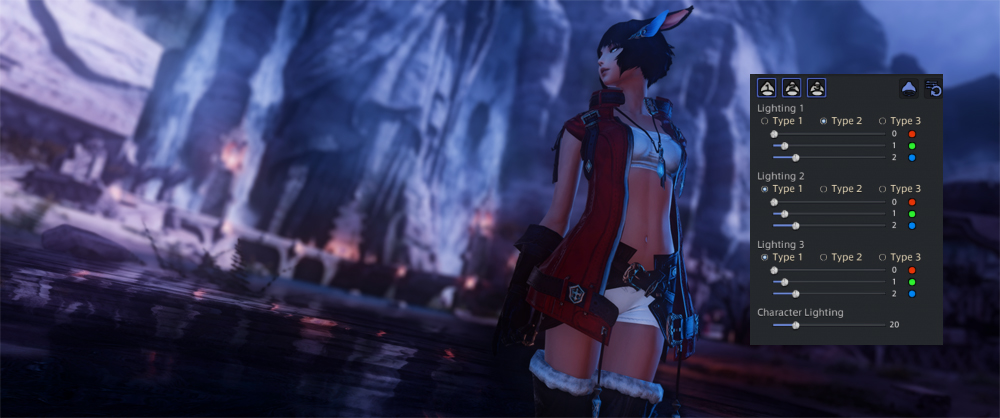
Lighting settings continued: Types

Once you’ve selected a light, you will be able to choose from three “types”. These types represent the size and intensity of the lights.
Type 1 is the softest light and can create the subtlest differences. It’s best use is lightly illuminating the character from a few steps away.
Type 2 is a middle ground type of light. It can be used the same way both Types 1 and 3 are used, however it’s not as dim or bright as either two. Personally I like to use it for overhead lights and accent lights.
Type 3 is the harshest and biggest light and can alter the lighting of an entire scene. It’s best used illuminating the entire scene from far away. It can also be used effectively close by for intense and dramatic statement lights.
Lighting settings continued: brightness sliders
Underneath the types, you’ll find three colour sliders. Red, green and blue. With these you can achieve different colour combinations as well as different intensities. The lower the number, the subtler a light. The higher the number, the more intense the light. The intensity of the light also influences how clearly a colour comes through.
The following images serve as a general visual guide. The values I’ve listed aren’t something you will apply on in a 1:1 way. The intensity you use will depend on the setting of your screenshot and might not be the exact numbers I’ve shown here. Rather, it’ll be a similar combination with different (albeit it close) values.
Lighting settings continued: colour values
Starting off with the most important ones, we have the natural types of light. These types of lights you will generally add in order to subtly enhance your image and work with the natural lighting of the scene. These are great for adding lighting to your character when you don’t want it to be clear that lights were added in the first place.
Then we have the colours that make for more abnormal lighting. These can make for dramatic effects and statement pieces. These can still be used in natural settings depending on the intensity you set them to and what other light sources you have in your scene.
Character Lighting
Underneath all the individual lights we have the “Character Lighting” slider. As the name basically already tells us, Character Lighting is a lighting option that only affects your character and what they’re holding. Like every other slider, being conservative with the values is key in using it effectively.
The reason we want to use this slider conservatively is due to two issues it comes with when we set it too high.
First and foremost, cranking up this setting removes depth from your character. With a large amount “overall” light added, you also remove clear shadows. While the image on the left is a bit on the dark side, the character’s face is much more dynamic to look at and feels far more natural with the scene.
Which brings us to the second issue which is how unnatural a single bright element looks in a scene that doesn’t match in brightness.
I tend to steer clear from setting this slider any higher than 25-30, if I even go that high. I usually sit anywhere between the 10-20 range. This way the character blends in with the rest of the scene and the natural shadows are retained. If I’m not happy with how bright the character looks at this point, I can always mess around with the individual lights or the manual brightness slider.
Saving/loading your settings
Finally, we have the option to save and load both our lighting and camera settings. This is all fairly simple, at the bottom of your Gpose menu you see two bottoms with arrows on them. The first one is the save window.
From here you can save your current lighting and camera settings so that if you were to exit Gpose or even the game, you can load these settings up for your next Gpose session.
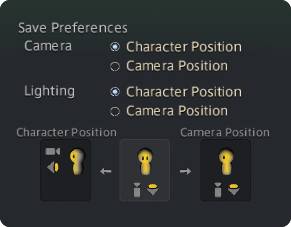
Though despite it being fairly straightforward, you might find yourself a little confused by the “Save Preferences” section.
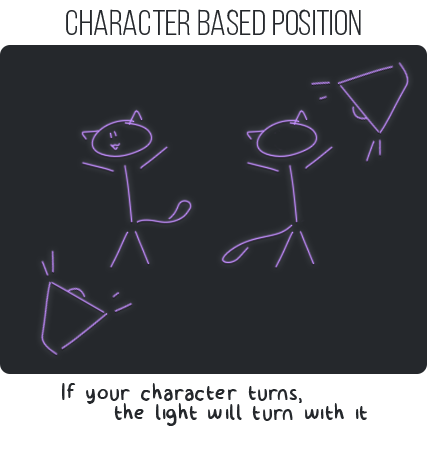
Save Preferences gives you two options for how you wish it to apply your settings next time you load them. You can choose from “Character Position” and “Camera Position”.
The way the tooltip in the Gpose menu explains what this exactly means is a little confusing, therefore I’ve drawn up these excellent graphics to explain exactly what the difference is.If I were to place a light in front of my character and save this setting with “character position checked”, Gpose will load in this light relative to where my character is facing.
This means that if I were to rotate my character outside of Gpose, re-entered Gpose and loaded in the lights I saved, it will place the lights based on where my character is facing now rather than where she was facing before.
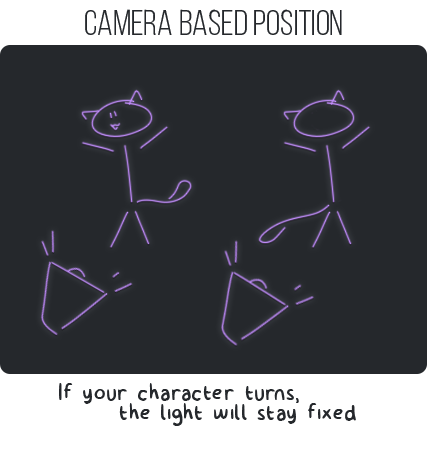
Camera position saves lighting based on your camera as you saved it. It’s essentially a “fixed” setting and it will remain the same regardless of where your character is facing. However, the lights will still use your character as a reference.
Meaning that if you were to move your character a few steps over, the lights you saved will still load in surrounding the character. It would simply ignore how the character has changed their angle but focusing solely on its position on the map and how the camera was originally placed when saving.
Combining settings
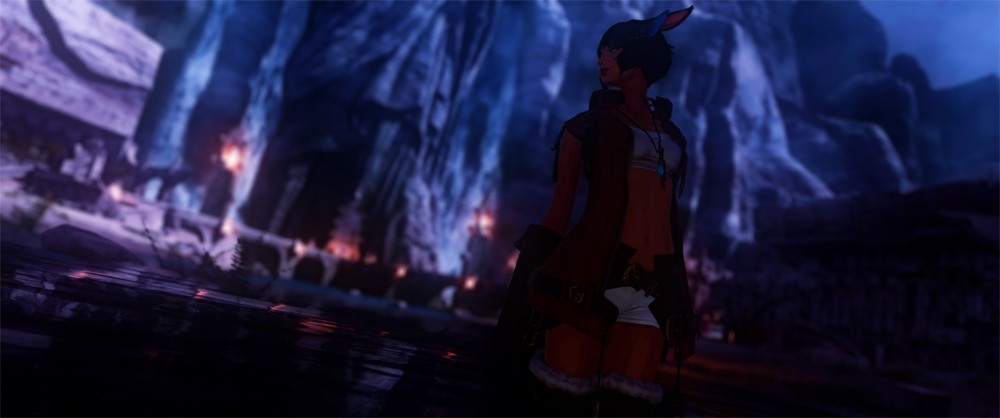
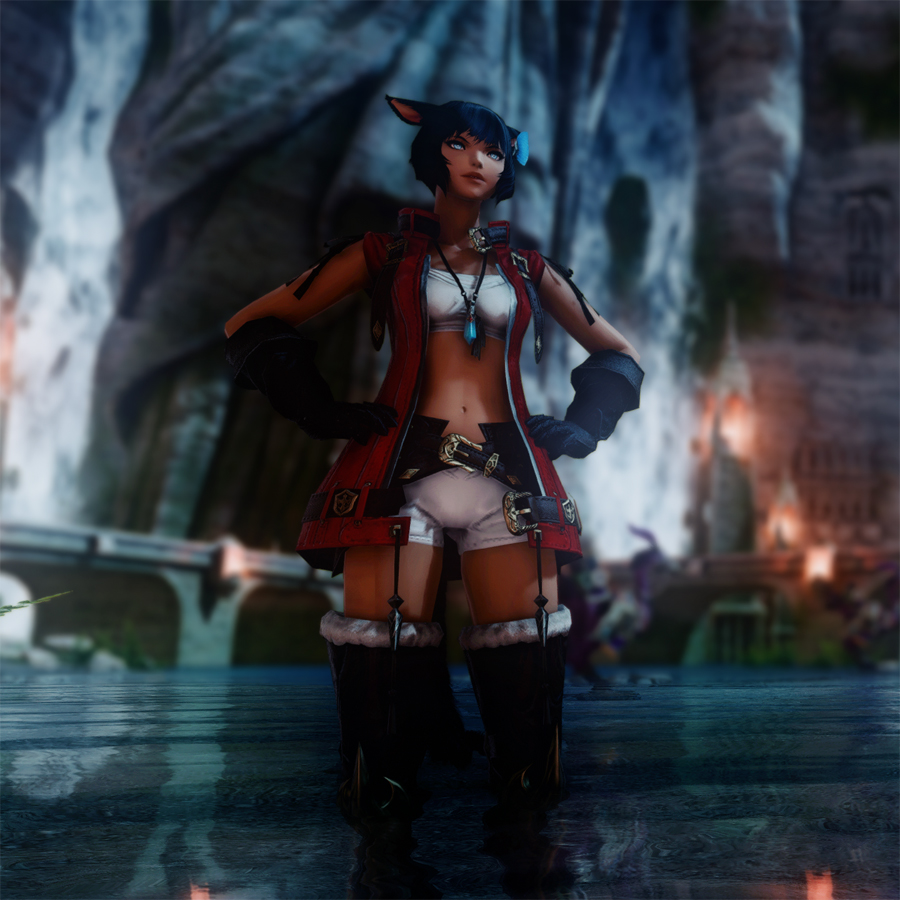
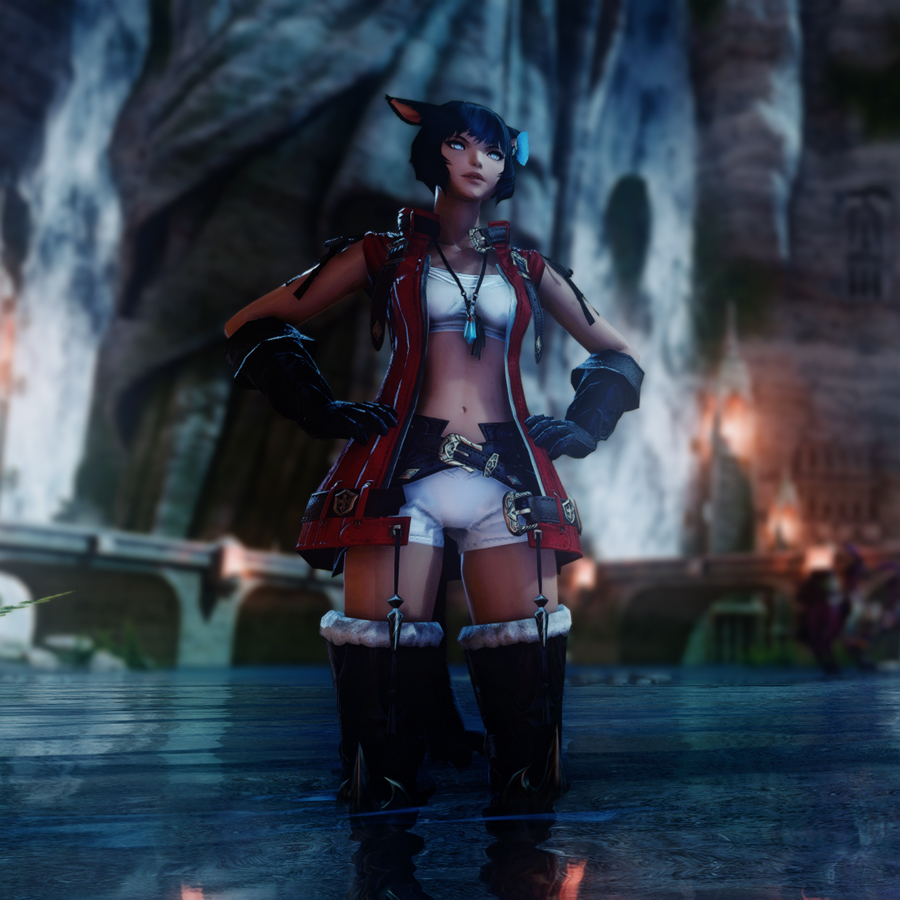
Let’s put everything we’ve learned to the test and brighten up the above scene, which, without a shadow of a doubt is too dark.
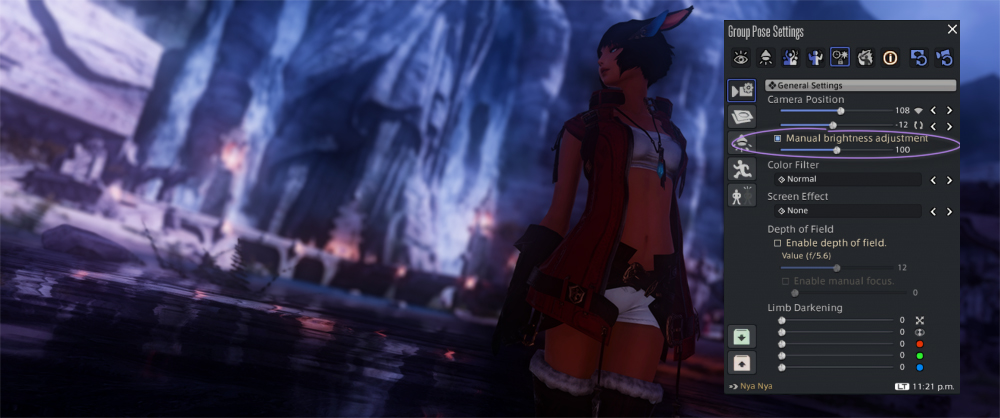
I’ll begin by setting the scene to “100” on the manual brightness adjustments slider. I can always come back to decrease or increase it. For now however, I just want a bit more visibility while I put the individual lights down.
From here, I’m going to start thinking about the temperature/colour of the lights I’m about to place as well as their location. I want to brighten the character overall as well as make it clear that some light sources exist around her. A more in depth guide on this particular step will be provided at some point, for now, let’s not over complicate it.
I place three lights. One to her right, one to her left and one in front of her.
With all the individual lights placed and done, I add just a tiny boost on the “Character Lighting” slider.