
Method 2- extracting a transparent overlay from a fully merged texture (not perfect, not guaranteed to work perfectly on faces, esp custom; may require cleanup.)
THIS INFORMATION CONTAINS NSFW VISUAL AIDS/IMAGES. IF YOU ARE UNCOMFORTABLE WITH THIS OR ARE UNDER 18, PLEASE LEAVE THIS PAGE. THE IMAGES SHOWN ARE FOR DEMONSTRATIVE AND NONSEXUAL PURPOSES, BUT THEY DO CONTAIN DEPICTIONS OF GENETALIA.
If you don’t have transparent overlays of your skin and makeup mods, you really should, esp now that Dawntrail will require you to update your custom skin mods.
This guide assumes you have basic knowledge of texture maps, digital art software, and access to the devkit or base modded texture for your body. This guide will show how to do it in either clip studio paint or photopea, however the basic concepts are the same for any digital art program other than ms paint.
If you have one or more diffuse maps that are fully merged with the base skin, you’ll need to find a way to extract it. This is a method to do so, but it isn’t perfect, and may require some cleanup. I have not tested it on faces, and due to dawntrail changing the UVs, faces will require going through Loose Texture Compiler either before or after this process, depending on if you have an endwalker vanilla/matching unmakeuped diffuse or not. It also does not work on custom/non vanilla based sculpts if your sculpt does not include a barefaced/no makeup diffuse. This method was taught to me by bizu, and I want to make sure it’s shared. Please do not use this for theft, and respect the original mod author’s perms. Do not use this to extract a transparent texture, and then reupload with no other edits as your own, that’s stinky.
This method can be done with Photoshop, Photopea, or Clip Studio Paint, though some of the steps are a little different between the three. I will first show clip studio paint, as it’s the one I had the most success with. Keep in mind that this is not perfect and may require other cleanup, and that this may not work well if at all for textures that are mostly non-opaque, such as body blushing, and may not work on things that are small or microdetail such as freckles. It’s likely possible to do this with other programs, but I can’t promise they’ll work on other programs.
As a new Dawntrail note- while body diffuses have for the most part not changed, you will still need to use an OLD version of the base bodies' skins for Pre-Dawntrail skin mods. Updated body textures for Dawntrail have the neck blended in from vanilla, and if you use a new Dawntrail modded base with an old Endwalker texture, this may not work or produce artifacts around the neck area.
Step 1- Find and download your mod with a merged texture
Step 2- Determine what the base skin texture used is. In this example it’s bibo, and specifically bibo non-smooth (detailed) skin. Figuring out the exact base skin texture used underneath is VERY important. You cannot use bibo smooth(new default) with a bibo non smooth (detailed), or tb2 with tbse. The only thing that doesn’t matter is the dialation on the textures outside of the UVs.
Step 3- Obtain the base skin texture matching your skin mod, and import both into the same file as layers.
Step 4-Duplicate the layer with the tattoos/body details and hide this layer.
Step 5- Use the layer style Divide (CSP) or Difference (PS/Photopea) on the layer that has the extra details. With divide, this should make everything but the differences pure white, and with difference, this should make everything but the differences pure black.
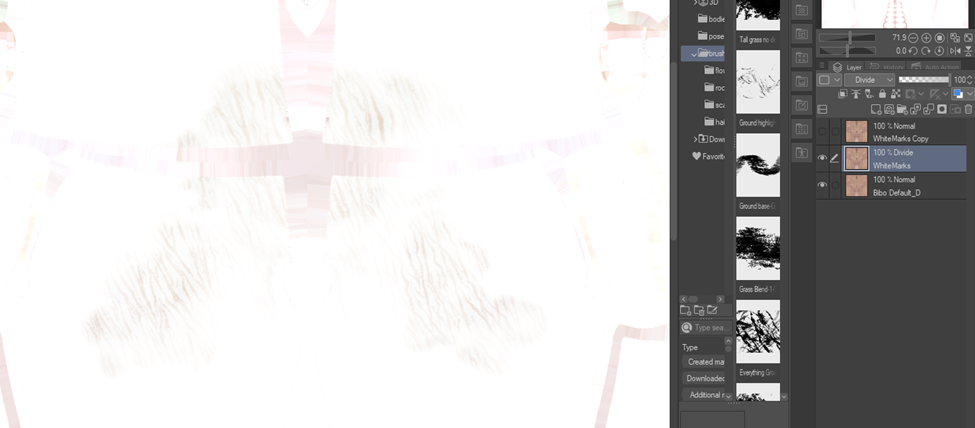
(This is Divide in CSP)
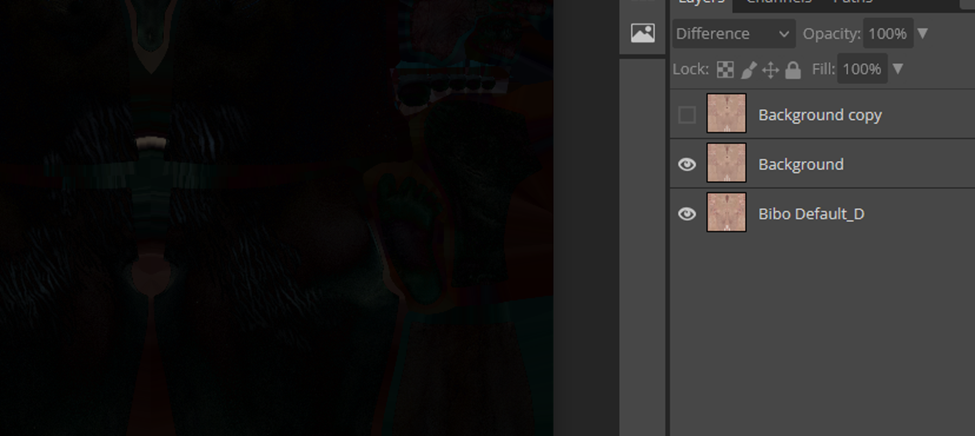
(This is Difference in Photoshop)
Step 6-Merge the two visible layers together
Step 7-Adjust levels so that there is a more extreme difference between the differences and stuff that was blotted out

Step 8-Convert the image to greyscale. There are a few ways to do this, depending on the program, but in CSP, I do edit> tonal correction> Hue/saturation/luminosity and turn the saturation as low as it can go.

- Optional step, but if you have a lot of extra junk like I do here, loosely select around the area/clean up around the area and fill it with either black or white, depending on which you’re doing.

Much better. This is even easier if you have a transparent UV overlay with no dialation, but this is assuming you don’t have that.
From here the process will be a little different depending on if you’re using Clip Studio, or Photoshop/photopea. I’ll start with Clip Studio.
Step 9a-In clip studio, once you get to this step, you’ll then go to edit. Convert brightness to opacity. This is why we used divide instead of difference.

Step 10-you can finally turn on the other layer we duplicated, and have it clip to the layer below.

From here, you can determine if you want to clean up your “mask” layer more or not. If needed, you can redo your levels and grayscale step, and then further edit the levels/contrast from there. If it’s clean enough but not opaque enough, you can duplicate the mask layer and keep merging it down to make it more opaque. Just make sure to keep checking your opacity by turning on your color layer again.

(This is after duplicating and merging twice)
Once you are satisfied with the opacity, you can merge the layers together, and do any further cleanup. (in my case, that’s erasing the belly button and the dialated pixels. Make sure to save this as both a png for using as a clipping mask for your normal/multi, and as a .dds, just to be safe.
Now for the photoshop version, as demonstrated by photopea.

At this point, we are going to use this as a mask. Technically speaking, you can instead of forcing it to greyscale manually, you can just grab a single color channel to use as a mask, but in order for me to get it to this point, I had to do a lot of contrast, levels, curves, and other adjustments that were easier to do after I put it to greyscale/black and white
Step 9b- In Photoshop, you will go to edit > brightness to opacity or in both Photoshop and Photopea, you can go to select> color range.

Step 10-After that you will click your color layer and select “add clipping mask” and this will clip to the layer below.

After that, you’re done, and can save as/export as png and .dds, then use the steps from method 1 to get your transparents for the normal and multi map.
No comments to display
No comments to display