Separating by Loose Parts
Because I forgot I was making a guide, I started a different upscale in the time that passed between starting and completing this document. So we are moving to the Red Mage Level 100 Artifact Coat. If you are following along using the Ravel Keeper’s Chestpiece of Casting, the same steps will apply regardless. All upscales are approached similarly.
Video Reference
If you’re a video person or simply need some video reference, you can view a video I made covering much of this material here: Separating By Loose Parts
Step 0: If you opted to NOT join your parts together above, I suggest renaming your parts to avoid accidentally hiding or deleting critical parts of the mesh. For the Red Mage coat, I renamed my wrists to “wrist” and elbows to “elbow.” This will help me remember that those are IMPORTANT and I SHOULD NOT get rid of them or join them into what I’m working on.
Step 1: Go into edit mode on your first Part (you can do this by pressing Tab). In this example, I am opening up the Torso part of the red mage coat, which includes everything except for the elbows and wrists. Press A to Select All, and then press P, which opens up the separate menu. Select “By Loose Parts.”
-
REMINDER: If you opted to join your elbows and wrists to the torso BEFORE separating by loose parts, your ‘torso’ part will include those too!
Step 2: Scream now about how many parts it is. Mine is hundreds. The picture is but one small part of the red mage coat.
HOWEVER now it is ready for you to begin working back and forth to figure out which parts you can hide or delete so that all the textures are fixed and the outfit is beautiful and facing a single direction. Don’t be scared! Many parts doesn’t mean it’s more complicated.
Why should I separate?
-
SE does not do a good job of distinguishing back from front faces in its engine. If you opt not to separate out loose parts, you can create issues with texture if you merge by distance at ANY point during the upscaling process.
-
Similarly, it is VERY easy to create texture issues or mismatching when weighting if the item in question has many layers of backfaces.
- Subdividing can also cause issues with backfacing, and with Bimbo boobs you NEED to subdivide in order to avoid the awkward crunch of too few vertices covering the titty.
-
Merging by distance between backfaces and manually fixing the issues yourself is a possibility, but I used to do that as a baby upscaler and had the following problems:
- The item lost its metallic shaders in game and showed up as a black blob
- The item failed to dye properly in game
- The item failed to dye to METALLIC properly in game
- The item had clipping or blurring issues in game
- The textures appeared too dark/light/broken in game
- So while you can try to skip this step if you’re not feeling up to it, I strongly recommend you just put on a good show or music and get this out of the way. It will make the ensuing process significantly easier!
How to Decide what to Remove
This is kind of complicated to describe (and I would recommend a cursory glance at the video here if you read it and don’t get it!), but the easiest way to explain it is that I go through this entire, horrible list of parts and carefully begin hiding (using H) the ones that appear RED from the outside of the outfit when I have View Backfaces on, until I have only faces that point the same direction and the entire outfit is BLUE. Doing this will fix the unsightly texture issues that you saw when you first loaded in the model, as the texture mismatch and distortion is caused by overlapping backfaces.
I do this for both the parts that show up red and blue, but also the parts that show up purple and pink. Purple and pink are code in blender for two faces are pointing opposite directions. That means at least one of those needs to go - we will add them back in later!
So my PERSONAL work process is:
-
Start with the FIRST part in the list. Press Tab to open up edit mode, and press A to select all. This is done ONLY to find the mesh easier, because it highlights everything, and I have Old Eyes. Turn OFF edit mode once you find it.
-
Now I look around the mesh to find what it is that I’ve highlighted. Sometimes the parts are very small and hard to see. IF YOU CAN’T FIND IT, I usually skip this part and come back later once bigger pieces are out of the way.
-
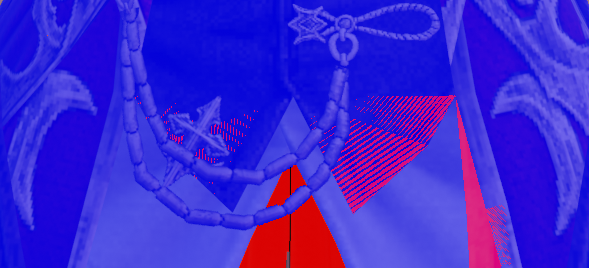
Zoom in on the part and press H to hide. On the example I show below in pictures, you can see that I am working on what appears to be a metallic ornament on the back of the coat. When I hide the part, it changes from PINK to BLUE. That means that the part I have selected is a backface.
-
If the part is a backface (red), I will KEEP it hidden. If the part is NOT a backface, or hiding it creates a hole or distortion of the mesh, I will use Ctrl+Z to undo my hide, and leave it alone.
-
Repeat this for lots of parts!
Picture examples:
Here I have selected this part.
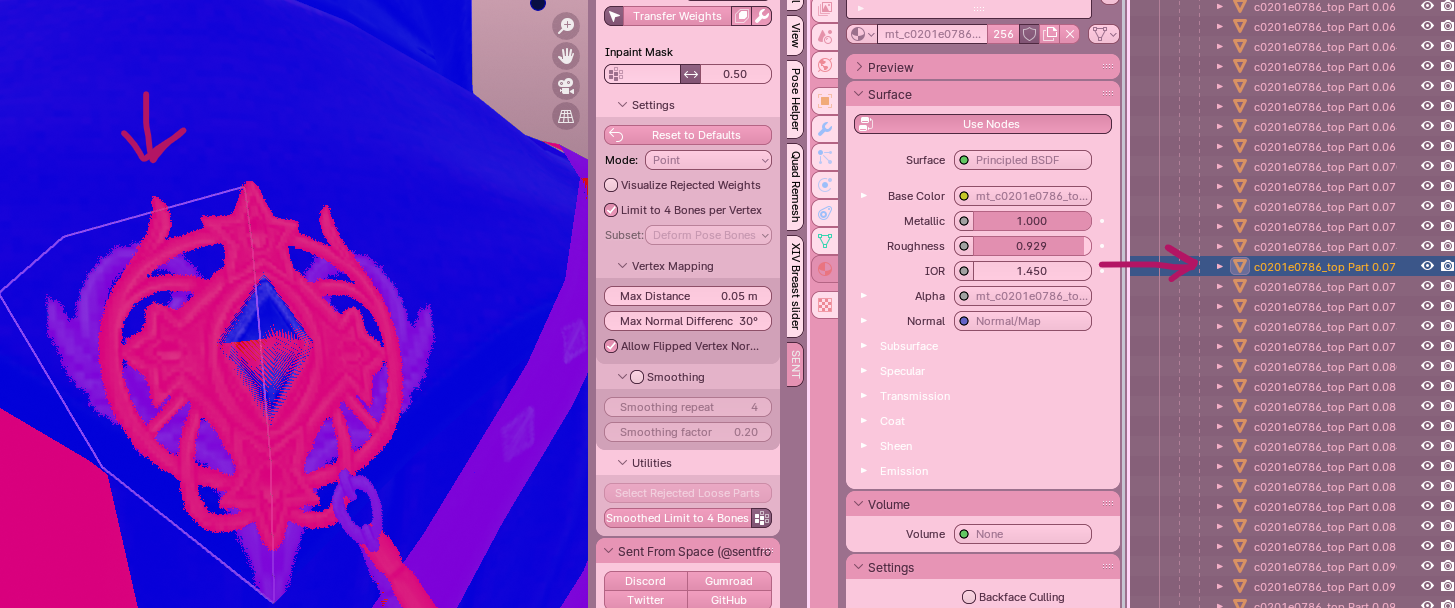
Hiding the part turns it blue. This means the part I selected is a backface.
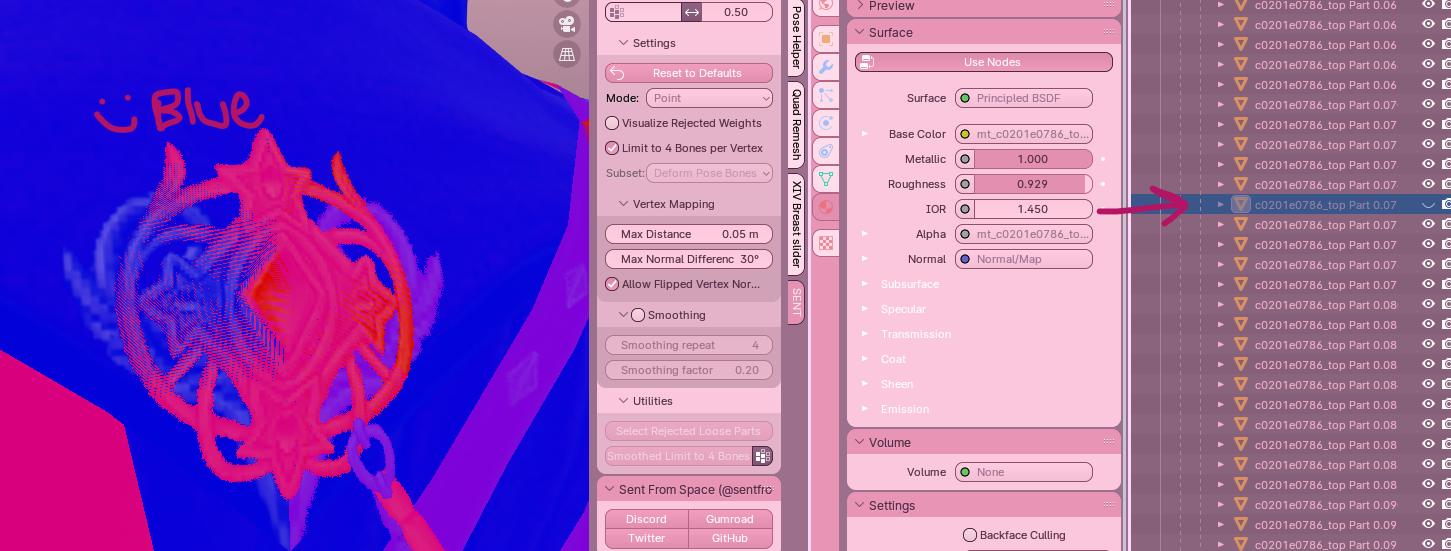
I will keep going, keeping the part hidden, if it is a backface. If it’s not (AKA it turns RED), OR hiding it creates some sort of hole or problem in the detailing, I will undo my hide and keep going.
I highly recommend working slowly and carefully, and hiding parts rather than deleting them immediately. That way, if you make a mistake somewhere in the past and accidentally hide the wrong part, you do not need to figure out how many steps ago you accidentally deleted the item. This is a personal choice, however, and if you feel very confident you can delete pieces with abandon!
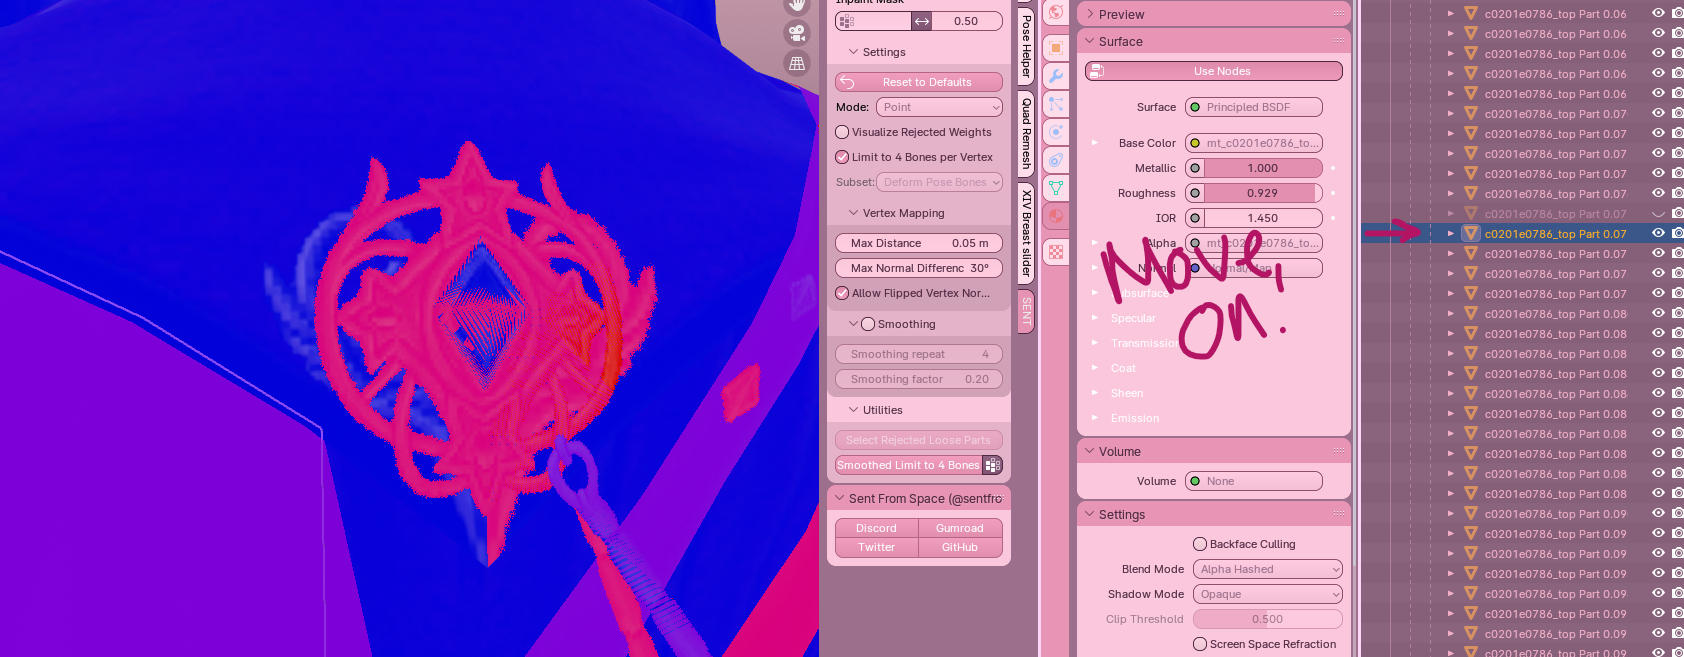
I don’t intend to leave any duplicated backfaces at this point. Everything is either red or blue. I’ll add in additional backfacing at the end of the ENTIRE process. For now, simple is best.
For parts where the backfaces are ‘hidden’ inside of it, such as this little hanging down part of the red mage coat, I will make a mental note of any backfaces I may need to add later to make it look beautiful on the move and go ahead and delete them. The goal is NO backfaces!
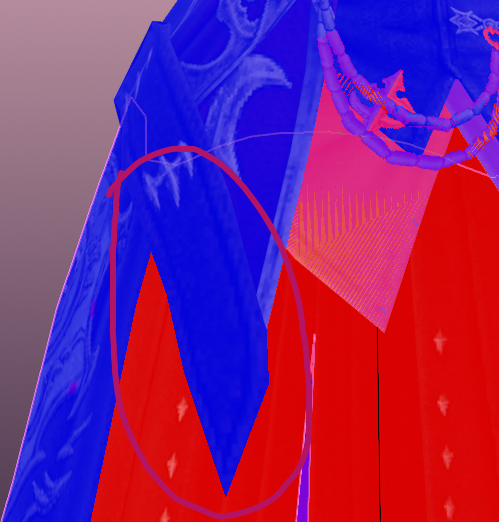
THE ONE EXCEPTION to this is backfacing where it would create a hole or distort the mesh. For example, there is a part on the red mage coat that shows up like so:
However, when you hide the part, it creates a hole in the mesh if you upskirt the model:

This is why I hide things rather than delete them to begin - I actually messed this up and had to go back and turn it back on! You don’t want to leave unsightly holes if you can help it. This is something we can work around later, but the less of this you have, the better.
Joining Parts Back Together
As you go along, you’ll begin to form an idea of what items should go together in logical parts. Keeping in mind the golden rule of vanilla, that ANY MESH can be made into distinct subparts as long as you keep the original part (IE: 1.x, etc) the same for textures, you can begin to join together pieces you feel in your heart should be joined as one.
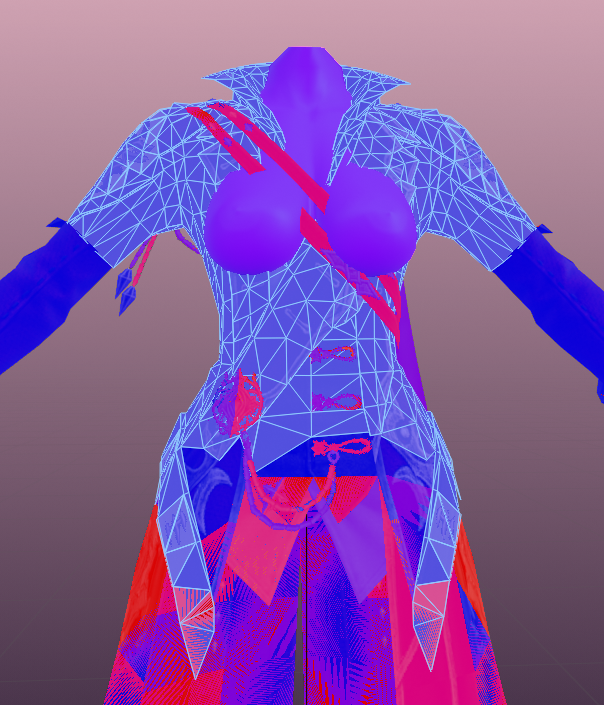
For example, in the video I show that I notice all of the actual ‘large’ pieces of the coat are purely front faces with no backfacing attached. So I begin to join those pieces together, adding in the detailing and piping I find, until I am left with something like this (remembering I do not fix my elbows and wrists in this part, but you may):
A few rules of thumb:
-
When in doubt, keep MORE distinct parts rather than LESS. If you’re worried that an item may need special attention or special weighting in later steps, keep it in its own part! We can always add it in later using either the seam method, or the changing material method, detailed below.
-
Rename joined parts so that you don’t accidentally hide or delete them. For example, I named the part above “coat torso”. This informs me that it’s an important part I shouldn’t delete or hide, and allows me to keep working with it removed from the gajillion parts, as changing the name will move its order in the list (and since vanilla items all start with c0201, it will move it ABOVE or BELOW your working ‘list’ of parts).
-
Keep items that will require future backfaces as their own parts for now. In the example above, you can see that the straps across the chest on the RDM coat have backfaces. I would NOT join them into “coat torso” (yet, or possibly ever) once I’ve hid their backfacing, because I need to remember that they’ll have to have their backfaces added back in MUCH later. Instead, I rename the part and call it “detailing” into which all the backface-required details on the top of the coat go. I make a third part called “skirt” for the skirt bit that will need backfaces. It’s up to you how you join things together.
-
If your commissioner (or…yourself!) has parts they want to remove as metadata toggles, now is the time to plan how to do that. It’s very easy to create “new” parts for parsing in TexTools while everything is split into separate pieces. For example, on the Reaper 100 coat, I split the feathery ruff off of the other feathers in order to put it on Metadata Toggle A. (This is shown in the video!)
At the end of the joining and hiding process, you should be left with a project that looks something like this:
