Step 1: Prepping the Mesh
Before you upscale, you must prep.
- Import/Material Setup
- Fixing Unconventional Vanilla Parts
- Fixing Backfaces
- Separating by Loose Parts
- Situational Issues
Import/Material Setup
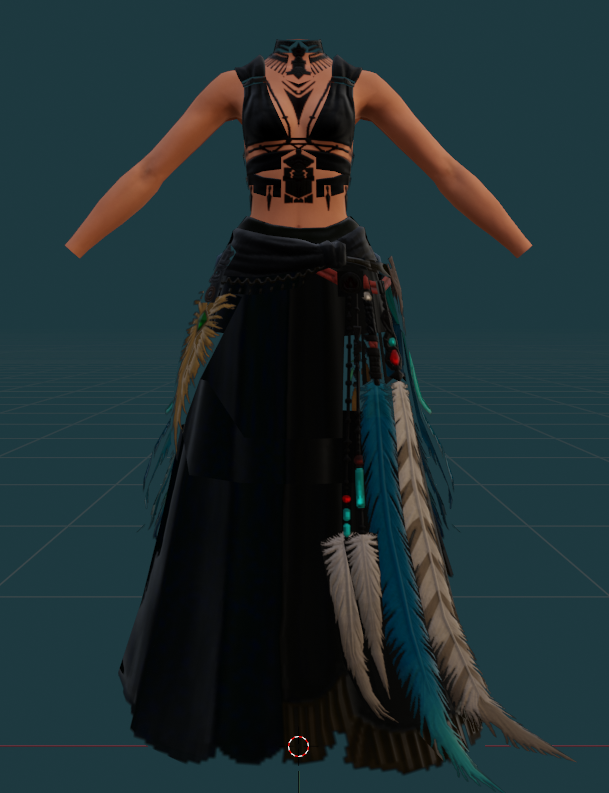
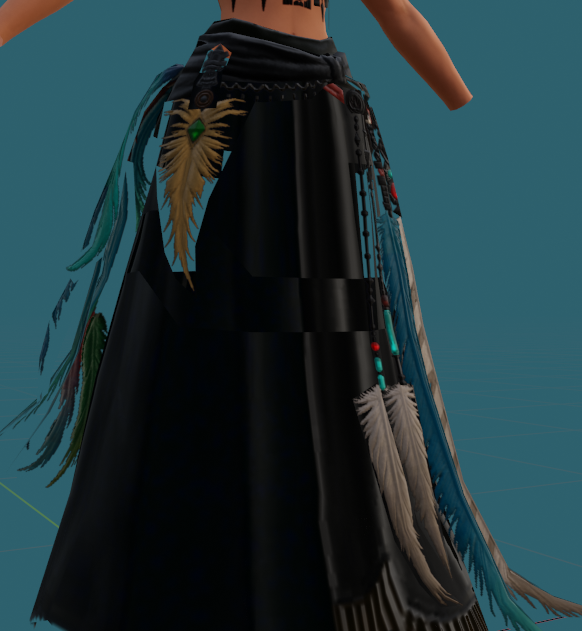
Import the vanilla item of choice into Blender. I’m using the Ravel Keeper’s Chestpiece of Casting for an example here - because this skirt has MANY parts and is very intricate. You may see that your textures immediately look weird. That’s normal for vanilla. I don’t really understand why SE sets up their items the way they do, but they do. We’ll fix it!
Go do your Properties column or tab - this is the tab that contains all of your vertex groups, materials, armature etc. You want to click on the button that looks like a circle with two black and two white parts in it. (marked on picture as 1)
My new blender layout is aggressively pink, so it may be hard to see, but here it is on mine, at the bottom.

From there: go to Settings and Viewport Display, and change Alpha Blend to Alpha Hashed. This will fix the strange shapes and backface collision issues that you have on the original. (marked on picture as 2)
Some people click “Backface Culling” in settings but I personally don’t. I like to see where the backfaces are on my outfit, so I can figure out if I need to remove them or leave them alone. That is a personal preference, and one I urge you to play with.
At this point I import a second copy of the vanilla item I’m working on and keep it in a collection labeled “backup.” This is important because sometimes I mess up. Additionally, this can be useful if you ever have a problem with the model’s normals, as you can copy data from the backup.
Fixing Unconventional Vanilla Parts
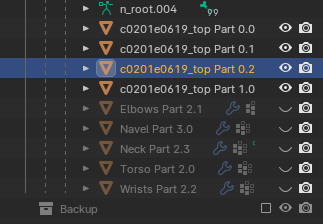
Opening the parts, you’ll notice that SE doesn’t always follow the 'traditional' modding convention of the skin being on Part 0.0. For example, this outfit, the skin is actually on 2.x. You can leave it like that or change it to whatever you want it to be - just remember which part you put it on for import into TT much later. For me, I just leave it where it is, I find that to be easier.
The golden rule of vanilla upscaling: As long as you leave all pieces that use the same material in the same Part (IE: 1.x, 2.x etc), you can split it into as many subparts (x.1, x.2, x.3) as you desire without messing up the appearance in game. Obviously be reasonable about this!
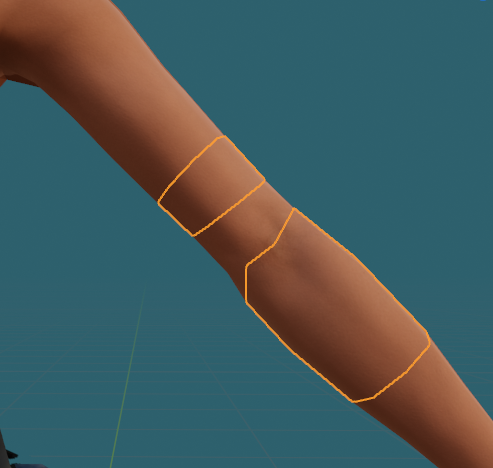
EXAMPLE: Your commissioner would very much like if you could remove the feathers on the No.2 Type B arms. The feathers come attached to the elbow part, which for this example we will call 1.2. You can place the feathers in their own subpart (such as 1.3) by selecting the feathers using L (select linked) and pressing P (separate) > “By Selection” without causing any problems to the design of the outfit. You CANNOT place the feathers in a new part (such as 2.3) without causing texture issues.
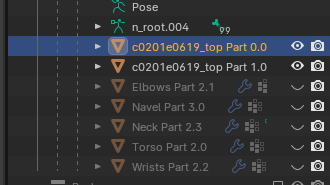
Go ahead and put your Bimbo body + piercings and pubes (if wanted) into the armature (please check Zizi's guide linked in Important Note if you are unsure of how to do this!). As you’re clicking through the vanilla parts, you may notice that SOMETIMES the elbows look like this, where there’s both an upper/lower elbow and a center elbow as separate parts on vanilla:
Just delete both vanilla elbow bits & import your Bimbo elbow part as ONE part as normal. Ignore trying to make Bimbo match vanilla, and don’t give it a second elbow bit. Square Enix does this to delete the middle of the elbow as “excess detail”, but we don’t need that, because modding does not generally care about excess detail to decrease load times.
Now that everything’s set up for LATER, I hide my Bimbo body parts to continue to prep the actual mesh. Because vanilla is needy and has many steps before you get to begin the upscaling portion.
Fixing Backfaces
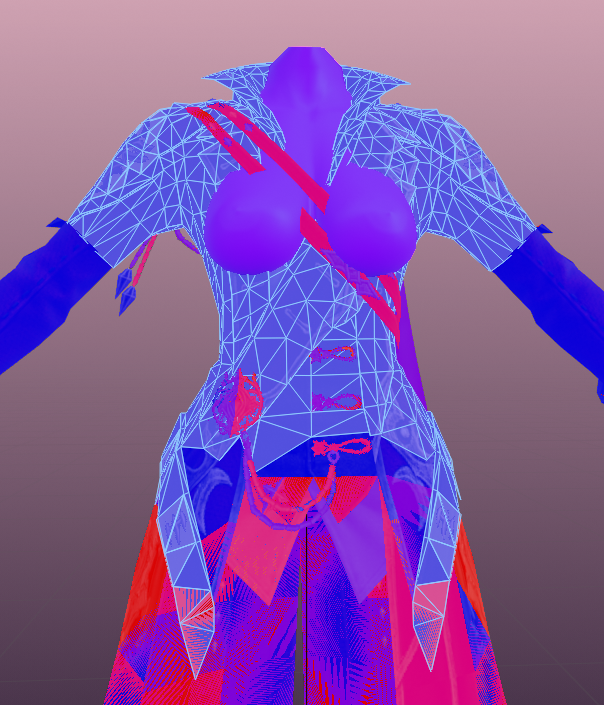
Turn those backfaces on (using Viewport Overlays > "Face Orientation") and in anything more complicated than a simple pair of underwear you’re gonna get….
EW. All of those backfaces are baked into the dress. This means that unless you get rid of them, everything will be 10x harder to adjust using Proportional Edit or sculpt tools. Also they tend to pull apart when weighting or merging by distance, causing an annoying hassle.
The fixing of backfaces is the longest part of vanilla upscaling. But once it is done, you will find the rest of the process is very simple and similar to upscaling modded outfits!
Joining Similar Parts
At this point, I join together all of the parts that make the most sense to be a single item. For example: for whatever reason…this skirt on the Ravel Keeper’s Casting is two parts. (Part 0.0 and Part 0.2 respectively.) Even though they use the same material, they’ve become two separate parts. Separate skirt parts or elbow parts are a great way to begin joining logically.
Do not ever join together parts that cross between vanilla materials when preparing the mesh.
(I.E.: Do not join a 1.x part, to a 2.x part!)
You are asking for a world of pain doing this to yourself. You will NOT be able to tell which parts should have connected to what material at the end of this, and you will mess ALL of your materials up and honestly, likely have to start over. There are times LATER in which it’s OKAY to join these together (such as in weighting), but you must ALWAYS separate them back out or you will mess up your textures.
Before & After of my meshes on the Ravel Keeper’s Chestwrap of Casting:
The reason I join similar parts is because in the next step I’m going to rip the entire dress apart, and for whatever reason the separating works better when I’ve joined everything logical together. I learned this from someone else who does vanilla upscales and it somehow works just so much better than trying to separate by loose parts on each individual item. If you find another method that works for you, you're welcome to use it!
Joining together Knees, Shins, Wrists, and Elbows:
-
I would very much caution you NOT to join these pieces together into the ‘whole outfit’ without marking them or distinguishing them in some way. IF YOU DO NOT DO THIS: you will ruin your glove & boot compatibility not just with other vanilla items, but also modded items. That’s so sad! Don’t do that :(
-
You can either join things together NOW or do it AFTER separating by loose parts. Personally I do it AFTER. Either way is fine.
-
When you join these parts together, I HIGHLY recommend marking the edges of each mesh as seam (more preferred) OR changing the material to another material so that you’re able to separate these parts easily at the end of the process (less preferred).
-
I will cover both of these later in the process in detail in "Merging by Distance" . It is your personal decision whether to join them all now or do it closer to weighting, but eventually you will need to join them together to make weights work.
Separating by Loose Parts
Because I forgot I was making a guide, I started a different upscale in the time that passed between starting and completing this document. So we are moving to the Red Mage Level 100 Artifact Coat. If you are following along using the Ravel Keeper’s Chestpiece of Casting, the same steps will apply regardless. All upscales are approached similarly.
Video Reference
If you’re a video person or simply need some video reference, you can view a video I made covering much of this material here: Separating By Loose Parts
Step 0: If you opted to NOT join your parts together above, I suggest renaming your parts to avoid accidentally hiding or deleting critical parts of the mesh. For the Red Mage coat, I renamed my wrists to “wrist” and elbows to “elbow.” This will help me remember that those are IMPORTANT and I SHOULD NOT get rid of them or join them into what I’m working on.
Step 1: Go into edit mode on your first Part (you can do this by pressing Tab). In this example, I am opening up the Torso part of the red mage coat, which includes everything except for the elbows and wrists. Press A to Select All, and then press P, which opens up the separate menu. Select “By Loose Parts.”
-
REMINDER: If you opted to join your elbows and wrists to the torso BEFORE separating by loose parts, your ‘torso’ part will include those too!
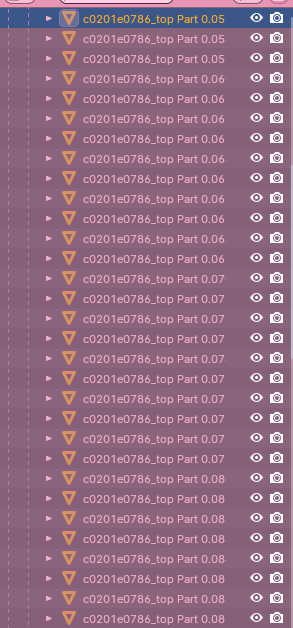
Step 2: Scream now about how many parts it is. Mine is hundreds. The picture is but one small part of the red mage coat.
HOWEVER now it is ready for you to begin working back and forth to figure out which parts you can hide or delete so that all the textures are fixed and the outfit is beautiful and facing a single direction. Don’t be scared! Many parts doesn’t mean it’s more complicated.
Why should I separate?
-
SE does not do a good job of distinguishing back from front faces in its engine. If you opt not to separate out loose parts, you can create issues with texture if you merge by distance at ANY point during the upscaling process.
-
Similarly, it is VERY easy to create texture issues or mismatching when weighting if the item in question has many layers of backfaces.
- Subdividing can also cause issues with backfacing, and with Bimbo boobs you NEED to subdivide in order to avoid the awkward crunch of too few vertices covering the titty.
-
Merging by distance between backfaces and manually fixing the issues yourself is a possibility, but I used to do that as a baby upscaler and had the following problems:
- The item lost its metallic shaders in game and showed up as a black blob
- The item failed to dye properly in game
- The item failed to dye to METALLIC properly in game
- The item had clipping or blurring issues in game
- The textures appeared too dark/light/broken in game
- So while you can try to skip this step if you’re not feeling up to it, I strongly recommend you just put on a good show or music and get this out of the way. It will make the ensuing process significantly easier!
How to Decide what to Remove
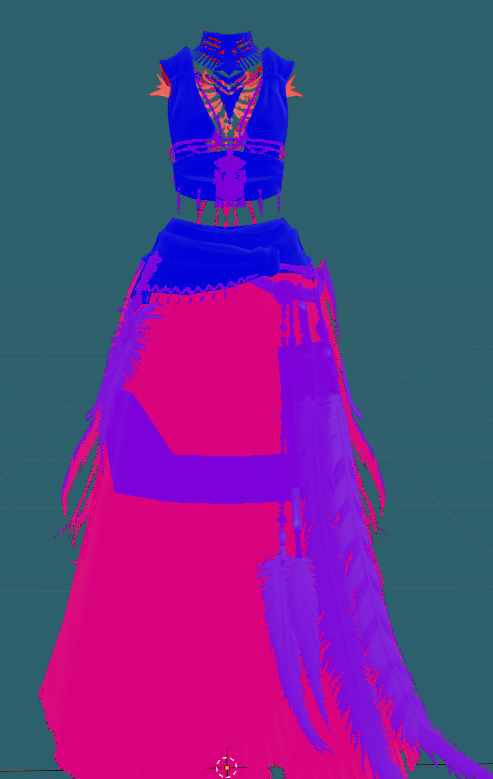
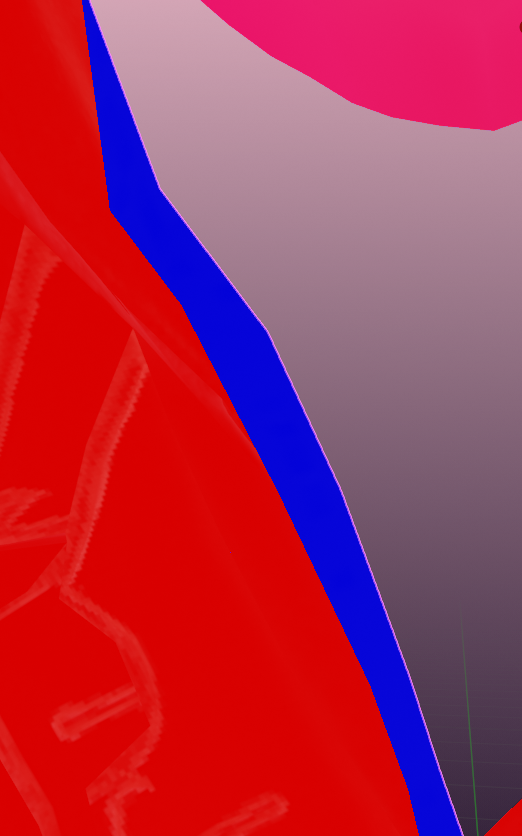
This is kind of complicated to describe (and I would recommend a cursory glance at the video here if you read it and don’t get it!), but the easiest way to explain it is that I go through this entire, horrible list of parts and carefully begin hiding (using H) the ones that appear RED from the outside of the outfit when I have View Backfaces on, until I have only faces that point the same direction and the entire outfit is BLUE. Doing this will fix the unsightly texture issues that you saw when you first loaded in the model, as the texture mismatch and distortion is caused by overlapping backfaces.
I do this for both the parts that show up red and blue, but also the parts that show up purple and pink. Purple and pink are code in blender for two faces are pointing opposite directions. That means at least one of those needs to go - we will add them back in later!
So my PERSONAL work process is:
-
Start with the FIRST part in the list. Press Tab to open up edit mode, and press A to select all. This is done ONLY to find the mesh easier, because it highlights everything, and I have Old Eyes. Turn OFF edit mode once you find it.
-
Now I look around the mesh to find what it is that I’ve highlighted. Sometimes the parts are very small and hard to see. IF YOU CAN’T FIND IT, I usually skip this part and come back later once bigger pieces are out of the way.
-
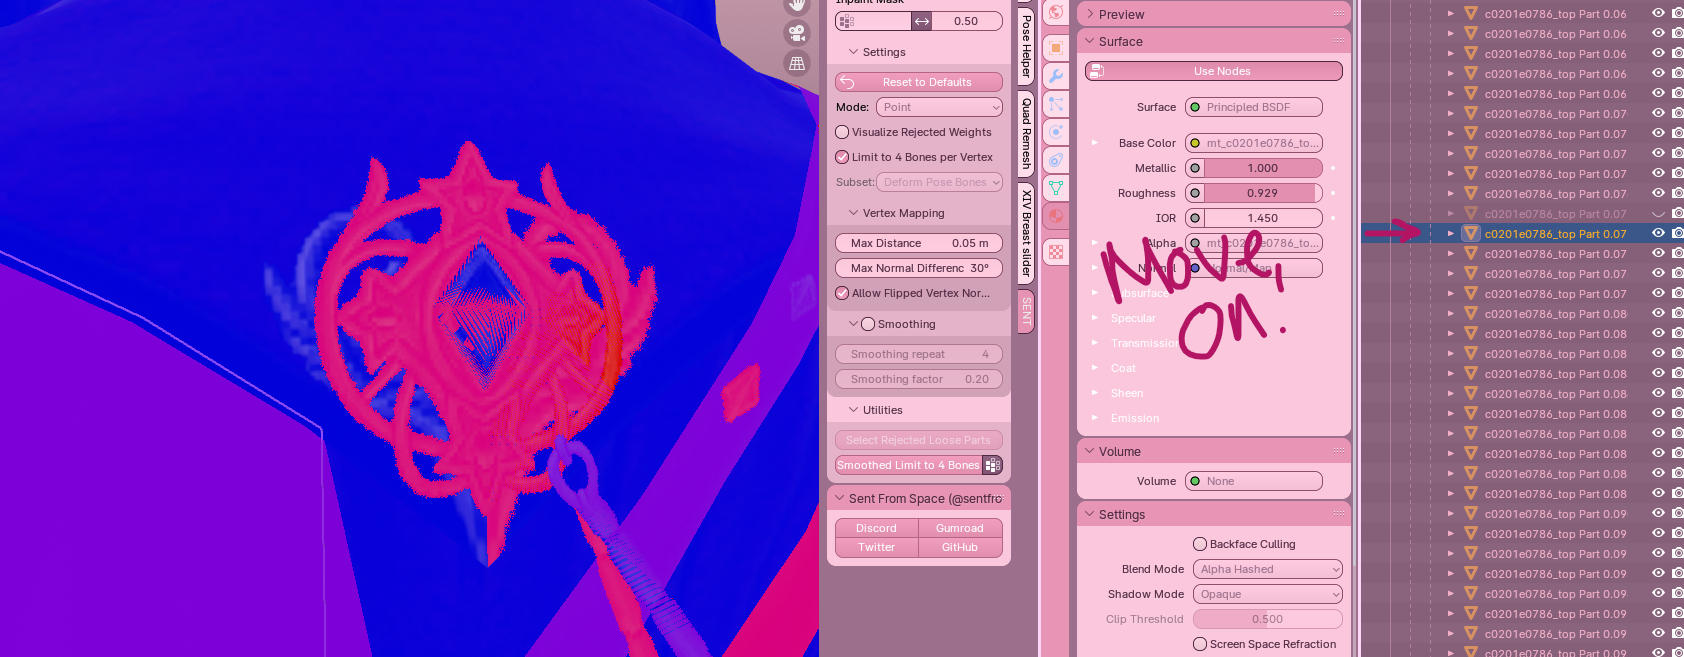
Zoom in on the part and press H to hide. On the example I show below in pictures, you can see that I am working on what appears to be a metallic ornament on the back of the coat. When I hide the part, it changes from PINK to BLUE. That means that the part I have selected is a backface.
-
If the part is a backface (red), I will KEEP it hidden. If the part is NOT a backface, or hiding it creates a hole or distortion of the mesh, I will use Ctrl+Z to undo my hide, and leave it alone.
-
Repeat this for lots of parts!
Picture examples:
Here I have selected this part.
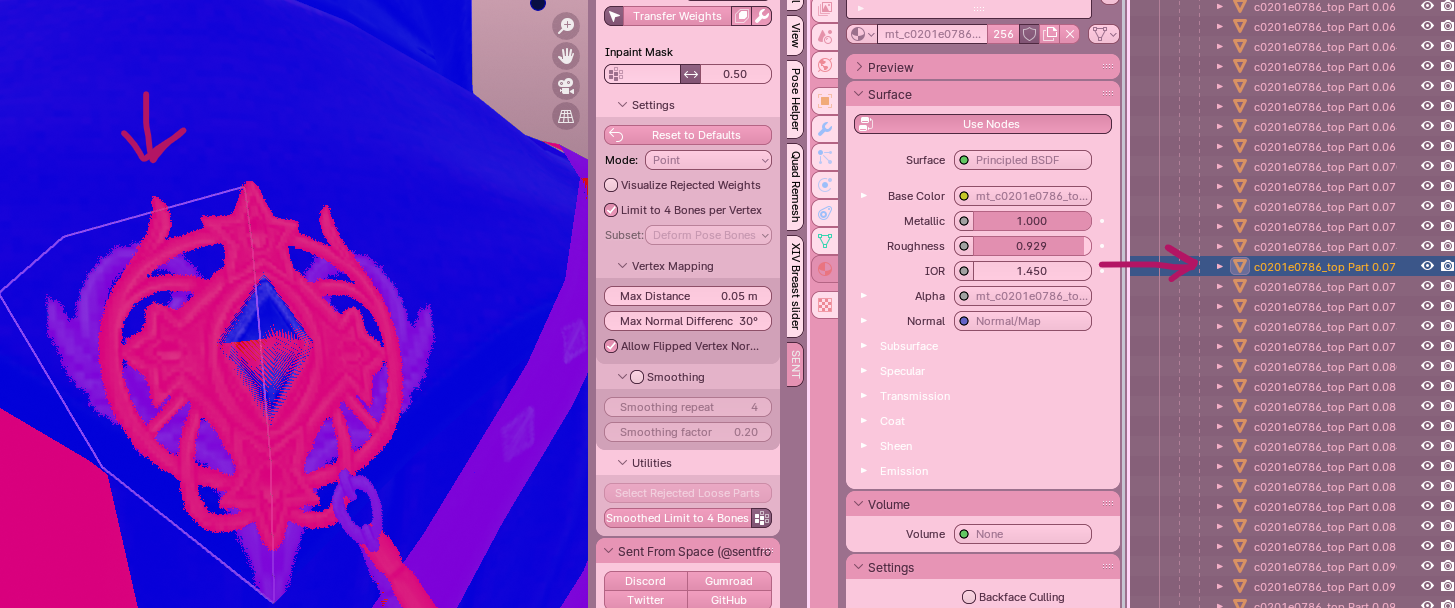
Hiding the part turns it blue. This means the part I selected is a backface.
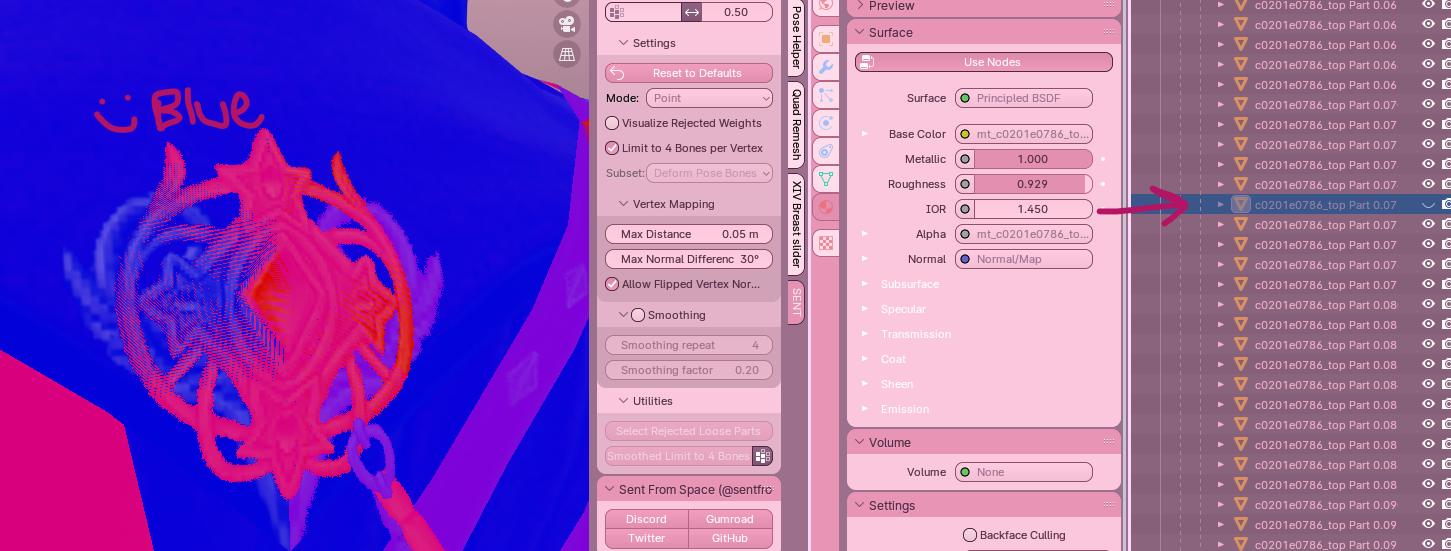
I will keep going, keeping the part hidden, if it is a backface. If it’s not (AKA it turns RED), OR hiding it creates some sort of hole or problem in the detailing, I will undo my hide and keep going.
I highly recommend working slowly and carefully, and hiding parts rather than deleting them immediately. That way, if you make a mistake somewhere in the past and accidentally hide the wrong part, you do not need to figure out how many steps ago you accidentally deleted the item. This is a personal choice, however, and if you feel very confident you can delete pieces with abandon!
I don’t intend to leave any duplicated backfaces at this point. Everything is either red or blue. I’ll add in additional backfacing at the end of the ENTIRE process. For now, simple is best.
For parts where the backfaces are ‘hidden’ inside of it, such as this little hanging down part of the red mage coat, I will make a mental note of any backfaces I may need to add later to make it look beautiful on the move and go ahead and delete them. The goal is NO backfaces!
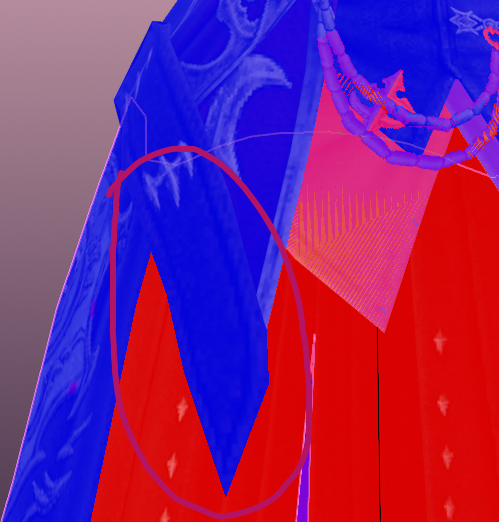
THE ONE EXCEPTION to this is backfacing where it would create a hole or distort the mesh. For example, there is a part on the red mage coat that shows up like so:
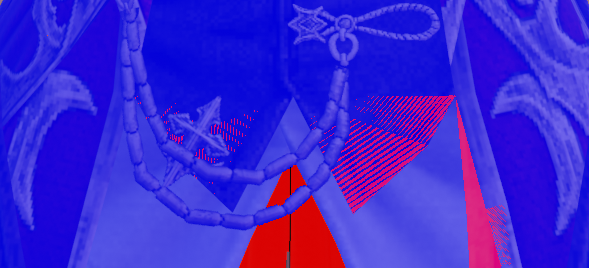
However, when you hide the part, it creates a hole in the mesh if you upskirt the model:

This is why I hide things rather than delete them to begin - I actually messed this up and had to go back and turn it back on! You don’t want to leave unsightly holes if you can help it. This is something we can work around later, but the less of this you have, the better.
Joining Parts Back Together
As you go along, you’ll begin to form an idea of what items should go together in logical parts. Keeping in mind the golden rule of vanilla, that ANY MESH can be made into distinct subparts as long as you keep the original part (IE: 1.x, etc) the same for textures, you can begin to join together pieces you feel in your heart should be joined as one.
For example, in the video I show that I notice all of the actual ‘large’ pieces of the coat are purely front faces with no backfacing attached. So I begin to join those pieces together, adding in the detailing and piping I find, until I am left with something like this (remembering I do not fix my elbows and wrists in this part, but you may):
A few rules of thumb:
-
When in doubt, keep MORE distinct parts rather than LESS. If you’re worried that an item may need special attention or special weighting in later steps, keep it in its own part! We can always add it in later using either the seam method, or the changing material method, detailed below.
-
Rename joined parts so that you don’t accidentally hide or delete them. For example, I named the part above “coat torso”. This informs me that it’s an important part I shouldn’t delete or hide, and allows me to keep working with it removed from the gajillion parts, as changing the name will move its order in the list (and since vanilla items all start with c0201, it will move it ABOVE or BELOW your working ‘list’ of parts).
-
Keep items that will require future backfaces as their own parts for now. In the example above, you can see that the straps across the chest on the RDM coat have backfaces. I would NOT join them into “coat torso” (yet, or possibly ever) once I’ve hid their backfacing, because I need to remember that they’ll have to have their backfaces added back in MUCH later. Instead, I rename the part and call it “detailing” into which all the backface-required details on the top of the coat go. I make a third part called “skirt” for the skirt bit that will need backfaces. It’s up to you how you join things together.
-
If your commissioner (or…yourself!) has parts they want to remove as metadata toggles, now is the time to plan how to do that. It’s very easy to create “new” parts for parsing in TexTools while everything is split into separate pieces. For example, on the Reaper 100 coat, I split the feathery ruff off of the other feathers in order to put it on Metadata Toggle A. (This is shown in the video!)
At the end of the joining and hiding process, you should be left with a project that looks something like this:

Situational Issues
These are some issues I have had when separating by loose parts, that I will fix as I come across them. These do not ALWAYS crop up in vanilla upscales, so you may never see them, but just in case!
In the video of the red mage coat, I cover funny edges of the mesh that clip into the skin. That is the only problem this coat really has. I have other videos however for some of the others, and will endeavor to update this when I find the other problems I don’t have videos of again.
Funny edges of the mesh that would clip into skin
When SE creates a vanilla item, they seamlessly touch the clothing mesh to the skin. Vanilla skin and vanilla outfits have very similar polys and poly structure, so it’s easy for them to magnet everything together. Unfortunately, our bodies are very high poly and this is NOT, so it is virtually impossible to do this with our modded version.
You will sometimes find strange edges that don’t appear to make sense, pointing into the mesh. These are places where SE has done that “seamless look”. You can either leave them in, or delete them if you feel that they don’t add anything to the outfit. I prefer to leave them, as I find that if I clip them slightly into the skin, I can achieve a similar “seamless” look to vanilla that I wouldn’t be able to get without.
This is an example of a strange seam that sits INSIDE of the clothing but I would leave alone. Here is a picture of it with the bimbo chest in place so you can see what I mean by the “seamless look”:
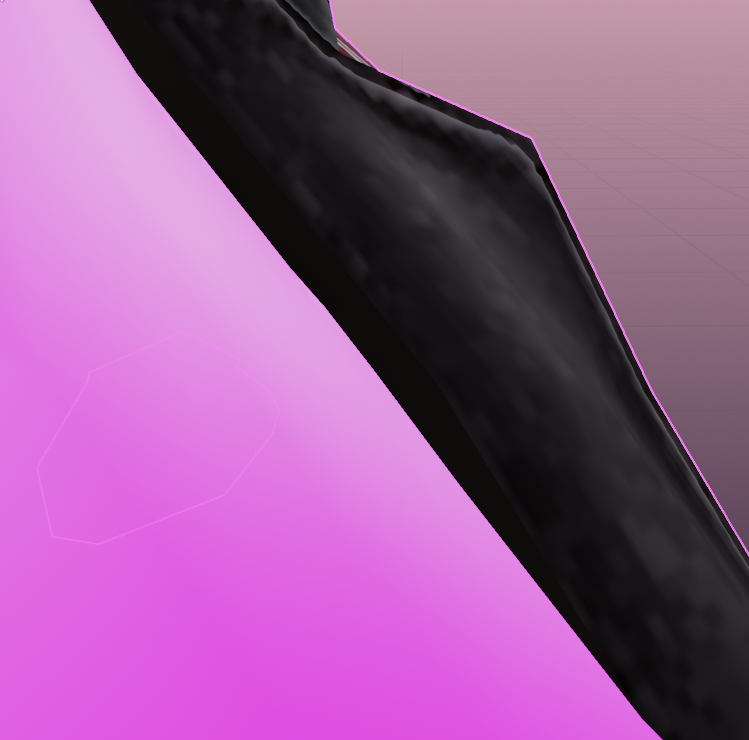
Without that part, it would either GAP at that location (meaning I need to leave more skin in the torso mesh later when upscaling), or it would float fairly significantly. I have had others where removing them made no noticeable difference, so it comes down to personal choice.
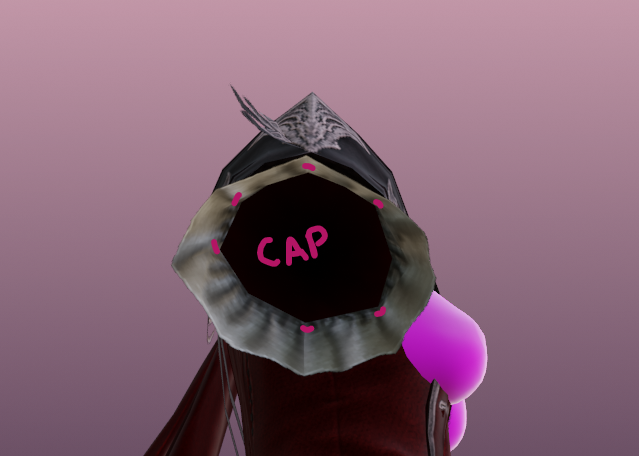
Wrist or waist “caps”
You will find that wrists, ankles, and torso areas tend to have what I will call “caps”. These are places where SE has created a ‘block’ so that they can remove skin inside of shirts/pants/skirts without the player seeing it. If you take these out, you will swiftly find that you’ll begin to see into the portal to the space dimension whenever your character waves their hands and legs around Here’s a picture of the sleeve cap from the bottom of the sleeve looking UP, as the RDM coat does not have arms inside of it.
Generally, you have two options when handling caps: you can either keep SE’s existing caps and upscale them like normal, OR (provided you do not mess up the texture/UV by doing so), you can extrude the region and create a NEW cap off of the existing mesh. I would advise at this point, opening up the UV Editing panel at the top of blender and examining where on the UV the cap sits.

You can see in this example that SE actually created a separate texture for the arm cap. So in this case, I would leave the cap alone and subdivide/upscale as normal, as it can cause issues when dying the fabric in game if you do not.
I created a video guide on how to extrude the region, if you end up needing to learn this skill by watching, which you can find here:
When extruding and ‘capping off’ an area, ideally you do this where people will NOT see it very much, as it will distort the mesh in some fashion on the cap. However, it’s still a useful skill to learn for other things as well.
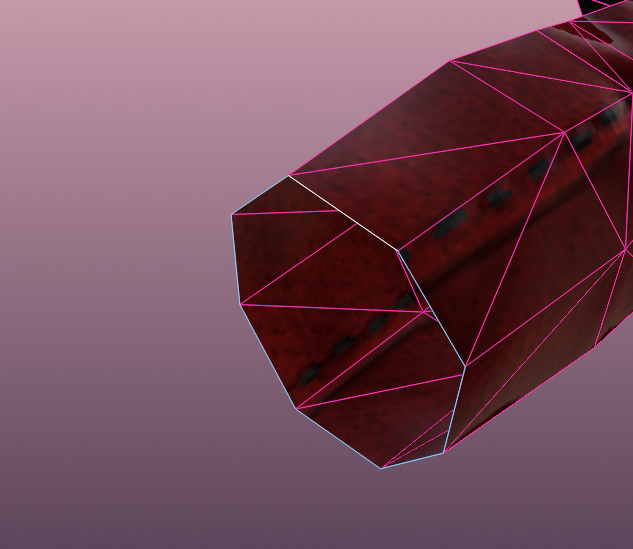
Go into Edit Mode on the item that has a hole you need to cap. For the purposes of this example, I will be using the elbow PURELY because it is a nicely shaped cylinder for ease of pictures. Go into Edge Mode (the second icon in the row of three next to the Edit Mode dropdown) and select all of the edges of the area you want to cap off:
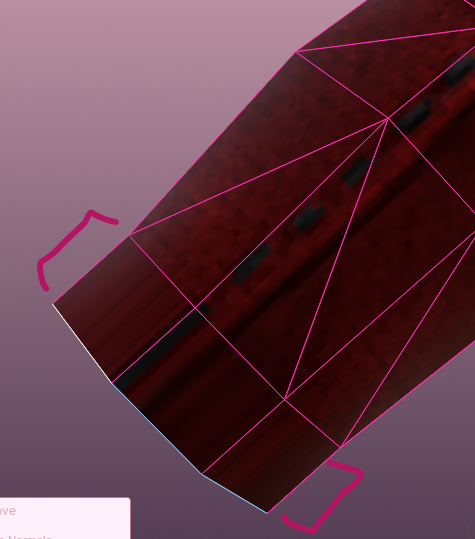
Once those parts are selected, press E to extrude the region. Drag these out to a reasonable length and then left click to confirm. In the picture below, the bracketed area is the new extruded region.
Once you have extruded the faces, click M for the merge menu, and then select “At Center.” This should create a cone.
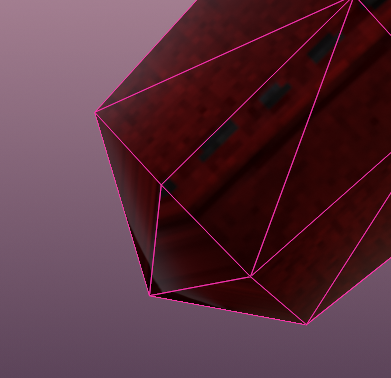
With your edit mode on “Vertices”, scoot that cone back until it makes a flat plane. Congratulations! You’ve capped the region. AGAIN, I really don’t recommend this unless you absolutely have no other option, as it DOES distort the textures and, in my opinion, really makes very visible areas look pretty bad in most circumstances. However, it’s very helpful for places like the top bit of vanilla pants/skirts, or other places where you won’t see the errors in the textures much (if at all).