# MMD to FFXIV Guide
A guide on how to port MMD motions to FFXIV
# Prologue: What you'll need
Before we get started, there is a checklist of files you'll need to have prepared:
- Blender
- XAT
- MMD Motion
- MMD Model
- FFXIV Player Model
- .sklb (Skeleton) file
- .pap file
- Retargeting add on and configuration
- Determination!
Download the Animation Tool Kit here : [Google Drive](https://drive.google.com/file/d/1GW5xj1YU2UO3FfdLmm7M8EyGFXmGJE-u/view?usp=sharing)
# Chapter 1: Add-ons for Blender
For this guide I am using Blender 3.3 LTS. You can view and install all Blender LTS [here](https://www.blender.org/download/lts/).
If you have Blender already installed, here is a list of add ons you will need installed onto Blender:
- [Auto Rig Pro](https://blendermarket.com/products/auto-rig-pro) (you’ll need to buy the full version)
- (Free) [Mwni’s retarget add on](https://github.com/Mwni/blender-animation-retargeting)
- There is also the [rokoko retargeting add on](https://www.rokoko.com/integrations/blender) but I’ve personally had mixed experiences with this one.
- [MMD Tools](https://github.com/powroupi/blender_mmd_tools) (To load MMD models and animation in Blender)
- If the above one does not work or you’re working with Blender 4.X, [UuuNyaa’s version](https://github.com/UuuNyaa/blender_mmd_tools) is the most up to date.
- To install an add on in Blender , do not unzip the ZIP file. Follow this gif:
- [](https://xivmodding.com/uploads/images/gallery/2024-08/b7aSnNCfOeJkDHzx-installadd-ezgif-com-video-to-gif-converter.gif)
Before we get started with porting over MMD motions, please read the Terms and Conditions of the motion’s creator. Some may or may not allow the use of motions outside of MMD!
With that out of the way, lets get started!
# Chapter 2: Loading in MMD Model and Motion
This chapter covers how to load in MMD model and motion.
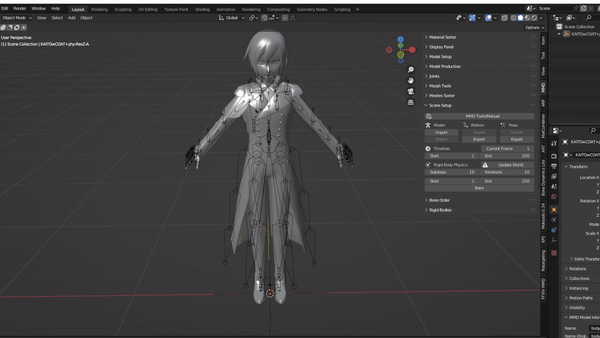
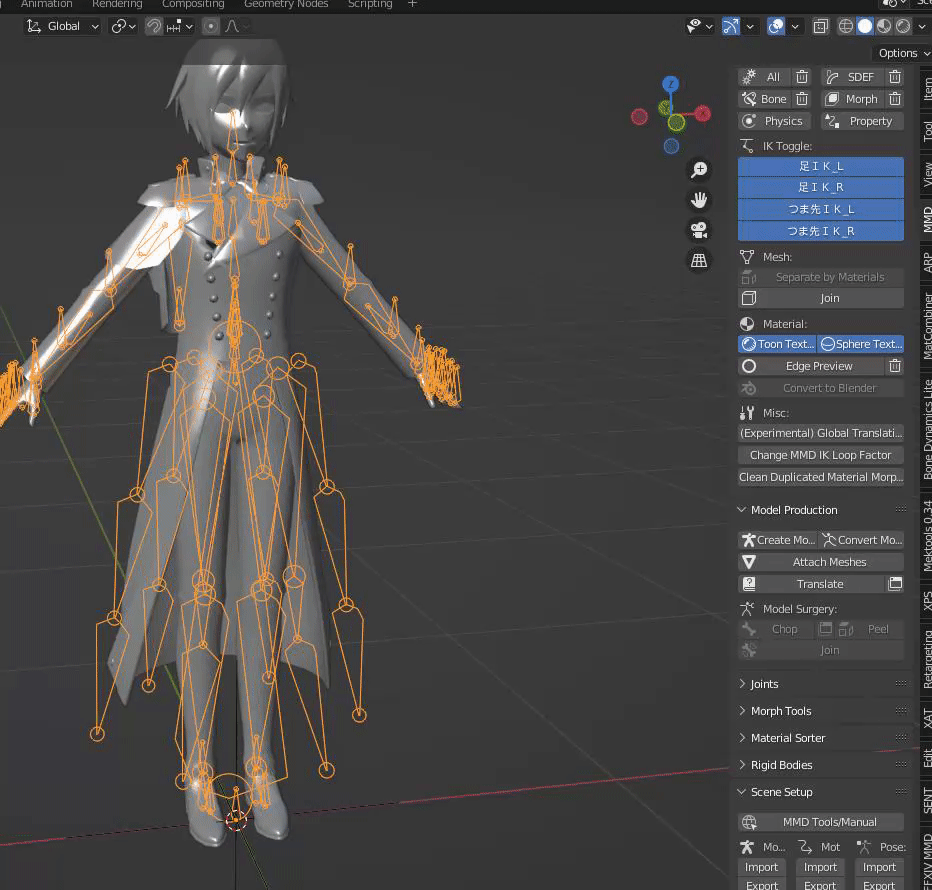
# Loading in the MMD Model
1. Locate/open the MMD Tool menu and find the Scene set up section.
2. Click on the Import button in the Model section.
3. Find your MMD model.
4. Before clicking the import model file, there a few settings that will need to adjusted.
- Scale - MMD models can come in a variety of sizes. To determine the closest size that roughly fits the FFXIV model, go to this sub chapter.
- Enable the following settings:
- Remove Doubles
- Fix IK Links
- Apply Bone Fixed Axis
- Rename Bones - User under score
- In the Rename bones to English, click on the drop down menu and select Internal Directory.
- [](https://xivmodding.com/uploads/images/gallery/2024-08/aGMbd1JnjUqkQBcb-importmmd.gif)
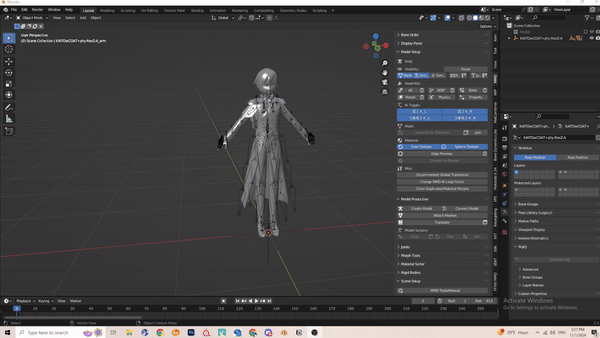
# Loading in MMD Motion
With the MMD model loaded in, next is importing the motion onto the model.
1. Select the skeleton of the MMD model.
2. In Scene set up section , find the Motion section.
3. Click on import button.
4. Locate the MMD motion.
1. Most MMD motions will have a .vmd file extension
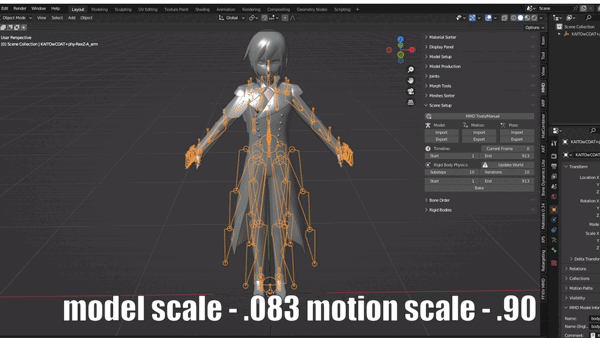
5. Before clicking on the Import VMD File, the scale value will have to be the same scale value the model was imported at.
1. It is best to remember what scale the model was imported at.
2. [](https://xivmodding.com/uploads/images/gallery/2024-08/TpC1GMKExKlbQkF4-rightmmdmotionscale.gif)
3. This what happens when a motion is imported at the wrong model scale
4. [](https://xivmodding.com/uploads/images/gallery/2024-08/0O4O05CLXqP1LgIT-wrongmmdmotionscale.gif)
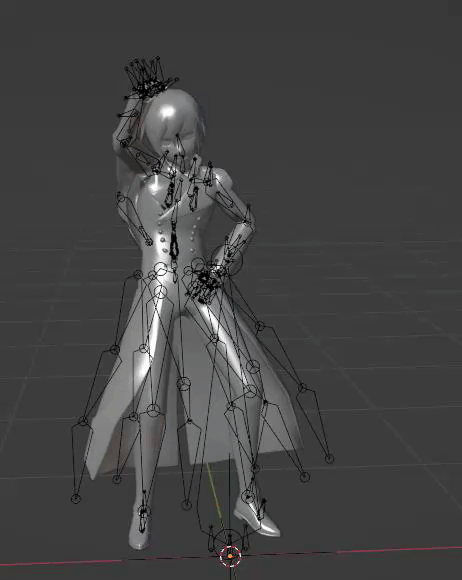
Congrats on loading the MMD motion into Blender!
If your motion seems to be playing weirdly, the IK constraints may need to be enabled/disabled. Most MMD authors will note if motion uses IK or not
1. Click on the MMD armature and go into pose mode. Yellow bones have constraints on them
[](https://xivmodding.com/uploads/images/gallery/2024-08/hm3GXqCRIiGB1HWt-offik.gif)
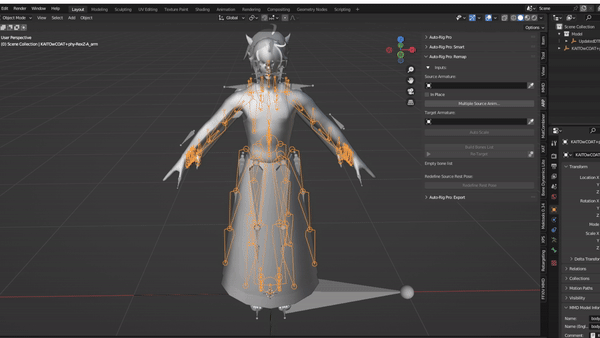
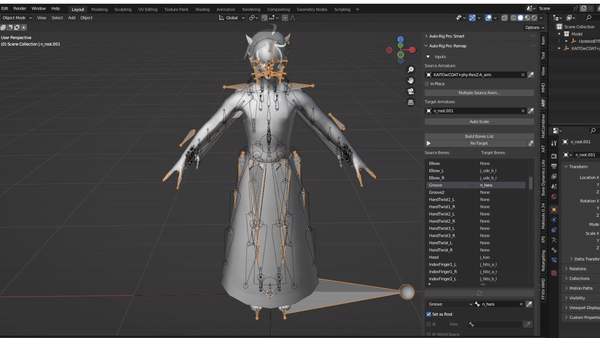
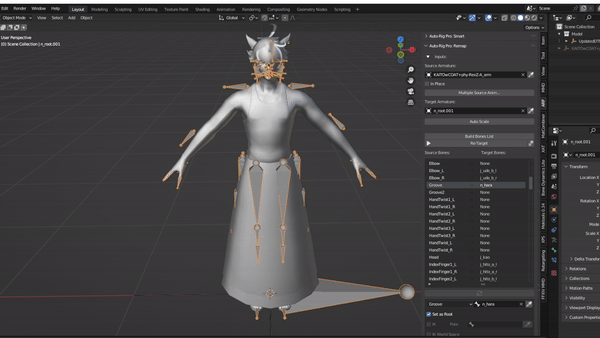
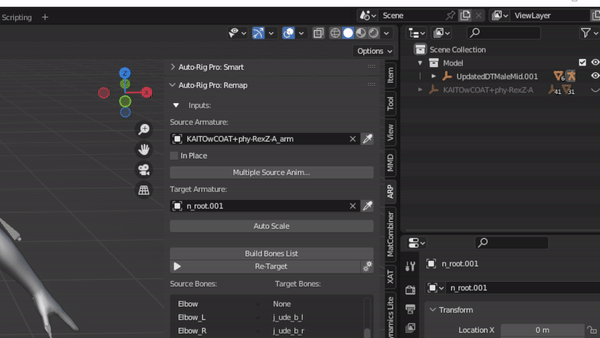
# Chapter 3.A: Retargeting with Auto Rig Pro
This chapter covers retargeting animation with ARP
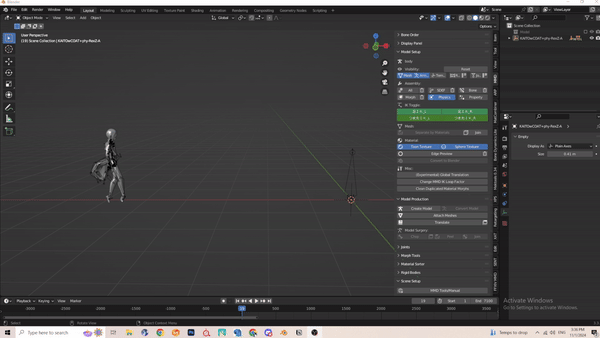
# Auto Rig Pro
1. Import/Append FFXIV model
- If you are importing your own FFXIV model, make sure to remember the X and Y direction of the primary and secondary. This will be important later.
- If you are using the Blender file from the toolkit, here's how to append it to a new Blender file
- [](https://xivmodding.com/uploads/images/gallery/2024-08/EUWe5GWjWkw4xIXz-append.gif)
2. Enable ARP and locate ARP in the add on bar
3. Expand the Remap section
4. In the source animation field, select the eyedropper button and select the source armature/skeleton (in this case, the MMD skeleton)
5. Then in the target field, again select the eyedropper and select target armature (in this case the FFXIV skeleton)
- [](https://xivmodding.com/uploads/images/gallery/2024-08/XduaZAN58Fp8mk6a-retargetp1.gif)
6. Click on “Build Bones”
7. This step is the longest if you don’t have a preset readily available. In this step you will have to roughly match the main body bones of your MMD model to the FFXIV skeleton. MMD armature can differ vastly from FFXIV skeleton and it can be frustrating to pinpoint which one matches the FFXIV skeleton.
1. Luckily I’ve prepared a MMD model I like to use and preset for retargeting :D
2. If you are retargeting from something not MMD, do note that one bone needs to act as the root/anchor (usually whatever is equivalent to FFXIV’s n\_hara bone)
- [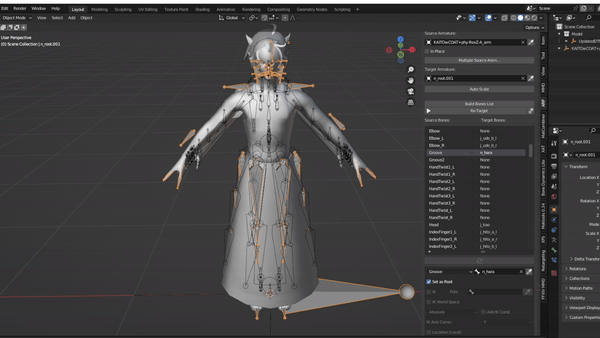](https://xivmodding.com/uploads/images/gallery/2024-08/oC9nfRsBC0dIpBcA-retargetp2.gif)
8. Find the import preset button and use the preset file
9. Click retarget
- [](https://xivmodding.com/uploads/images/gallery/2024-08/pR6A2Se2Y18BjptJ-retargetp3.gif)
10. ARP retargeting can be done rather quickly, so itll be done in no time.
11. Once its done retargeting, press play to see if the FFXIV model plays correctly.
- [](https://xivmodding.com/uploads/images/gallery/2024-08/7SIRcNRfGrsKrxng-result.gif)
12. In the Scene Collection, navigate to the n\_root. There will be an icon below it that stores the animation. This is called the track. Double click on it and rename it to something you will recognize. (ie. Finished Dance , etc)
- [](https://xivmodding.com/uploads/images/gallery/2024-08/BEnMDSygPbMozMBH-advice1.gif)
13. Right Click on the icon that stores the MMD model and remove it from the scene
- [](https://xivmodding.com/uploads/images/gallery/2024-08/WIv9wHvcd9gJ1oR6-advice2.gif)
14. The last step of the process is exporting the model and animation as fbx.
15. Before exporting make sure to adjust the primary and secondary bones in the armature section to match the orientation the bones were imported as.
- Most do X on primary and Y on Secondary to make viewing bones much easier for refining animation
- [](https://xivmodding.com/uploads/images/gallery/2024-08/Mm66zWFOEVjRTamw-exportfbx.gif)
- Otherwise this will happen as the end result
- 
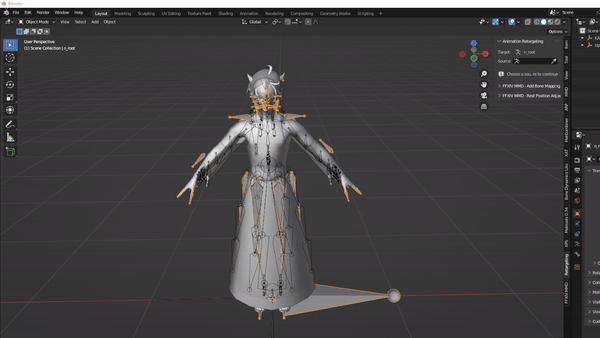
# Chapter 3.B: Retargeting with Mwni
If you don't have access to ARP, Mwni's retargeting tool is the second best option
# Mwni Retargeting
The process of retargeting with Mwni is very similar to chapter 3.A with some minor differences
1. Look for Animation Retargeting section
2. Select the FFXIV armature/skeleton and at the source field, select the eyedropper tool and select the MMD skeleton.
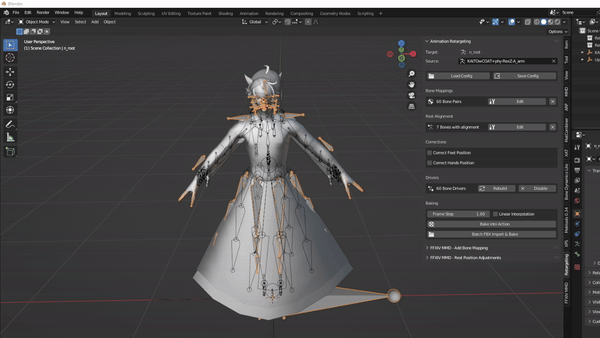
3. Here you would have to create the bone mapping ( by selecting the create button) or import a config file (which we have :D)
- [](https://xivmodding.com/uploads/images/gallery/2024-08/CF8QvUyzmY6dc6X2-mwnistep1.gif)
4. Similar to ARP, there should be on central/root bone mapped (n\_hara to waist or center).
5. One particular aspect of Mwni’s retarget tool is the rest alignment. One bone on your source armature must be rotated or moved for the retargeting to work.
- [](https://xivmodding.com/uploads/images/gallery/2024-08/YUOPaI2qeSjrya0B-restalignment.gif)
6. In the rest alignment section, click on edit. Itll change the current mode to pose mode. Select any bone (pref any upper body bone or arm(s)) and rotate/move it slightly. Then click on apply. If you have a config already you can skip this step.
7. Once the bone mapping and rest alignment is complete, try playing the animation. If done right, the FFXIV model should follow along…. roughly.
8. But we’re not done yet! It might appear that the animation is on the FFXIV model but it has not been baked into it yet.
**(HIGHLY RECCOMEND SAVING YOUR BLENDER FILE BEFORE BAKING)**
1. With your file saved, click the “Bake into Action” button. This will apply the retargeting motion to the FFXIV model.
- One of my few issues with Mwni’s tool is the time it takes to bake. It can take up to 30min - 1hr to fully bake an animation . This varies depending on the length of your animation.
2. After it has finished baking, in the scene collection, right click on kaito’s empty and delete it
- [](https://xivmodding.com/uploads/images/gallery/2024-08/WIv9wHvcd9gJ1oR6-advice2.gif)
3. Try playing again to verify it has succesfuly baked. If not, save first then do ctrl + z to revert.
- Select the FFXIV skeleton and go into pose mode.
- Press A for select all. Find the Pose button > animation > bake action.
- unselect Only select bones and have visual keying and clear constraints enabled
- Click on Ok (make sure to save before hand) and wait for the baking to finish
4. In the Scene Collection, navigate to the n\_root. There will be an icon below it that stores the animation. This is called the track. Double click on it and rename it to something you will recognize. (ie. Finished Dance , etc)
- [](https://xivmodding.com/uploads/images/gallery/2024-08/BEnMDSygPbMozMBH-advice1.gif)
5. Before exporting make sure to adjust the primary and secondary bones in the armature section to match the orientation the bones were imported as.
- Most do X on primary and Y on Secondary to make viewing bones much easier for refining animation
- [](https://xivmodding.com/uploads/images/gallery/2024-08/Mm66zWFOEVjRTamw-exportfbx.gif)
- Otherwise, this will happen
- 
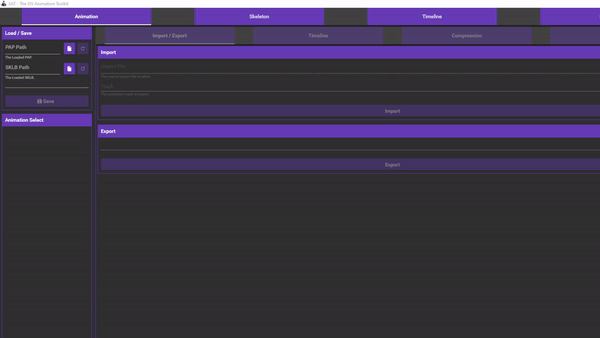
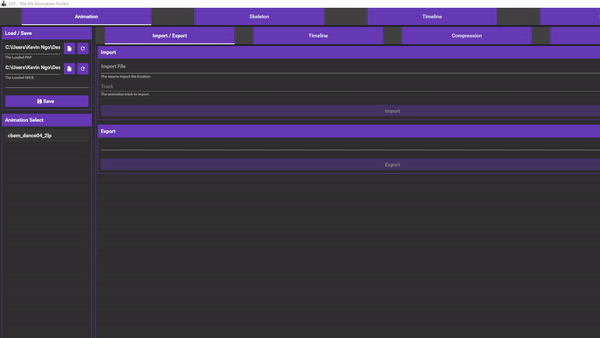
# Chapter 4: Importing Animation into XAT
We're almost at the finish line! Our next step is importing our animation into a FFXIV .pap
To install XAT:
- [XAT](https://github.com/Etheirys/XAT/releases/tag/v2024.8.5.610)
- Install the XAT.zip file
- After downloading, make a new folder on extract the files in the zip file into this folder
Here’s how to navigate XAT’s UI.
# XAT
1. In the Load/Save section, in the PAP path field, click on the paper icon to locate your base/clean .pap file. I have one included already in the animation toolkit folder.
2. Then in the SKLB path, click on the paper icon to locate your base .sklb file of your race and/or gender. Though for this tutorial, we’ll be using midlander M skeleton (also provided in the tool kit).
- [](https://xivmodding.com/uploads/images/gallery/2024-08/JmPDu2YNjRbVtXKE-xatstep1.gif)
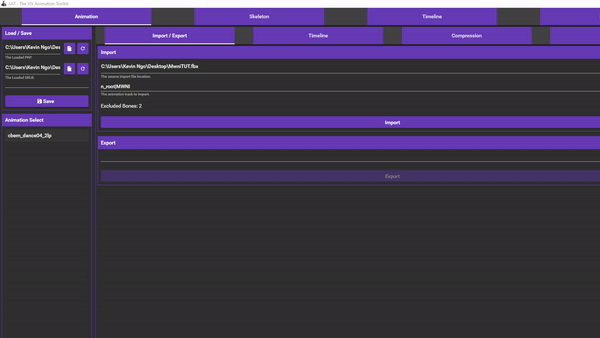
3. After the pap and sklb are loaded in, navigate to the animation select field and choose the first option.
4. With that selected, we’ll want to import our FBX file.
5. In the Import/Export section, click on the paper icon and locate your newly exported FBX.
6. If its been succesfully imported, there will be a message below with “found x animation track”
7. In the track field, click on the drop down menu. Locate the correct track you want to import.
8. Before clicking on the import button, go tot he excluded bones and click on the bone icon.
9. Sometimes when working with motions, ear physics act a little wonky and earrings act weirdly on non- elezen/lala/miqote .
- [](https://xivmodding.com/uploads/images/gallery/2024-08/fHoffvcNUHrSLJBm-xatstep2.gif)
10. I’ve included a preset to exclude ear bones. Select the paper icon with the up arrow and locate .xbe file in the toolkit folder. Then click on the green arrow to finalize.
11. Then click on import. This will replace the animation in the “cbem\_dance04\_2lp” field.
12. The next step is to change some data within the pap. Click on the timeline tab.
13. Select Actor 0 and under track. Go through each track to find the one that has C09 field in it(usually track 0 or 1). You can safely delete/trash the rest.
14. Under the C009 field, change the duration from 180 to the duration of your animation. You can reference this (I hope you saved your blender file) in your blender file
- [](https://xivmodding.com/uploads/images/gallery/2024-08/yu4v3uz5McE0mkVm-xatstep3.gif)
15. This next step is sorta optional. Do this if your animation has more than 1k frames. Click on the compression tab
16. Click on the drop down menu and select Predictive. Then click on compress. This will help lower pap file size . Once that is done…
17. Click on save and save your modified .pap somewhere convenient.
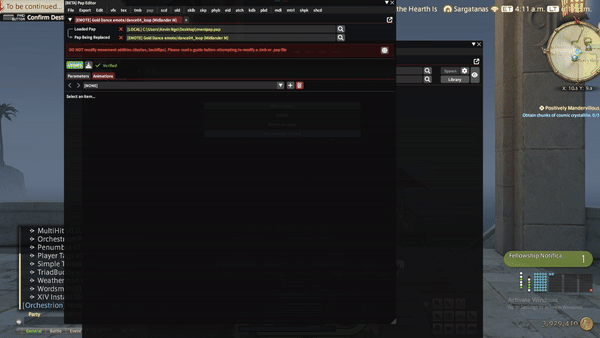
# Chapter 5.A : Importing .pap through VFXEditor
Congrats on getting this far! With this, you're almost finished with porting your custom animation into the game.
If you dont already have VFXedit install, here is the repo:
https://raw.githubusercontent.com/0ceal0t/Dalamud-VFXEditor/main/repo.json
# VFXEditor
1. Open VFX edit by using the command /vfxbeta
2. Find the pap section and click on the pap button
3. In the Loaded pap section, click on the magnifying glass. Here we’re importing our custom pap from XAT.
4. Select the Paths section and in the Local path section, click on the folder icon and find where you saved your custom .pap. Double click or press okay
5. In the Pap being replaced field, click on it’s magnifying glass and select the Emote tab. For this tutorial we’re replacing Gold dance. So search for Gold Dance
6. Outside of specific ARR emotes, we will be replacing the loop.
7. Additionally in this tutorial we’ll be replacing the Midlander M version of the dance. Click on the checkmark.
- [](https://xivmodding.com/uploads/images/gallery/2024-08/or1UOnUsqcfzBBGC-vfxstep1.gif)
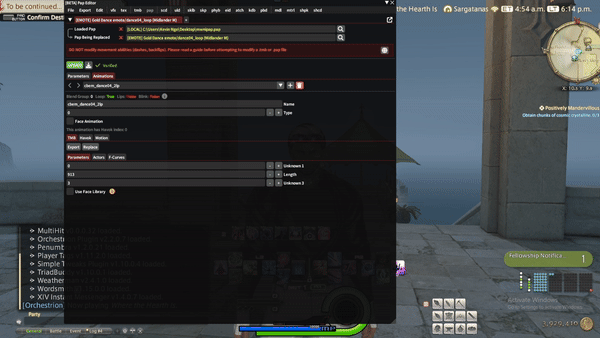
8. Navigate to the Animations tab and select the drop down menu. In the TMB section and under the parameters, change the length to the duration of your animation.
9. Since we already edited the information in the actor section we don’t have to do it here. Click on update and perform the emote (or use amanesis/brio if its an emote you don’t have) to see if it works correctly!
- [](https://xivmodding.com/uploads/images/gallery/2024-08/ziqGvJ74obteFY5t-vfxstep2.gif)
10. Once you’ve verified it works, click on Export and export as either .pmp or ttmp2.
11. In the export field , scroll down till you see the pap section, click on the left most box to confirm to export the pap. Give it a name and export :D!
12. Back in Pap editor, click on the red X for both fields and do a redraw to ensure a clean environmen.
13. Import your newly made modpack into penumbra and enjoy your new ported dance!
- [](https://xivmodding.com/uploads/images/gallery/2024-08/R9Hs3tGwM0QeizSG-vfxstep3.gif)
# Chapter 5.B: Importing custom animation through Textools
Now by the chance if you dont have vfxedit installed or dalamund is down for whatever reason, it is possible to import your animations through Textools! Though will recquire additional information.
# Textools
- Open TextTools and change system state to unsafe (or transaction on, I havent worked with transactions myself yet)
- Go to Tools > File operations > Import File
- Input the path for your emote. In this case the path for Gold Dance is ( for midlanders adjacent races atleast) : chara/human/c0101/animation/a0001/bt\_common/emote/dance04\_loop.pap
- A new window pop up. Import your .pap and press open. Log in and verify it works.
- [](https://xivmodding.com/uploads/images/gallery/2024-08/ukTyG3HRoZOmKXYW-ttstep1.gif)
- Afterwards , open up Textools again. Go to Mods > Create Modpack > From Files > Select your .pap and give your mod a name.
- [](https://xivmodding.com/uploads/images/gallery/2024-08/rZgFHuQwRYqv8UUZ-ttstep2.gif)
- Finally go to Help > Start Over if needed
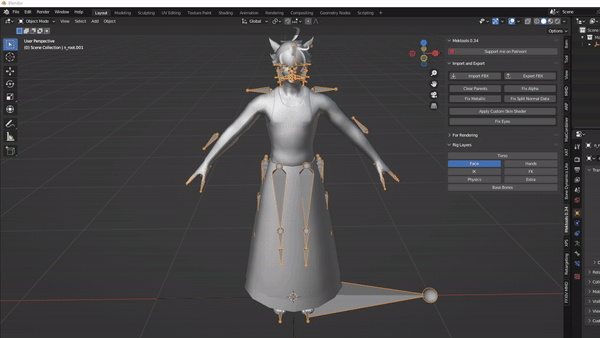
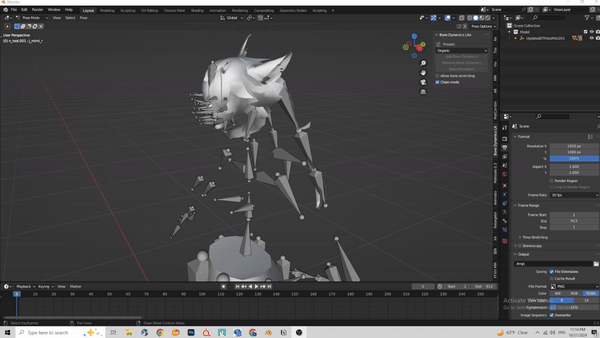
# Chapter 6 : Q&A, Physics , etc.
Now that we've ported over the base animation, what else can we add to our dance mod? Here is a list of things you can add to your mod to make it more enjoyable!
Music
Lip/Face movement
Camera
VFX (I personally won't be going over this/ not an expert on this)
Skirt/Tail/Ear/Hair Physics
# How to Determine MMD Scale
So say you're using a different MMD model and you don't know what scale to import it as.
Import your FFXIV FBX model into the scene[](https://xivmodding.com/uploads/images/gallery/2024-08/rqWxMxeTNVsLu5az-importfbx.gif)
To make it easier on the eyes, I recommend importing the Primary Bone Axis to X axis and secondary bone axis to Y axis.
Alternatively, you can also append the FFXIV model from the blend file in the animation kit!
[](https://xivmodding.com/uploads/images/gallery/2024-08/EUWe5GWjWkw4xIXz-append.gif)
1. Once that is done, locate the MMD tools section and find the scene set up.
2. Under model section, click on import and find your desired MMD model
3. Change the scale to 1 before selecting import.
- [](https://xivmodding.com/uploads/images/gallery/2024-08/7b1nY0IEJQk5Vclb-findscale1.gif)
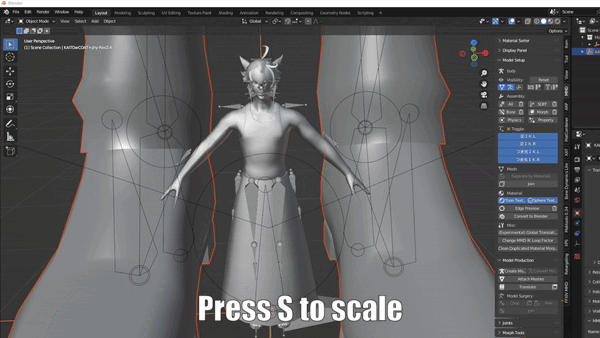
4. Now without clicking off of the newly imported MMD model, click S on your keyboard (or w/e key bind you have set for your Blender)
5. Scale the model down till it roughly fits the FFXIV model's head and/or arms.
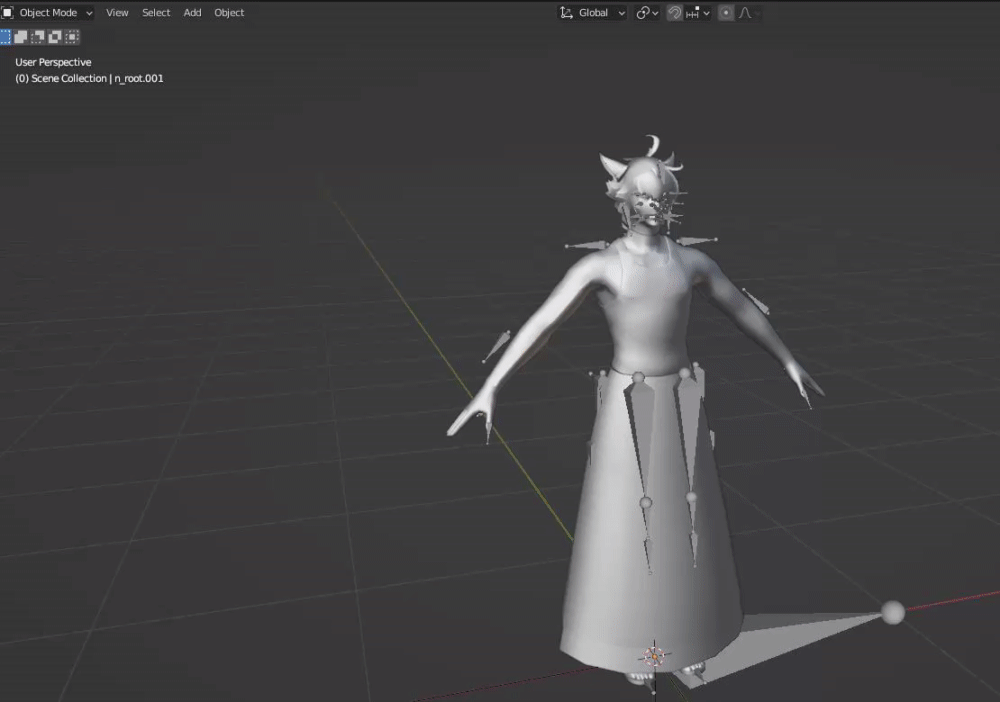
6. Navigate to the Items tab and take note of the scale value. That is scale at which you want to import your MMD model and motion at.
- Remove the MMD model out of the scene
- [](https://xivmodding.com/uploads/images/gallery/2024-08/WIv9wHvcd9gJ1oR6-advice2.gif)
7. Reimport your MMD model at the desired scale
- [](https://xivmodding.com/uploads/images/gallery/2024-08/XdNMwNkNXRA7Nsgk-findscale2.gif)
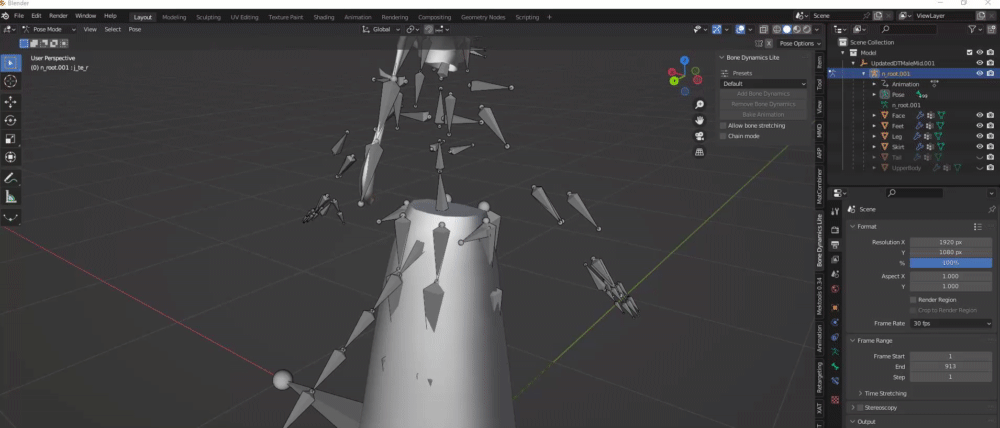
# Ear/Tail Physics
Ear and tails are the easiest to implement! To demonstrate , I will be using Bone Dynamics Pro. You can use the free lite version (honestly what I use).
With working with ear physics , you will essential double your work flow. If you want to include ear physics option and a static ear option (for non elezen, mitoqe and lalafel), youll have to create a version for static ear too.
**As with anything involving Blender, please make sure you are saving frequently!!**
1. Select your armature and go into pose mode.
- Default short cut key to pose mode is Ctrl + Tab (for windows atleast)
- [](https://xivmodding.com/uploads/images/gallery/2024-11/niGnOKYyQsDA6woC-step1.gif)
2. Rotate camera behind and disable the UpperBody and Tail Mesh so we can see the bones more clearly.
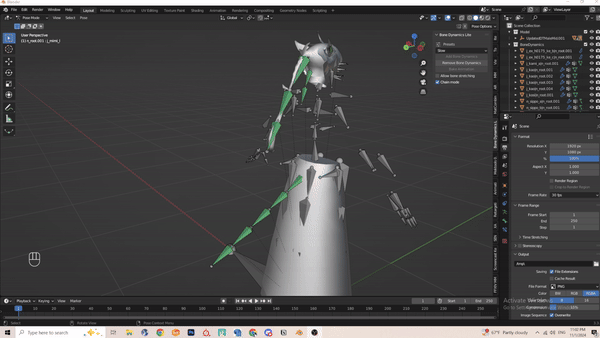
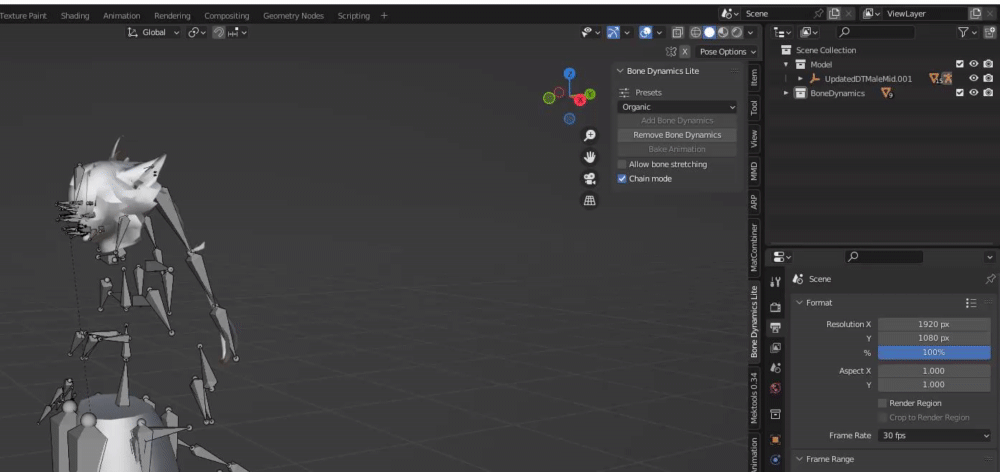
3. Navigate to the Bone Dynamic Lite Tab and enable “Chain Mode”
- [](https://xivmodding.com/uploads/images/gallery/2024-11/D9TR4FaKCldxRfFK-step2.gif)
4. For Tail and hair, I usually use the organic preset. Very smooth and feels natural to me. Feel free to test other presets!
- If you are using BD Pro, you are able to make your own preset and adjust parameters to your liking.
5. We’ll have to select the bones from the beginning to end. In this example we’re starting with n\_sippo\_a.
6. With the bone selected, click on the add bone dynamics option. This will change the bone to a green color
- [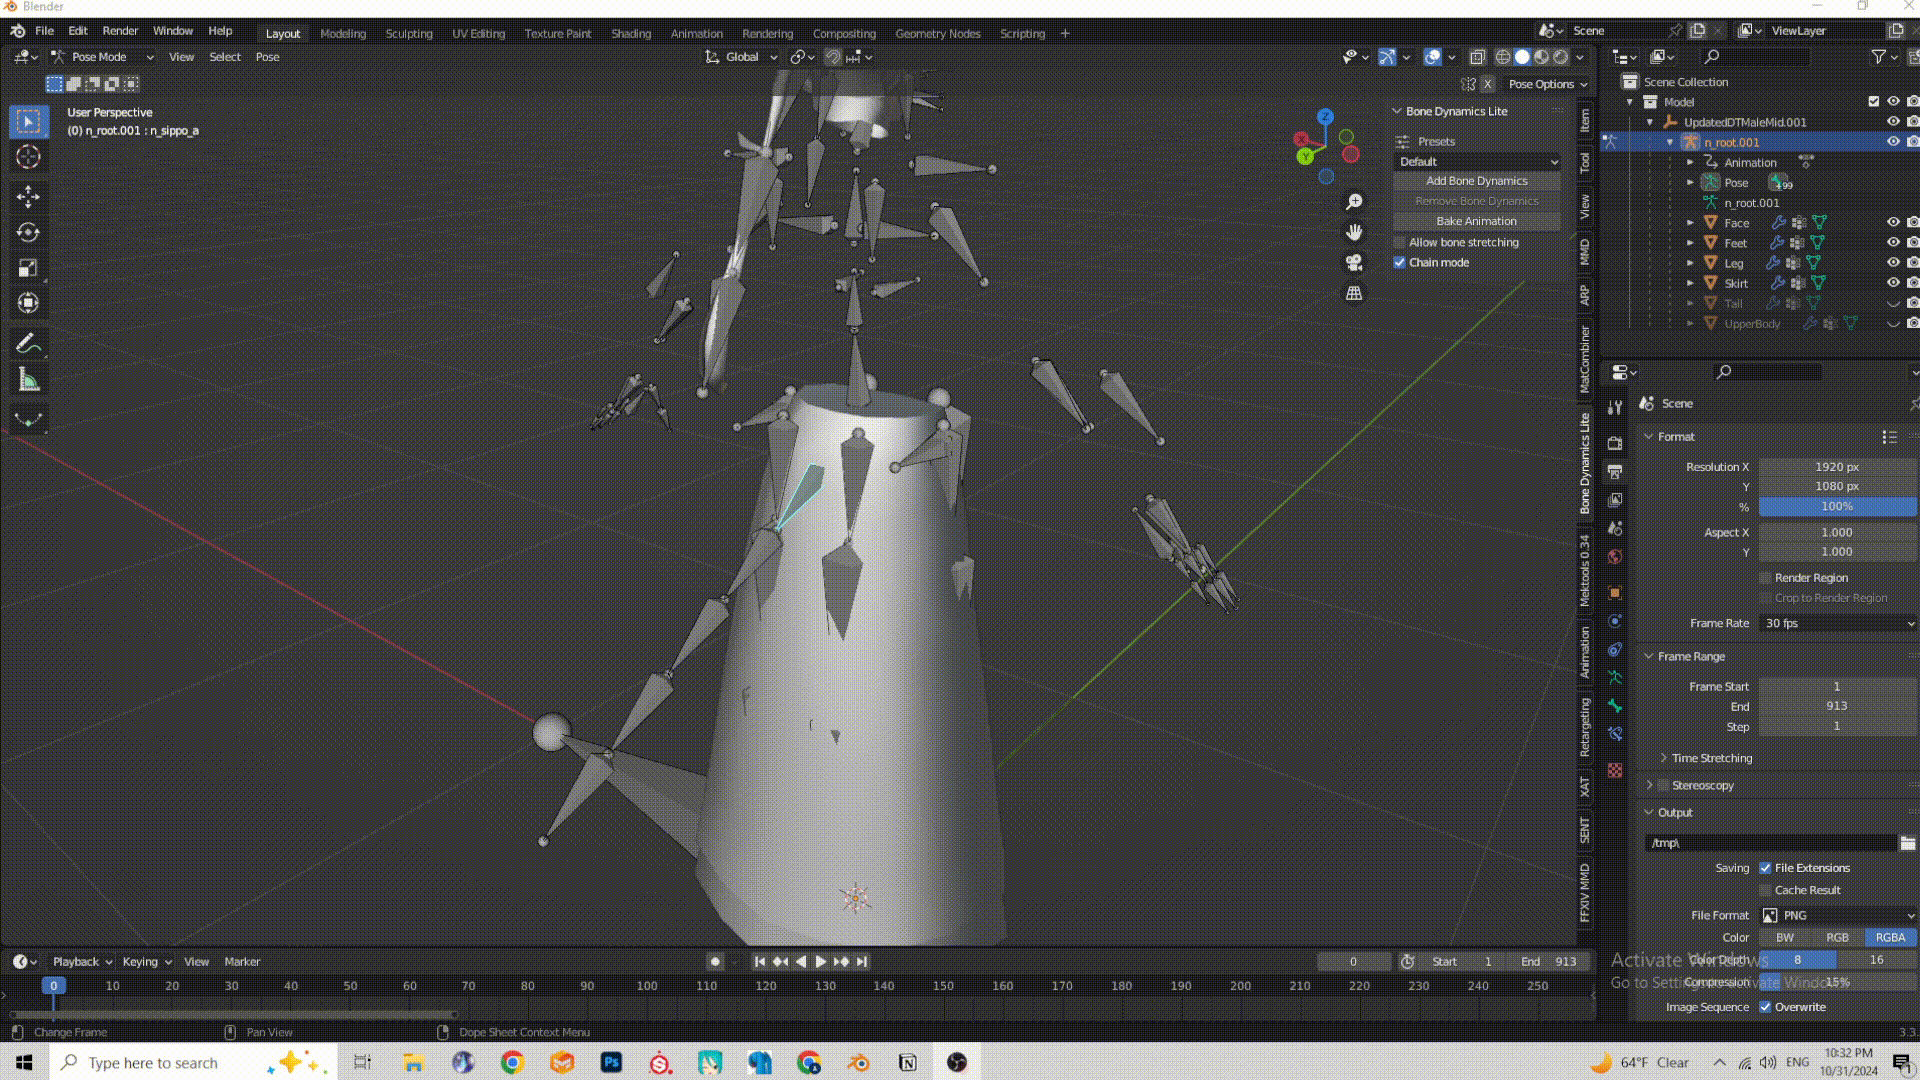](https://xivmodding.com/uploads/images/gallery/2024-11/BBn8JLx4tWExdEQD-step3.gif)
7. Repeat previous step until you have reached the end of the tail
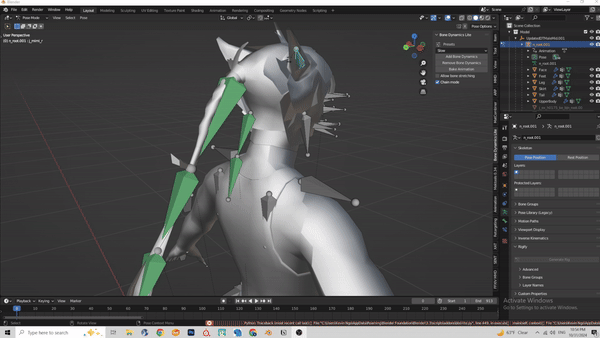
8. The process is the same for the hair. Hair bones are:
- j\_kami
- j\_ex (this is if your hairstyle has a pony tail)
- [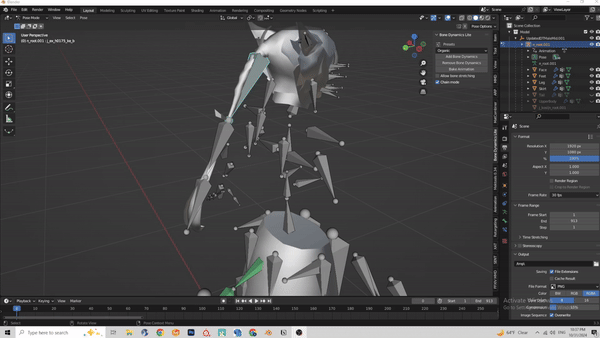](https://xivmodding.com/uploads/images/gallery/2024-11/0FX3vr9vJ5TLThdE-step4b.gif)
9. Here is a little preview of the physics. Not too bad!
- [](https://xivmodding.com/uploads/images/gallery/2024-11/pxQThPUaxpo36zSE-step5.gif)
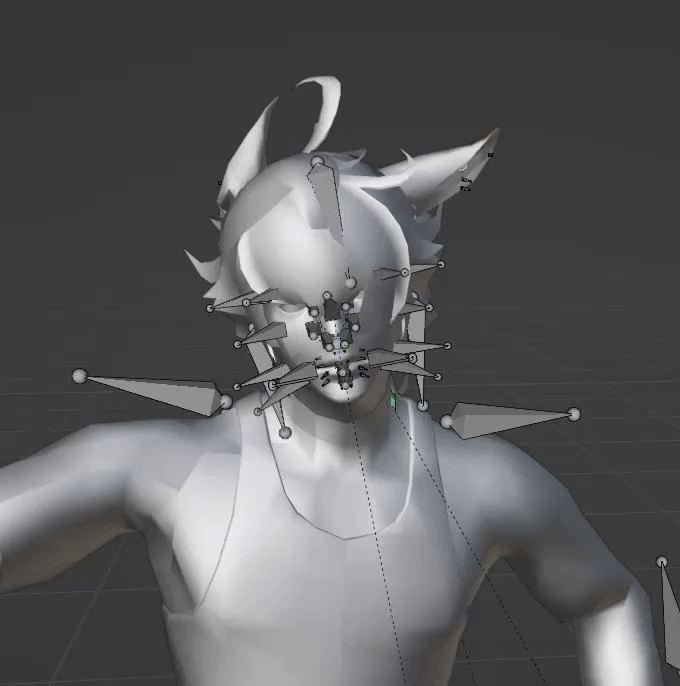
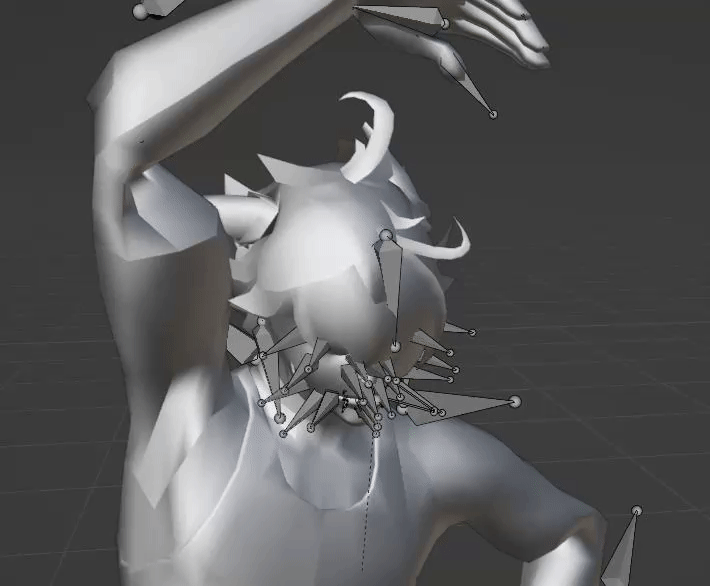
10. Now for ear physics. This is where things get a bit weird. Lalafels, Elezen and mitoqes use the j\_mimi bones, viera use a completely different ear bone (j\_zerc). So (in theory atleast) ear physics using the j\_mimi bones will not be comptabile with viera ear bones.
11. Ear bones can be a little hard to see sometimes
- [](https://xivmodding.com/uploads/images/gallery/2024-11/nxFqnzrXsXw6QVHC-step6.gif)
12. For ear physics, I use the Slow option. Organic makes it too flowy for my taste.
- Organic:
- [](https://xivmodding.com/uploads/images/gallery/2024-11/uygNEofQPFHlgoID-organicphysics.gif)
- Slow:
- [](https://xivmodding.com/uploads/images/gallery/2024-11/FZndrhsZyurXz3h0-slowphysics.gif)
13. Once all the physics have been applied, run through the motion a few times to see if its to your liking!
14. Now to bake the physic motion into the animation itself. Select the first bone, then use shift + click and select all the green bones.
- [](https://xivmodding.com/uploads/images/gallery/2024-11/rz3gV0FVmn0hPcr6-step7.gif)
15. **Before you click on Bake Animation. PLEASE SAVE YOUR PROGRESS!**
16. Select Bake animation and click okay
- Baking can vary depending on animation length.
17. Once baking is complete, preview the motion.
18. Navigate to scene section and select the BoneDynamics Icon. Right click and delete hireachy.
- [](https://xivmodding.com/uploads/images/gallery/2024-11/wmZTuJIoVxKuSsLI-step8.gif)
19. Once you verified everything works properly you can export the animation. Refer to the end of chapter 3 on how to export.
20. Now that you made a Ear physics version, you can quickly make a static ear version easily.
21. Select the armature and go back into pose mode. Select the two ear bones (j\_mimi\_l and \_r , shift + select the other ear bone)
22. Upon selecting those two, the animation track will show the frames. In the animation track section, you can press DEL or X > Delete keyframes to delete all the ear physics animation.
- [](https://xivmodding.com/uploads/images/gallery/2024-11/kiS7QoEuKnfSB4tb-step9.gif)
23. Normally what helps me is renaming the animation track and export file to Earless(motion name here).
- [](https://xivmodding.com/uploads/images/gallery/2024-11/SWvkD0cGfDisHctv-step10.gif)
24. And thats all for ear and tail physics!
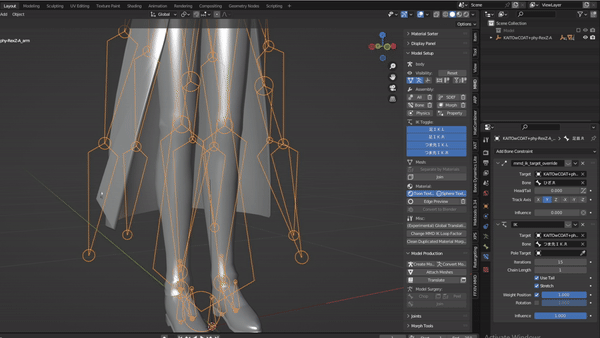
# Skirt Physics
If you have made it this far…. welcome to the pits of skirt physics hell (mostly joking). FFXIV skirt physics is a bit of a pain to deal with. To achieve flowy skirt physics like you see in MMD videos, you ideally need a lot of skirt bones to work with.
MMD Skirt Bones:
[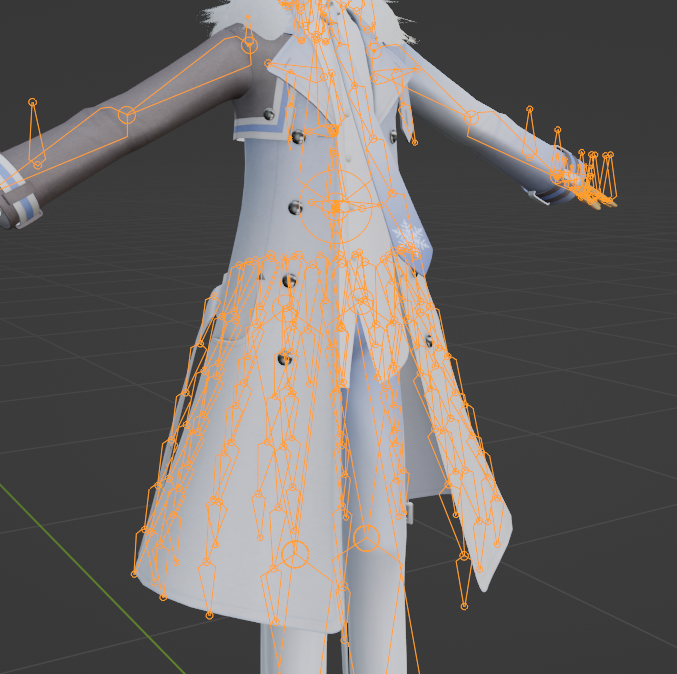](https://xivmodding.com/uploads/images/gallery/2024-11/mIZAAMZRhDM0wdON-mmdskirt.PNG)
FFXIV Skirt Bones:
[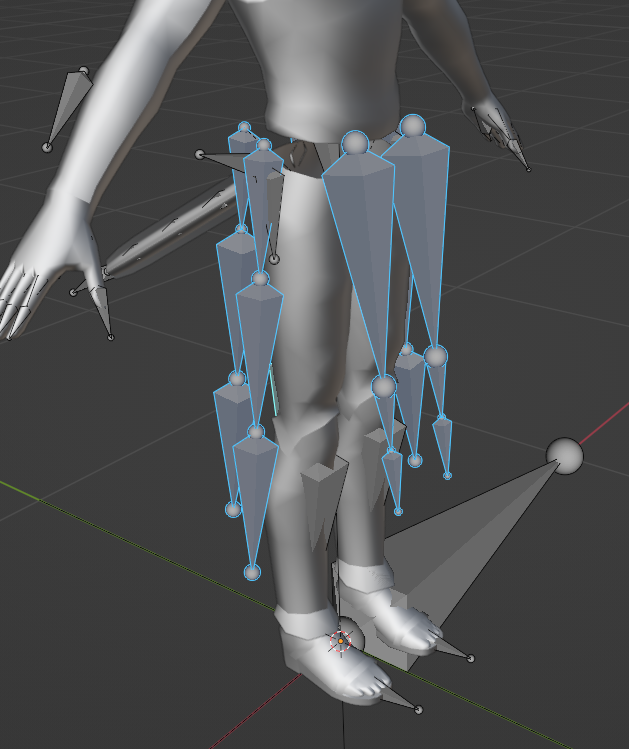](https://xivmodding.com/uploads/images/gallery/2024-11/fjGtKD4lGiswIV55-ffxivskirt.PNG)
**Big credits to RexZ for adjusting the kaito MMD model to match ffxiv’s skirt bones! Major life saver ngl.**
1. Load in your MMD model as shown in Chapter 1.
2. Before you start, navigate to the Scene Set up section. In the Rigid Body section, click on the Update World button.
- [](https://xivmodding.com/uploads/images/gallery/2024-11/3xGgUg88T2f2wAu8-step1.gif)
3. Select the MMD model’s armature and import your motion. Remember at the same scale you imported the model at.
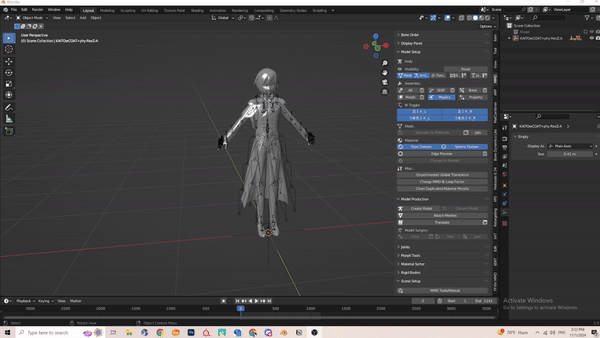
To enable physics, have the MMD model’s armature selected and find the Model set up section. In the assembly, click on the physics button.
- [](https://xivmodding.com/uploads/images/gallery/2024-11/vO8zTbTdRHKB393A-step2.gif)
4. Now depending on the motion you are working with, default paramters should be fine.
- Example here is See Tinh. Motion isnt too drastic, so it should be good for retargeting
- [](https://xivmodding.com/uploads/images/gallery/2024-11/tCdDjgyNTNrRZ3ej-seethinhexample.gif)
- Now for motions that have really drastic movement, those will require changes in the parameters.
- 2 examples: Erase or Zero and Geddan
- [](https://xivmodding.com/uploads/images/gallery/2024-11/C73VZp6YoOU82v79-eraseexample.gif)
- [](https://xivmodding.com/uploads/images/gallery/2024-11/pZe6l005UoowLAj6-geddanexample.gif)
- I don’t exactly know what the parameters do, but I usually mess around with substeps. A Higher substep (from what i’ve observed at least) means a more solid, thicker physics. Change either parameters to get it to work with your motion.
- [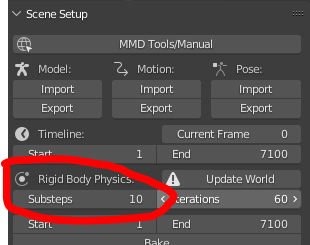](https://xivmodding.com/uploads/images/gallery/2024-11/nuEUoQIFmRusxFfV-physicchange.PNG)
- I usually re-enable physics after changing the substep. If physics doesn't work, I usually have to resort to disabling and re-enabling physics.
- Here is what adjusted looks like. See? Its much better
- [](https://xivmodding.com/uploads/images/gallery/2024-11/M5nWgoA67qR3Fp6E-correcterase.gif)
5. Once you are satisfied with your desired skirt motion, its time to bake it!
6. Select the MMD armature and click on the Bake option in the Rigid Body section. This can very depending how long your animation is.
- [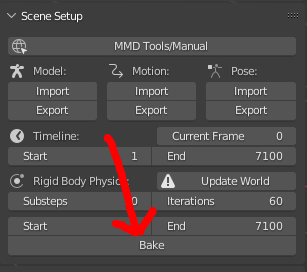](https://xivmodding.com/uploads/images/gallery/2024-11/P80uWeUKeuvcU4KD-bake.PNG)
7. If you are dis-satisfied with your bake for w/e reason, the bake button changes into “delete bake”.
8. Once all that is done, you can proceed to the retargeting process.
- If using ARP, the config file provided has the skirt bones already mapped
- [](https://xivmodding.com/uploads/images/gallery/2024-11/Xoyh64H4q30rDk05-completeretarget.gif)